How to Install PVC Decking Material: Pro Framing & Fastening
Learn how to install PVC decking material with pro tips on joist spacing, hidden fasteners, thermal expansion gaps, and subframe preparation.

Cellular PVC decking material offers superior moisture resistance, mold immunity, and scratch durability compared to traditional wood-plastic composites. However, its 100% synthetic composition demands strict adherence to thermal expansion protocols and specific fastening techniques. Because PVC lacks the natural wood grain that provides structural rigidity, improper subframing or fastening will result in deflection, buckling, and premature failure. This guide details the exact measurements, fastener specifications, and thermodynamic principles required for a professional-grade PVC deck installation.
Subframe Preparation and Joist Spacing Requirements
Unlike wood decking, PVC decking material is highly susceptible to deflection (sagging) between joists. The subframe must be exceptionally rigid. According to the American Wood Council's DCA-6 Prescriptive Residential Wood Deck Construction Guide, all joists must be installed with the crown facing up to ensure a flat plane. Furthermore, applying a high-quality butyl-based joist tape (such as Trex Protect or G-Tape) to the top edge of every joist is mandatory. This prevents moisture entrapment between the PVC and the wood subframe, which can cause subframe rot and deck squeaking.
| Board Layout Angle | Maximum Joist Spacing (OC) | Required Blocking |
|---|---|---|
| 90° (Perpendicular) | 16 inches | Mid-span blocking required for spans over 12 feet |
| 45° (Diagonal) | 12 inches | Continuous herringbone or solid blocking required |
| Stair Treads | 10 inches | Solid 2x blocking beneath each tread stringer |
| Picture Frame Borders | 12 inches | Perimeter blocking required to support miter joints |
The Thermodynamics of PVC: Managing Expansion and Contraction
The most critical failure point in PVC decking material installation is ignoring thermal movement. Cellular PVC expands and contracts primarily along its length (longitudinally). The coefficient of linear thermal expansion for cellular PVC is approximately 3.0 × 10⁻⁵ in/in/°F.
The Physics of PVC Expansion
For a 20-foot (240-inch) PVC board subjected to a 50°F temperature increase from its installation temperature, the longitudinal expansion is calculated as: 240 × 50 × 0.00003 = 0.36 inches. If installed tight against a fixed structure or another board with no end gap, this board will buckle with 3/8" of upward force.
To accommodate this movement, end gaps must be calculated based on the ambient temperature at the exact time of installation. Side-to-side gaps remain a static 1/8" to 3/16" to allow for drainage and minor lateral movement.
| Installation Temperature | Gap at Fixed Structure / Butt Joint | Gap at Free End |
|---|---|---|
| Below 40°F (Cold) | 1/8 inch | 1/8 inch |
| 40°F to 70°F (Moderate) | 3/16 inch | 1/8 inch |
| Above 70°F (Hot) | 1/4 inch to 3/8 inch | 1/8 inch |
Cutting and Machining Cellular PVC
PVC decking material requires specific tooling to prevent chipping the outer polymer cap or melting the cellular core. Standard framing blades will tear the material.
- Blade Selection: Use a minimum 60-tooth, preferably 80-tooth, carbide-tipped finish blade. Triple-chip grind (TCG) tooth profiles yield the cleanest cuts on synthetic caps.
- Feed Rate: Push the material through the saw at a moderate, steady pace. Feeding too slowly generates friction heat, melting the PVC core and causing the blade to bind. Feeding too quickly chips the bottom edge.
- Miter Saws: When using a power miter saw, place a sacrificial piece of plywood or MDF beneath the PVC board to prevent 'blowout' or chipping on the underside of the cut.
Fastening Systems: Hidden vs. Top-Down
Never use standard galvanized or deck screws on PVC. The lack of wood grain means standard screws lack pull-out resistance, and the zinc coating can react with the PVC cap, leaving permanent black stains. Always use 304 or 316 stainless steel fasteners, or polymer-coated structural screws rated for synthetic decking.
Hidden Clip Systems
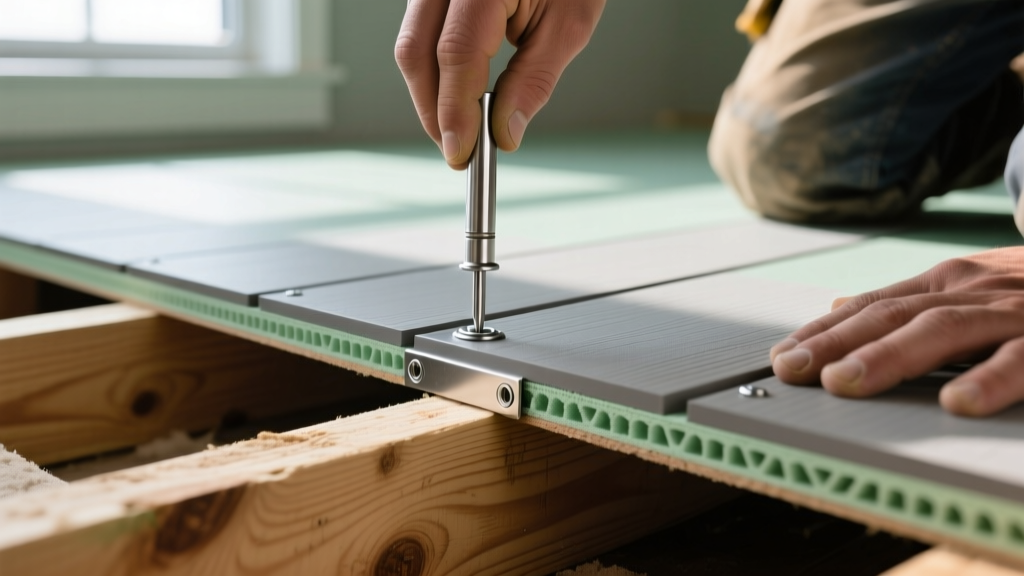
Hidden fasteners (such as the TimberTech CONCEALoc or Trex Hideaway clips) are the industry standard for PVC. These clips insert into the grooved edges of the boards. When using hidden clips, maintain a 1/8" gap between the clip and the board edge to allow for lateral thermal shifting. Drive the stainless steel screws at a 45-degree angle into the joist, ensuring the screw head seats flush in the clip without over-torquing, which can crack the PVC groove.
Top-Down Color-Matched Plugs
For picture-frame borders, stairs, or non-grooved boards, a top-down hidden fastener system like the Cortex PVC system is required. This involves driving a specialized star-drive screw and then inserting a color-matched PVC plug into the countersunk hole. Critical detail: You must use plugs specifically manufactured for PVC, not composite. Composite plugs have a different surface texture and will stand out visibly against a smooth PVC cap.
Step-by-Step Installation Sequence
- Install Starter Clips: Secure stainless steel starter clips to the joists at the leading edge of the deck. Leave a 3/4" gap between the starter clip and the house ledger to allow for airflow and drainage.
- Seat the First Board: Slide the grooved edge of the first PVC board into the starter clips. Ensure the board is perfectly square to the ledger.
- Place Intermediate Clips: Insert hidden clips into the opposite groove of the first board at every joist intersection. Tap them gently with a rubber mallet to seat them fully.
- Secure the Clips: Drive the provided stainless steel screws through the clips into the joists. Use a drill with an adjustable clutch set to a low torque (usually setting 5-8) to prevent stripping the PVC groove.
- Slide and Lock: Slide the next board's groove onto the exposed clips. Use a specialized PVC board puller tool (never a standard steel pry bar, which will mar the PVC surface) to snug the board against the clips, maintaining the 1/8" side gap.
- Manage End Joints: When boards must be spliced end-to-end, always do so over a solid joist. Use a 45-degree scarf joint rather than a square butt joint to hide the expansion gap as the boards shift longitudinally.
Fascia and Riser Board Protocols
Fascia boards are highly exposed to direct sunlight and experience the most extreme thermal cycling. According to TimberTech's official installation guidelines, PVC fascia must never be rigidly pinned to the subframe.
- Oversized Holes: Pre-drill all fascia screw holes using a 1/4" drill bit, even if using a #8 screw. This creates a slip plane that allows the fascia to expand and contract independently of the wood subframe.
- Washer-Head Screws: Use stainless steel washer-head screws (or color-matched fascia screws with built-in washers) to bridge the oversized hole without pulling through.
- Adhesive Prohibition: Never use construction adhesive (like Liquid Nails) behind PVC fascia. Adhesive locks the board in place, guaranteeing it will warp or buckle when temperatures rise.
Warning: Heat Retention on Dark PVC Colors
Dark-colored PVC decking material (such as deep browns, blacks, or dark grays) can reach surface temperatures exceeding 140°F in direct summer sunlight. If installing dark PVC, ensure the subframe is adequately ventilated. Trapped heat beneath the deck can accelerate the degradation of pressure-treated joists and cause the PVC boards to sag between joists due to thermal softening.
Troubleshooting Common PVC Installation Failures
Bulging or 'Tenting' at End Joints
Cause: End gaps were too tight during installation on a cold day, or boards were installed tightly against a fixed structure without a 1/4" relief gap.
Fix: Remove the fasteners on the affected boards, pull them back, and re-cut the ends to achieve the proper thermal gap based on the current ambient temperature.
Audible Squeaking Underfoot
Cause: PVC rubbing directly against untreated wood joists, or hidden clips over-torqued and pulling the board tight against the joist without a friction buffer.
Fix: If caught early, loosen the clip screws slightly. If the deck is fully built, squeaks usually require lifting the boards and applying butyl joist tape to the subframe to create a synthetic-to-synthetic friction barrier.
Chipped or Melted Cut Edges
Cause: Using a framing blade with too few teeth, or pushing the material too slowly through a miter saw, generating friction heat.
Fix: Switch to an 80-tooth carbide finish blade. If the edge is already melted, use a fine-grit sanding block (220-grit) or a PVC edge-scraper to lightly bevel and smooth the cut edge before installing the board into a picture-frame border.
Written by
Priya KapoorPriya Kapoor is a real estate market analyst and construction economics researcher with expertise in housing affordability, development feasibility, and infrastructure investment. She holds a Master of Regional Planning from Cornell University and previously worked as a senior analyst at CBRE's Investment Properties group, where she modeled returns for $4B in mixed-use development pipelines. Priya now runs an independent research practice advising developers, municipalities, and REITs on construction cost forecasting and market timing. She publishes the quarterly "BuildMat Market Pulse" report tracking material price indices across 12 commodity categories. Based in Austin, TX, Priya serves on the board of Habitat for Humanity Austin and is a marathon runner.
More from Priya Kapoor
View all
Construction Cost
Cost to Build a 1600 Sq Ft Home in 2026: Full Breakdown
Accurate 2026 cost to build a 1600 sq ft home—material, labor, and regional pricing breakdowns included. Plan your budget with real-time estimates.
Aug 11, 2026

Wood & Lumber
Name the Types of Wood for Pressure Treatment and Preservation
Learn how to name the types of wood best suited for pressure treatment. Compare species treatability, chemical retention levels, and 2026 preservation costs.
Aug 4, 2026

Stone & Masonry
Stone Veneer Suppliers Lindenhurst: 2026 Cost Analysis
Analyze 2026 stone veneer costs in Lindenhurst, NY. Compare local supplier pricing, delivery fees, and Suffolk County installation labor rates.
Aug 4, 2026