How to Build and Install Small Deck Ideas for Tight Spaces
Learn how to execute small deck ideas with space-saving framing, micro-foundations, and hidden fasteners for compact urban yards.
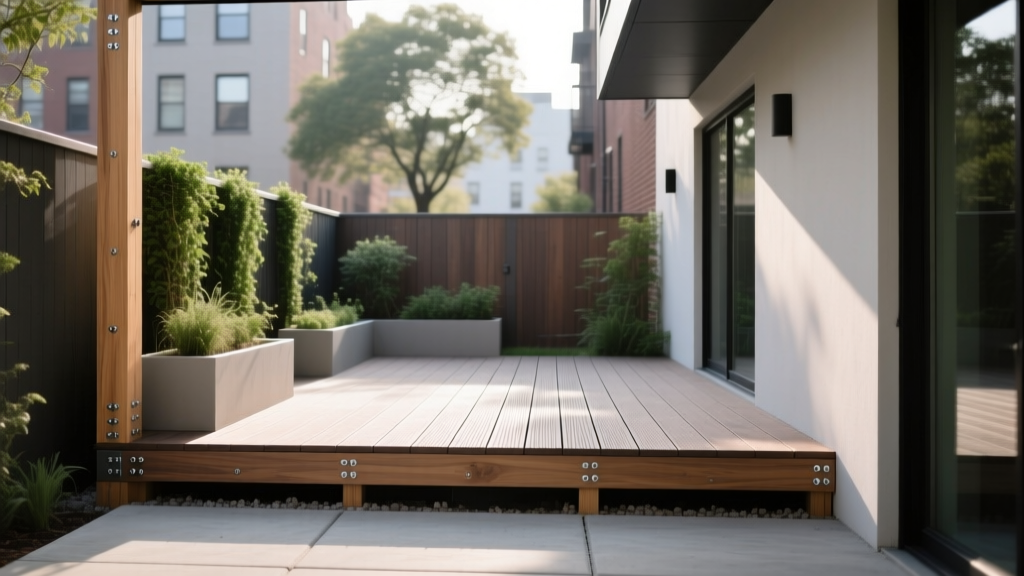
The Engineering Reality of Compact Deck Construction
When homeowners and contractors evaluate small deck ideas for urban infill lots, narrow side yards, or compact patio extensions, the focus often drifts toward aesthetics. However, executing a high-performance deck under 150 square feet requires a fundamentally different installation approach than building a sprawling 400-square-foot platform. Tolerances are drastically tighter, load distribution is concentrated over fewer footings, and space-saving features like built-in seating must be engineered directly into the primary joist system rather than added as an afterthought.
This guide details the exact installation protocols, structural hardware, and framing techniques required to bring compact deck concepts to life without sacrificing longevity or code compliance. By integrating micro-foundations, spatial-illusion decking patterns, and integrated structural seating, you can maximize every square inch of a tight footprint.
Micro-Foundations: Helical Piles vs. Precast Deck Blocks
Small decks rarely justify the cost and site disruption of excavating deep poured concrete footings, especially in tight side yards where mini-excavators cannot access. Instead, modern installation relies on two primary micro-foundation systems. For attached decks requiring frost-depth compliance, helical piles are the industry standard. For freestanding, low-profile floating decks, precast concrete blocks remain viable.
| Foundation Type | Load Capacity (Per Pile) | Installation Time | Best Application for Small Decks |
|---|---|---|---|
| Simpson Strong-Tie Helical Piles | 4,300 lbs (axial) | 15-20 mins per pile | Attached decks, poor soil conditions, high wind uplift zones |
| Precast Concrete Deck Blocks | 1,750 lbs (bearing) | 5 mins per block | Freestanding floating decks under 30 inches high, stable soil |
| Diamond Pier DP-50 | 5,000 lbs (axial) | 20-30 mins per pier | Multi-level small decks, heavy stone/tile overlay applications |
Framing Built-In Seating to Reclaim Floor Space
One of the most effective small deck ideas for maximizing usable floor area is integrating built-in perimeter seating. However, simply building a wooden bench on top of the finished decking wastes materials and creates awkward trip hazards. The professional approach is to frame the seating directly into the deck’s structural joist network.
Step-by-Step Structural Bench Integration
- Establish the Bench Joist Line: Run a continuous double 2x8 beam parallel to your primary house ledger, offset by 18 inches (the standard depth for a bench seat). This creates a dedicated 'bench zone' within your joist layout.
- Install Heavy-Duty Hangers: Because the bench framing will handle dynamic human loads (jumping, leaning), do not rely on toe-screwing. Use Simpson Strong-Tie LUS28 joist hangers secured with 10d common nails or SD connector screws to tie the bench joists to the double beam.
- Block for Rigidity: Install 2x6 solid blocking between the bench joists at 24-inch intervals. This prevents twisting and provides a secure nailing surface for the vertical bench fascia and seat decking.
- Cantilever Limits: If the bench extends past the primary beam, ensure the cantilever does not exceed one-quarter of the joist span. For a 10-foot 2x6 joist, the maximum cantilever for the bench section is 24 inches.
Decking Board Orientation and Fastening Protocols
The visual perception of a small deck is heavily influenced by board orientation and fastening methods. Installing boards diagonally (at a 45-degree angle to the joists) draws the eye outward, making a compact 8x10 footprint feel significantly wider. However, this aesthetic choice dictates strict structural adjustments during installation.
The 12-Inch Rule for Diagonal Decking
Standard composite decking (such as Trex Transcend Lineage or TimberTech Advanced PVC) is rated for 16-inch on-center (O.C.) joist spacing when installed perpendicular to the joists. When installed diagonally, the span between joists increases mathematically. To prevent sagging and bounce, you must reduce joist spacing to 12 inches O.C. for diagonal applications. Failure to do so will result in premature fastener failure and board deflection.
Hidden Fastener Execution
On a small deck, exposed screw heads create visual clutter. Utilizing a hidden fastener system like Trex Hideaway Hidden Fasteners provides a clean, seamless surface.
- Start with a Grooved Starter Board: Route a groove into the edge of your first perimeter board or use a factory-grooved starter strip. Secure it using top-down color-matched composite screws, then plug the holes with matching composite plugs.
- Engage the Clips: Insert the stainless steel or polymer clips into the grooves of the installed board. Pre-drive a single screw into the clip to hold it in place before laying the next board.
- Manage Thermal Expansion: Even on a 12-foot run, composite materials will expand and contract. Maintain a strict 3/16-inch gap between board ends, and use the manufacturer's designated 'gap tools' (often included in the fastener box) to ensure uniform spacing across the entire small footprint.
Space-Saving Railing Installations
Traditional 4x4 railing posts mounted to the outside of the rim joist consume valuable square footage and make a small deck feel claustrophobic. To preserve the maximum usable area, install railing posts inside the rim joist.
By notching the 4x4 post or using an internal post anchor (like the Simpson Strong-Tie E-Z Base), you reclaim up to 3.5 inches of deck space per linear foot of railing. When combined with horizontal cable railings (such as Feeney CableRail), the visual barrier disappears entirely, blending the small deck seamlessly into the surrounding yard.
"When installing cable railings on compact decks, ensure the tensioning hardware is mounted on the structural posts, not the intermediate pickets. Apply tension in a star pattern—similar to tightening a car wheel—to maintain uniform deflection and strictly adhere to the 4-inch sphere rule required by building inspectors." — Adapted from Fine Homebuilding Deck Framing Guidelines
Execution Checklist for Tight-Site Logistics
Installing a deck in a confined urban yard presents unique logistical hurdles. Material staging and waste management must be planned before the first footing is dug.
- Pre-Cut Framing Lumber: Measure your joist and beam lengths precisely and have your lumber yard pre-cut the primary structural members. This eliminates the need for a 10-foot miter saw station on a site where space is already restricted.
- Vertical Material Staging: Store composite decking boards vertically against the house wall (secured with temporary ratchet straps) rather than laying them flat across the yard, which blocks access paths for concrete or gravel delivery.
- Dust Containment: When cutting PVC or capped composite boards in tight proximity to neighboring properties, use a track saw connected to a HEPA vacuum extractor. This prevents toxic micro-plastics from drifting onto adjacent patios and keeps the small work zone clear of slippery debris.
By treating compact outdoor spaces as precision engineering projects rather than simplified carpentry tasks, contractors and DIY builders can deliver small deck ideas that are structurally bulletproof, visually expansive, and highly functional for years to come.