Installing Trex Material for Deck Boards: A Step-by-Step Guide
Learn how to properly install Trex material for deck boards. This guide covers framing spacing, hidden fasteners, gapping, and edge finishing.

Subframe Preparation and Joist Spacing Matrix
The longevity of any composite deck relies entirely on the rigidity of its subframe. Unlike traditional pressure-treated lumber, composite boards lack the structural tensile strength to bridge wide gaps without sagging over time. When preparing your joist layout for Trex material for deck installations, you must adhere strictly to the manufacturer's span tables to maintain structural integrity and keep the 25-year limited warranty valid.
Standard framing utilizes 2x8 or 2x10 pressure-treated southern yellow pine or Douglas fir joists. For all current Trex product lines—including Transcend Lineage, Transcend, Select, and Enhance—the maximum on-center (OC) spacing changes based on the angle of the deck boards relative to the joists.
| Trex Product Line | Profile Type | 90-Degree Joist Spacing | 45-Degree Diagonal Spacing | Required Blocking |
|---|---|---|---|---|
| Transcend Lineage | Solid Edge | 16' OC | 12' OC | Every 4 feet |
| Transcend / Select | Solid Edge | 16' OC | 12' OC | Every 4 feet |
| Enhance Naturals | Scalloped Bottom | 16' OC | 12' OC | Every 4 feet |
| Enhance Basics | Scalloped Bottom | 16' OC | 12' OC | Every 4 feet |
Board Acclimation and Layout Strategy
Composite decking is manufactured using a blend of wood fibers and recycled polyethylene plastic. This composition makes it highly susceptible to thermal expansion and contraction. Before installing any Trex material for deck surfaces, allow the boards to acclimate on-site for at least 48 hours. Store them flat, supported every 4 feet, and out of direct sunlight if possible to prevent premature heat warping before fastening.
Managing the Picture Frame Border
Always install your perimeter picture frame boards first. This establishes a clean, mitered boundary that hides the end-grain cuts of the main field boards. When mitering the corners of the picture frame, use a 45-degree bevel cut and secure the joints with color-matched Cortex face screws and plugs, as hidden fasteners cannot be used on the extreme outer edges of solid-edge boards without specialized routing.
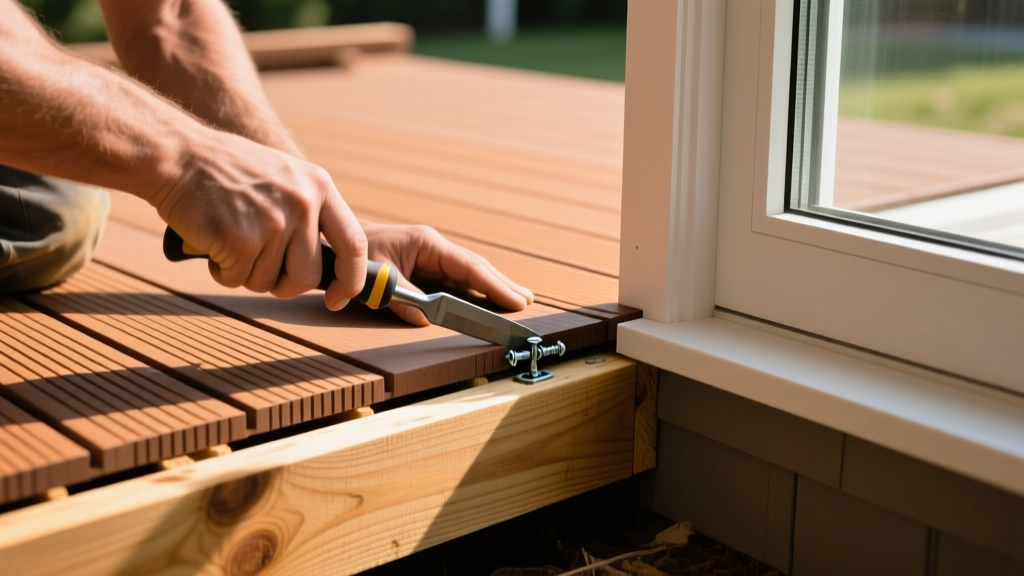
Fastening Systems: Hidden vs. Face-Screwed
Trex offers two primary hidden fastening systems for grooved-edge boards, and choosing the right one dictates your final side-to-side gapping.
- Trex Universal Hidden Fastener: Made of stainless steel with a carbon steel screw. This clip provides a 1/4-inch side-to-side gap. It is the most robust option for high-traffic areas and regions with heavy snow loads.
- Trex Hideaway Fastener: Made from glass-filled nylon. This clip provides a slightly tighter 3/16-inch side-to-side gap. It is faster to install and completely eliminates the risk of metallic squeaking underfoot, but lacks the sheer strength of the stainless steel Universal clip.
For square-edge boards, or for the first and last boards of a run where hidden clips cannot engage, you must face-screw. Never use standard wood screws. Standard screws will cause 'mushrooming'—where the composite material pushes up around the screw head, creating an unsightly and hazardous bump. Always use the Trex Cortex Hidden Fastening System, which includes a specialized depth-setting bit that drives the screw slightly below the surface, allowing you to insert a color-matched composite plug.
Precision Gapping for Thermal Expansion
While the hidden fasteners automatically set the side-to-side gap, the end-to-end gap must be calculated manually based on the ambient temperature at the exact time of installation. Composite boards expand primarily along their length. If you install boards tightly end-to-end on a cold morning, they will buckle and push up at the seams when summer temperatures hit 90°F.
| Ambient Temperature at Installation | Required End-to-End Gap |
|---|---|
| Below 40°F (4°C) | 1/4 inch |
| 40°F to 70°F (4°C to 21°C) | 1/8 inch |
| Above 70°F (21°C) | 1/16 inch (or tight) |
According to structural guidelines verified by the ICC Evaluation Service (ESR-4272) for Trex composite decking, failing to maintain these expansion gaps voids the warranty against thermal buckling. Use 16d nails or specialized composite spacing tools as temporary shims between board ends while fastening, then remove them once the run is secured.
Fascia and Stair Riser Installation (The Buckling Fix)
The most common installation failure in composite decking occurs at the fascia and stair risers. Fascia boards cover the rim joists and provide a finished look, but because they are installed vertically and exposed to direct, unshaded sunlight, they experience extreme thermal cycling.
Step-by-Step Fascia Attachment
- Blocking: Install continuous 2x4 blocking along the rim joist every 12 inches on center. Fascia requires more support than field boards to prevent bowing.
- Over-Drilling: Using a 1/8-inch drill bit, drill completely through the fascia board at every blocking location. This creates a slip plane.
- Fastening: Drive the Cortex screw through the over-drilled hole and into the blocking. The screw should grip the blocking tightly, but the fascia board should be able to slide slightly left or right on the screw shaft as it expands.
- Plugging: Tap the color-matched Cortex plug into the countersunk hole using the provided setting tool. Ensure the grain pattern on the plug aligns with the board.
Cutting, Routing, and Edge Finishing
When cutting Trex material for deck layouts, use a carbide-tipped blade with a low tooth count (40 to 60 teeth for a 10-inch blade). High-tooth-count blades generate excessive friction heat, which can melt the polyethylene cap layer and leave a burr on the cut edge.
If your design requires grooving square-edge boards for hidden fasteners in specific transition areas, use the official Trex Router Bit (Model #94090). Standard slot-cutting bits will not match the precise dimensions of the Trex groove, leading to loose fastener clips that rattle when walked upon.
For the Enhance line, which features a scalloped (hollow) bottom profile, be aware that the exposed ends will show the hollow chambers. Always use solid blocking behind these exposed ends or install a solid fascia board to conceal the profile. Never attempt to fill the scalloped hollows with caulk or wood filler, as the differing expansion rates will cause the filler to crack and fall out within a single freeze-thaw cycle.
Maintenance and Post-Installation Cleanup
Once the installation is complete, remove all construction dust and sawdust immediately. Composite sawdust contains fine wood fibers that can absorb moisture and stain the cap layer if left to sit through a rainstorm. Clean the deck surface using a mild composite deck cleaner and a soft-bristle brush. Avoid power washing with a pressure exceeding 3,100 PSI, as the concentrated stream can etch the protective polymer shell of the Transcend and Select lines, permanently dulling the finish. Proper installation and immediate cleanup ensure your Trex deck remains structurally sound and visually pristine for decades.
Written by
David NakamuraDavid Nakamura is a licensed architect (AIA) and construction technology writer focused on sustainable building methods, mass timber engineering, and high-performance building envelopes. He holds a Master of Architecture from the University of Washington and is a certified Passive House Consultant (CPHC). David spent eight years at the Seattle firm Mithun, where he led the design of three LEED Platinum projects, before founding his own practice specializing in net-zero residential design. He serves on the editorial advisory board of GreenBuilder Magazine and has authored peer-reviewed papers on cross-laminated timber (CLT) connections for the Journal of Structural Engineering. In his spare time, David teaches woodworking at Pratt Fine Arts Center and kayaks the Puget Sound.
More from David Nakamura
View all
Construction Cost
Labor Cost to Build a Deck Per Sq Ft: 2026 Installation Guide
Discover the exact labor cost to build a deck per sq ft in 2026. This installation guide breaks down contractor rates, complexity factors, and hidden fees.
Aug 4, 2026

Construction Cost
How Much Does It Cost to Build a 3 Bedroom House? Financing Guide
Learn exactly how much it costs to build a 3 bedroom house and explore 2026 financing options, construction loan types, and budget frameworks for your build.
Aug 4, 2026

Construction Cost
Cost to Build a Tennis Court: 2026 Guide
How much does it cost to build a tennis court in 2026? Breakdowns for asphalt, concrete, and synthetic surfaces plus fencing and lighting.
Jul 30, 2026