Expert Classroom Carpet Installation: Step-by-Step Guide
Master classroom carpet installation with our step-by-step guide. Learn subfloor prep, adhesive selection, and layout techniques for durable school floors.
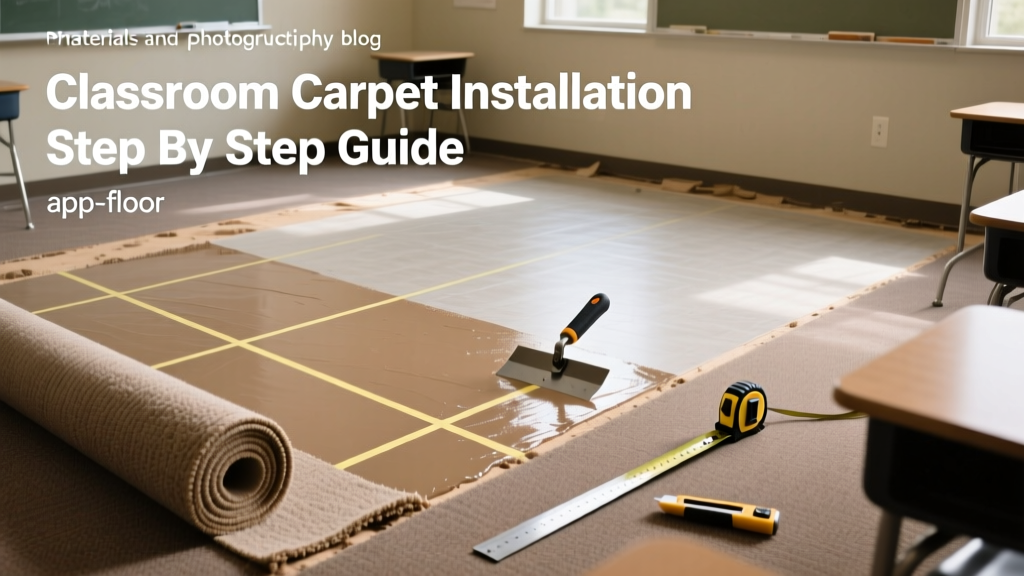
Pre-Installation: Acclimation and Subfloor Diagnostics
Installing classroom carpet requires strict adherence to commercial flooring standards to withstand high foot traffic, rolling desk chairs, and frequent cleanings. The most common cause of premature flooring failure in educational facilities is inadequate subfloor preparation. Before any material is unrolled, the concrete slab must be evaluated for moisture, alkalinity, and surface profile.
New concrete slabs must cure for a minimum of 28 days, though 60 days is recommended for deep structural pours before conducting moisture tests. Installing carpet over green concrete traps alkaline moisture, leading to adhesive degradation and mold growth.
Moisture and pH Testing Protocols
Commercial classroom installations must comply with ASTM F2170 for relative humidity (RH) testing. Installers must drill holes into the concrete slab to a depth of 40% of the slab's total thickness (or 20% if drying from both sides). After inserting insulated sleeves and sealing the holes, wait 72 hours before reading the digital hygrometers. The maximum acceptable RH limit for most commercial carpet adhesives is 80%. Additionally, perform an alkalinity test using distilled water and a calibrated pH meter; the slab's pH must fall between 7.0 and 9.0.
For surface preparation, the concrete must be mechanically profiled via shot-blasting or diamond grinding to achieve a Concrete Surface Profile (CSP) of 1 to 3, as outlined by the International Concrete Repair Institute (ICRI). Any existing cutback adhesive or sealers must be completely removed, as they prevent the new adhesive from achieving a mechanical bond.
Material Selection: Broadloom vs. Modular Carpet Tile
Facility managers typically choose between broadloom (roll) carpet and modular carpet tiles (usually 24"x24" or 18"x36"). While broadloom offers a lower initial material cost, modular tiles provide superior lifecycle value in educational environments due to selective replacement capabilities.
| Feature | Broadloom Carpet | Modular Carpet Tile |
|---|---|---|
| Material Cost (2026) | $1.50 - $3.50 / sq. ft. | $2.80 - $5.50 / sq. ft. |
| Installation Labor | Higher (requires power stretcher, seam sealing) | Lower (dry-lay or peel-and-stick options) |
| Maintenance & Repair | Requires patching; visible seams over time | Individual tiles can be swapped for stains/wear |
| Subfloor Access | Blocks access to under-floor utilities | Easily lifted for IT/electrical access |
For high-traffic zones like hallways and middle-school classrooms, specify solution-dyed nylon (SDN) fibers, such as Shaw Contract's Eco Solution Q or Mohawk Group's Colorstrand. SDN fibers have color integrated into the polymer matrix, making them highly resistant to bleach-based cleaning agents commonly used in school sanitation protocols.
Step-by-Step Installation Procedure
Proper installation ensures the flooring performs under the rigorous demands of a classroom environment. The Carpet and Rug Institute (CRI) mandates specific protocols for commercial installations to maintain warranty validity.
Step 1: Material Acclimation and Layout
All carpet materials and adhesives must acclimate in the classroom for a minimum of 48 hours prior to installation. The HVAC system must be operational, maintaining a temperature between 65°F and 85°F, and a relative humidity between 10% and 65%.
For modular tiles, establish a perpendicular cross-axis by snapping chalk lines from the center points of opposing walls. This ensures the room is square. Begin laying tiles at the intersection of the chalk lines, working outward in a pyramid pattern. To minimize visible seam lines, install tiles in a "quarter-turn" pattern (rotating each adjacent tile 90 degrees) unless the manufacturer specifies a monolithic (directional) layout.
Step 2: Adhesive Selection and Application
Schools must prioritize indoor air quality. Specify adhesives that carry the CRI Green Label Plus certification to ensure ultra-low VOC emissions, aligning with EPA guidelines for Indoor Air Quality in Schools.
For direct glue-down broadloom carpet over porous concrete, use a 1/16" x 1/16" x 1/16" U-notch trowel. For non-porous surfaces or carpet tiles requiring a pressure-sensitive adhesive (PSA), use a 3/32" x 3/32" x 3/32" V-notch trowel. Using the wrong trowel results in adhesive starvation (causing bubbling) or adhesive bleed-through (ruining the carpet face).
Apply the adhesive evenly, maintaining a consistent spread rate. Most commercial pressure-sensitive adhesives require a "flash-off" or open time of 30 to 45 minutes before the carpet is laid. The adhesive should feel tacky to the touch but should not transfer to your finger when pressed. Laying carpet into wet adhesive will cause the backing to delaminate.
Step 3: Setting, Seaming, and Rolling
For broadloom carpet, seams must be sealed using a commercial latex seam sealer or hot-melt tape to prevent edge raveling. Use a power stretcher to achieve the proper tension, preventing wrinkles from forming when heavy classroom furniture is moved.
Immediately after laying the carpet (whether tile or broadloom), roll the entire floor with a 100-pound, three-section floor roller. Roll in two perpendicular directions (north-south, then east-west) to ensure complete adhesive transfer and eliminate trapped air pockets. Pay special attention to the perimeter edges and seams, using a hand roller to ensure a secure bond.
Common Failure Modes and Troubleshooting
Even with proper materials, installation errors can lead to costly callbacks. Recognize these common failure modes specific to educational facilities:
- Edge Curling in Carpet Tiles: Usually caused by insufficient adhesive at the perimeter or rolling chairs catching the edge. Fix: Apply a continuous bead of hot-melt adhesive or specialized tile-tab tape at all perimeter edges and door thresholds.
- Adhesive Bleed-Through: Appears as dark, sticky spots on the carpet face. Fix: This occurs when using a trowel with too large a notch or failing to observe the adhesive's flash-off time. The affected tiles must be pulled, the subfloor scraped clean, and new adhesive applied with the correct trowel.
- Seam Peaking (Broadloom):strong> Visible ridges at the seams. Fix: Caused by cutting the carpet seams with a dull blade or stretching the carpet too aggressively across the seam. Always use a fresh, sharp utility blade and a wall-trimmer for precise edge cuts.
2026 Cost Breakdown for School Projects
Budgeting for classroom carpet requires factoring in material, labor, subfloor prep, and old floor removal. Below is a realistic cost matrix for a standard 900-square-foot classroom as of early 2026.
| Line Item | Carpet Tile (900 sq ft) | Broadloom (900 sq ft) |
|---|---|---|
| Demolition & Disposal | $900 - $1,350 | $900 - $1,350 |
| Subfloor Prep (Grinding/Patching) | $450 - $900 | $450 - $900 |
| Material (Mid-Grade SDN Nylon) | $3,150 - $4,500 | $1,800 - $2,700 |
| Installation Labor & Adhesive | $1,125 - $1,575 | $1,350 - $1,800 |
| Total Estimated Project Cost | $5,625 - $8,325 | $4,500 - $6,750 |
While broadloom presents a lower upfront cost, facility directors increasingly favor carpet tiles for classrooms. The ability to replace a 24"x24" tile damaged by a chemical spill or heavy desk gouge for under $10—rather than re-stretching or patching a massive broadloom roll—results in a significantly lower total cost of ownership over a 10-year lifecycle.