Best Easy Flooring Options for DIY Installation Compared
Compare the best easy flooring options for DIY projects. We analyze LVP, laminate, peel-and-stick, and carpet tiles by cost, prep, and durability.

The 'Easy' Flooring Spectrum: Mechanics of DIY Installation
The term 'easy' in flooring is relative. For a professional, a glue-down hardwood floor is standard; for a homeowner, it is a multi-day ordeal requiring trowels, adhesives, and nailers. When evaluating easy flooring options, the market segments into three primary mechanical systems: click-lock floating floors, peel-and-stick adhesives, and loose-lay friction systems. Understanding the mechanical limitations of each system is the first step in preventing catastrophic installation failures.
Click-lock systems (utilizing patented Unilin or Välinge profiles) rely on a milled tongue-and-groove that snaps together at an angle or via a drop-and-lock vertical mechanism. Peel-and-stick options depend entirely on the substrate's smoothness and the adhesive's chemical bond. Loose-lay materials rely on high-friction backing and perimeter tension. Selecting the wrong mechanism for your specific subfloor condition is the primary reason DIY flooring projects fail within the first 12 months.
Material Breakdown: Top 4 Easy Flooring Options Compared
Below is a technical analysis of the four most viable easy flooring options for residential DIY installation, evaluated by material composition, cost, and structural requirements.
1. Luxury Vinyl Plank (LVP) - Click-Lock (The All-Rounder)
Rigid core LVP, specifically Stone Plastic Composite (SPC), has dominated the DIY market due to its dimensional stability and waterproof core. Unlike older flexible vinyl, SPC LVP will not telegraph minor subfloor imperfections.
- Reference Product: COREtec Pro Plus (5mm SPC core + 1.5mm attached cork pad).
- Wear Layer Requirement: Minimum 20 mil (0.5mm) for residential durability; 12 mil will show micro-scratches within two years in high-traffic zones.
- Material Cost: $3.80 to $6.50 per square foot.
- Installation Speed: 150 to 200 square feet per day for a single DIYer.
- Failure Mode: Failing to undercut door jambs, resulting in visible perimeter gaps where T-moldings cannot adequately cover the expansion space.
2. Laminate Flooring - Click-Lock (The Budget Champion)
Modern laminate utilizes high-density fiberboard (HDF) cores with advanced aluminum-oxide wear layers. While not inherently waterproof, newer hydrophobic edge treatments have drastically improved moisture resistance.
- Reference Product: Pergo Outlast+ (10mm HDF, AC4 commercial rating, SpillProtect edge sealing).
- AC Rating: Always specify AC4 or higher for residential use. AC3 will dent under concentrated point loads (e.g., dining chair legs).
- Material Cost: $2.40 to $4.20 per square foot.
- Installation Speed: 200 to 250 square feet per day (planks are typically wider and longer than LVP).
- Failure Mode: Water intrusion at the seams causing HDF edge swelling (peaking). Laminate requires immediate spill cleanup and is not recommended for full bathrooms.
3. Peel-and-Stick Vinyl Tile (The Weekend Warrior)
Peel-and-stick tiles offer the lowest barrier to entry but possess the highest substrate preparation requirements. The pressure-sensitive adhesive will not bond to porous, dusty, or textured surfaces.
- Reference Product: Armstrong Luminaire Peel & Stick (12x12 inch, 2mm gauge).
- Subfloor Requirement: Must be installed over perfectly smooth lauan underlayment or a feather-finished embossing leveler. Existing ceramic tile grout lines must be completely filled and sanded flush.
- Material Cost: $1.20 to $2.80 per square foot.
- Installation Speed: 100 square feet per day (cutting and peeling is labor-intensive).
- Failure Mode: 'Telegraphing'—where subfloor imperfections, screw heads, or grout lines become visible through the thin vinyl surface within weeks of installation.
4. Carpet Tiles - Loose Lay / Tack Strip (The Soft Solution)
Modular carpet tiles eliminate the need for power stretchers and knee kickers required for broadloom carpet. They utilize a high-friction backing or perimeter tape to stay in place.
- Reference Product: FLOR Modular Tiles (24x24 inches, low-VOC backing).
- Material Cost: $4.50 to $9.00 per square foot.
- Installation Speed: 300+ square feet per day (no cutting required for field tiles; only perimeter cuts needed).
- Failure Mode: Pile direction mismatch. Failing to rotate tiles 90 degrees (quarter-turn installation) or aligning all pile directions identically can cause visible shading differences at the seams.
Head-to-Head Comparison Matrix
| Feature | SPC LVP (Click) | Laminate (Click) | Peel & Stick Vinyl | Carpet Tiles (Loose) |
|---|---|---|---|---|
| Avg. Cost (Material) | $4.50 - $6.50 / sq ft | $2.40 - $4.20 / sq ft | $1.20 - $2.80 / sq ft | $4.50 - $9.00 / sq ft |
| Subfloor Tolerance | 3/16' over 10 ft | 3/16' over 10 ft | Perfectly flush / smooth | 1/4' over 10 ft |
| Water Resistance | 100% Waterproof Core | Water-Resistant Edges | Waterproof Surface | Stain-Resistant Only |
| Underlayment Needed? | Often Attached | Yes (Acoustic/Moisture) | No (Adhesive direct) | No (Friction backing) |
| Best Application | Kitchens, Baths, Basements | Living Rooms, Bedrooms | Powder Rooms, Laundry | Home Offices, Playrooms |
The Hidden Bottleneck: Subfloor Preparation
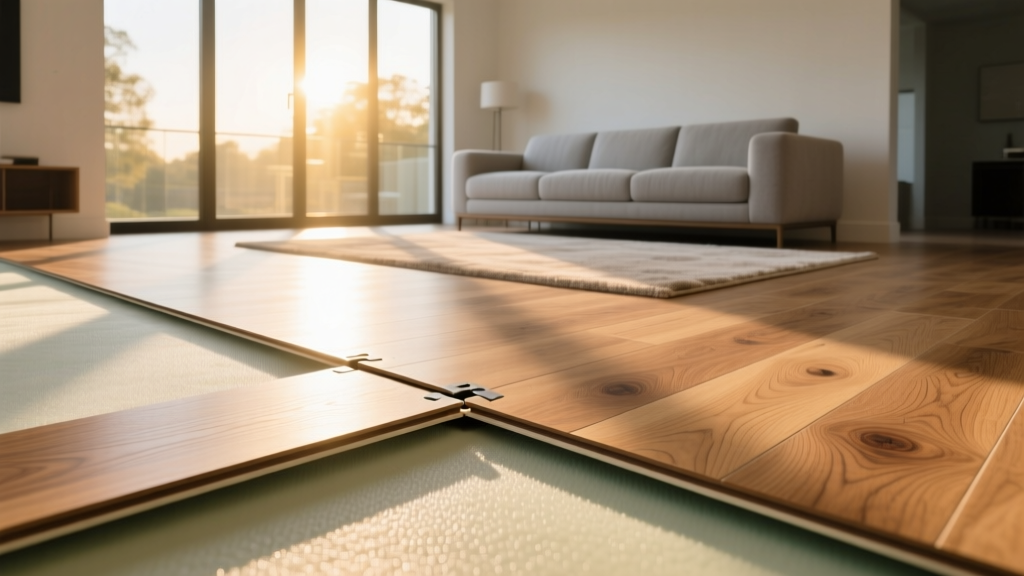
The most common reason DIYers abandon 'easy' flooring projects is underestimating subfloor preparation. According to the National Wood Flooring Association (NWFA) installation guidelines, floating click-lock floors require a subfloor flatness tolerance of 3/16 inch over a 10-foot radius. If your concrete slab or plywood subfloor deviates beyond this, the click-lock joints will experience shear stress during foot traffic, eventually snapping and causing the floor to separate or squeak.
Before installing any LVP or laminate over a concrete slab, perform a calcium chloride moisture emission test (ASTM F1869). If moisture vapor emission exceeds 3 lbs per 1,000 square feet per 24 hours, you must apply a penetrating concrete sealer or lay down a 6-mil polyethylene moisture barrier before installing an underlayment. Skipping this step will trap alkaline moisture, degrading the adhesive on peel-and-stick tiles and causing mold growth under floating floors.
For subfloor leveling, avoid standard drywall joint compound. Use a cementitious self-leveling underlayment (SLU) like Henry 565 FloorPro. Mix it to a pancake-batter consistency, pour it over low spots, and use a gauge rake to spread it. It will cure to a rock-hard, perfectly flat surface in 90 minutes, ready for flooring installation the same day.
Decision Framework: Which Easy Floor Fits Your Scenario?
Use this conditional framework to select the correct material based on your specific room environment and budget constraints.
- Scenario A: Below-grade basement with a concrete slab.
Decision: SPC LVP. You must have a 100% waterproof core. Laminate will absorb ambient basement humidity and swell at the seams. Ensure you use a 6-mil poly vapor barrier beneath the LVP if the pad is not pre-attached with a moisture film. - Scenario B: High-traffic living room on a tight budget.
Decision: AC4-rated Laminate. Laminate offers superior scratch resistance against dog claws and heavy furniture compared to similarly priced LVP. The aluminum-oxide wear layer is significantly harder than urethane vinyl coatings. - Scenario C: Small powder room remodel over existing sheet vinyl.
Decision: Peel-and-Stick Vinyl Tile. Because the square footage is low (usually under 40 sq ft), the labor of applying embossing leveler to the existing sheet vinyl seams is manageable, and the waterproof surface handles splashes effectively.
Common DIY Installation Mistakes to Avoid
Even the most forgiving easy flooring options will fail if fundamental installation physics are ignored. Consumer Reports flooring tests consistently highlight that installation errors, rather than material defects, account for the vast majority of flooring failures.
1. Ignoring the Expansion Gap
All floating floors expand and contract with seasonal humidity and temperature fluctuations. You must maintain a strict 1/4-inch expansion gap around the entire perimeter of the room, including around plumbing pipes and door casings. If the floor touches the drywall or door jamb, it will buckle in the center of the room during the summer months when the material expands.
2. Failing to Stagger End Joints
End joints in adjacent rows must be staggered by a minimum of 6 inches (preferably 12 inches for wider planks). Creating an 'H-pattern' or 'stair-step' pattern concentrates structural weakness along a single axis, making the floor highly susceptible to separation under rolling loads.
3. Skipping the Acclimation Period
Bring the flooring into the installation environment at least 48 hours before installation. The room's HVAC system must be operational and set to normal living temperatures (65°F to 80°F). Installing cold laminate or LVP directly from an unheated garage will result in significant gapping once the material warms and contracts to its equilibrium state inside the home.
By matching the mechanical properties of the flooring system to your specific subfloor conditions and room environment, you can achieve a professional-grade installation using any of these accessible, DIY-friendly materials.
Written by
James ThorntonJames Thornton is a construction industry veteran with 25 years of hands-on experience in wood framing, lumber grading, and residential building codes. He started as a framing carpenter in rural Oregon, earned his ICC Residential Building Inspector certification, and eventually became a senior plan reviewer for the City of Portland Bureau of Development Services. James holds a B.S. in Wood Science & Technology from Oregon State University and is a certified lumber grader through the West Coast Lumber Inspection Bureau (WCLIB). He has inspected over 3,000 residential construction sites and authored the city's internal guide on advanced framing techniques (2x6 at 24" O.C.). James lives in Bend, OR, where he builds custom timber-frame cabins and competes in lumberjack sports.
More from James Thornton
View all
Insulation
Best Home Insulation Materials: Complete 2026 Guide
Compare top home insulation materials for 2026. Find R-values, installed costs per square foot, and best uses for fiberglass, spray foam, and mineral wool.
Aug 4, 2026

Sustainable Building
Certify Your Green Building Material for LEED and WELL
Step-by-step guide to certifying a green building material for LEED v5 and WELL v2. Master EPDs, HPDs, and VOC limits for 2026 project specifications.
Aug 4, 2026

Stone & Masonry
Veneer Stacked Stone Panels: Interior Design & Style Showcase
Discover how veneer stacked stone panels transform interiors. Explore modern design profiles, material pairings, and technical installation specs.
Aug 4, 2026