Mastering the Fans Floor Pattern: Scalloped Tile Installation Guide
Learn exact installation procedures for the fans floor pattern. This guide covers scalloped tile layout, mortar selection, and cutting techniques.
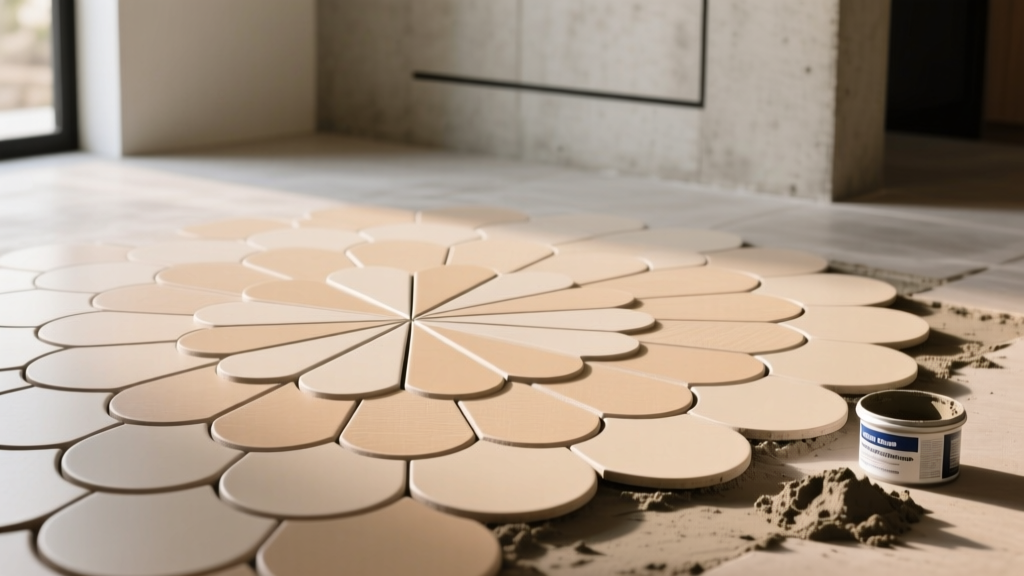
Understanding the Fans Floor Geometry and Layout
The term fans floor is widely used in the trade to describe overlapping scallop, fish-scale, or fan-arc tile layouts. Unlike rectilinear formats, a fans floor pattern relies on interlocking convex and concave curves. This geometry creates unique installation challenges regarding lippage, mortar squeeze-out, and perimeter cutting. In 2026, the most common fans floor tiles are porcelain or glazed ceramic, typically measuring 6x7 inches or 8x9 inches per individual scale, often mounted on 12x12-inch fiberglass mesh sheets.
Because the tiles overlap in a staggered 50% offset, the focal point of the room must dictate the starting line. Snap a primary chalk line parallel to the longest sightline, then snap a secondary perpendicular line. Dry-lay three full sheets along the intersection to verify that the curved edges do not create an optical illusion of drifting. If the room is out of square by more than 1/4 inch over 10 feet, adjust the primary line to split the difference, preventing awkward, razor-thin cuts at the doorway thresholds.
Pre-Installation: Subfloor Prep and Deflection Limits
Scalloped tiles are highly unforgiving of substrate movement. The curved grout joints act as natural fault lines; if the floor deflects, the grout will crack along the arcs before it cracks on a straight joint.
For the underlayment, an uncoupling membrane (such as polyethylene fleece-backed mats) is vastly superior to traditional cement backer board (CBU) for a fans floor. The membrane absorbs lateral shear stress, protecting the intricate curved grout lines from cracking due to seasonal timber expansion and contraction.
Step-by-Step Installation Procedure
Step 1: Mortar Selection and Trowel Notch Sizing
Selecting the wrong trowel is the most common cause of failure in a fans floor installation. Scalloped tiles often feature a slightly domed or curved back profile. Using a standard 1/4-inch square-notch trowel will result in excessive mortar squeeze-out into the 3/16-inch grout joints, requiring hours of tedious cleaning before the mortar cures.
- Optimal Trowel: Use a 1/4-inch x 3/16-inch V-notch trowel. The V-shape provides adequate coverage (minimum 80% for dry areas, 95% for wet areas per NTCA guidelines) while allowing the mortar to collapse without pushing into the curved valleys.
- Mortar Type: Use a high-performance, polymer-modified thin-set mortar meeting ANSI A118.15 standards. These advanced mortars offer superior non-sag properties, preventing the mesh-mounted sheets from sliding down the wall or shifting on the floor before the initial grab sets.
Step 2: Setting the Scalloped Sheets
- Comb the Mortar: Hold the V-notch trowel at a strict 45-degree angle. Comb the mortar in straight, horizontal lines to allow air to escape when the tile is embedded.
- Back-Buttering: If the scalloped tiles are unmounted (individual pieces), you must back-butter the concave underside of each tile with the flat side of the trowel. For mesh-mounted sheets, back-buttering is generally not required if the substrate is perfectly flat.
- Embedding: Press the sheet into the mortar and use a 15-pound rubber float to beat it in. Move the float in a circular motion to ensure the mortar makes full contact with the curved tile backs.
- Interlocking: Slide the next sheet into the overlapping arc. Do not force the tiles apart to widen the grout joint; the mesh spacing is pre-calculated. Maintain a consistent 3/16-inch joint at the straight sides and a tight overlap at the curved tops.
Cutting Complex Curves: Wet Saw vs. Angle Grinder
The perimeter cuts of a fans floor are notoriously difficult. A standard wet saw yields a straight cut, which looks jarring when a flat edge meets a curved baseboard or wall.
To maintain the organic flow of the pattern against straight walls, professional installers use a 4-inch angle grinder equipped with a continuous-rim diamond contour blade. Create a cardboard template of the wall profile, trace it onto the tile, and carefully grind away the excess material. Always leave a 1/4-inch expansion gap between the cut tile and the wall framing; this gap will be concealed by shoe molding or a flexible silicone caulk bead colored to match the grout.
For interior cuts, such as plumbing penetrations for toilet flanges, use a diamond-grit hole saw attached to a variable-speed drill. Start at a 45-degree angle to create a pilot groove, then slowly level the drill to prevent the bit from wandering across the glazed surface.
Mortar and Grout Specifications for Fan Patterns
| Material Component | Specification / Standard | Why It Matters for Fans Floor |
|---|---|---|
| Thin-Set Mortar | ANSI A118.15 (Extended Open Time) | Allows time to adjust overlapping mesh sheets without losing bond strength. |
| Trowel Notch | 1/4" x 3/16" V-Notch | Prevents squeeze-out into the narrow, curved scallop valleys. |
| Grout Type | Single-Component Urethane (ANSI A118.9) | Resists staining and efflorescence in the deep, water-trapping curves. |
| Expansion Joint | 1/4" Perimeter Gap | Accommodates lateral shear without cracking the interlocking arcs. |
When grouting a fans floor, avoid standard cementitious sanded grout. The curved valleys of the scallop pattern trap water during the curing process, leading to severe shading inconsistencies and efflorescence. Instead, use a single-component urethane grout or a high-quality epoxy. These materials are impervious to water, stain-resistant, and do not require sealing, which is critical for maintaining the pristine look of the overlapping scales.
Common Failure Modes and Troubleshooting
Cause: Pressing the tile too hard into an overly thick mortar bed, forcing the fiberglass mesh backing up into the grout space.
Fix: Use the flat side of the trowel to scrape away excess mortar immediately. If the mesh is visible after grouting, carefully burnish the joint with a damp sponge and a grout float before the grout forms its final skin.
Cause: The top edge of the lower tile sits higher than the overlapping top edge of the tile below it, creating a shadow line and a toe-stubbing hazard.
Fix: Use a 1/16-inch horseshoe shim placed horizontally between the straight side edges of the tiles during setting. Remove the shims before grouting to ensure a uniform joint width.
Labor costs for a fans floor installation are significantly higher than standard rectilinear formats. As of 2026, professional installers charge between $12.00 and $18.00 per square foot for labor alone, reflecting the increased time required for layout verification, intricate perimeter cutting, and meticulous joint cleaning. Always factor in an additional 15% for material waste, as cutting the curved edges yields a high volume of unusable offcuts compared to standard subway or square tiles.