Strategic Selection Framework for Floor Heating Options
Compare electric and hydronic floor heating options. Use our selection framework to match system types, costs, and flooring materials for your project.

The Core Decision: Electric vs. Hydronic Radiant Systems
Selecting the right radiant heating system requires moving beyond basic comfort claims and analyzing the structural, electrical, and financial realities of your specific project. The market is dominated by two primary technologies: electric resistance cables and hydronic water loops. According to the U.S. Department of Energy, radiant heating is generally more efficient than baseboard heating and usually more efficient than forced-air heating because no energy is lost through ducts. However, the application dictates which technology yields a positive return on investment.
| Feature | Electric (Cables/Mats) | Hydronic (PEX Tubing) |
|---|---|---|
| Upfront Material Cost | $6 - $14 per sq. ft. | $12 - $22 per sq. ft. (excl. boiler) |
| Installation Thickness | 1/8' to 1/4' (mats) or 3/8' (cables in SLC) | 1.5' to 2' (requires gypsum/sleeper build-up) |
| Operating Cost | High (electricity rates apply) | Low (natural gas or high-efficiency heat pump) |
| Ideal Application | Single-room retrofits, bathrooms, kitchens | Whole-house new construction, slab-on-grade |
| Heat-Up Time | 30 to 60 minutes | 2 to 4 hours (high thermal mass) |
For a master bathroom remodel where the goal is warm tile underfoot for 30 minutes in the morning, electric mats are the undisputed choice. Running a dedicated 240V circuit for a 100-square-foot bathroom costs roughly $1,200 in materials and provides immediate, zoned comfort. Conversely, specifying a hydronic system for a single bathroom requires running PEX lines back to a central manifold and boiler, adding thousands in plumbing labor and complexity for a negligible comfort upgrade over electric.
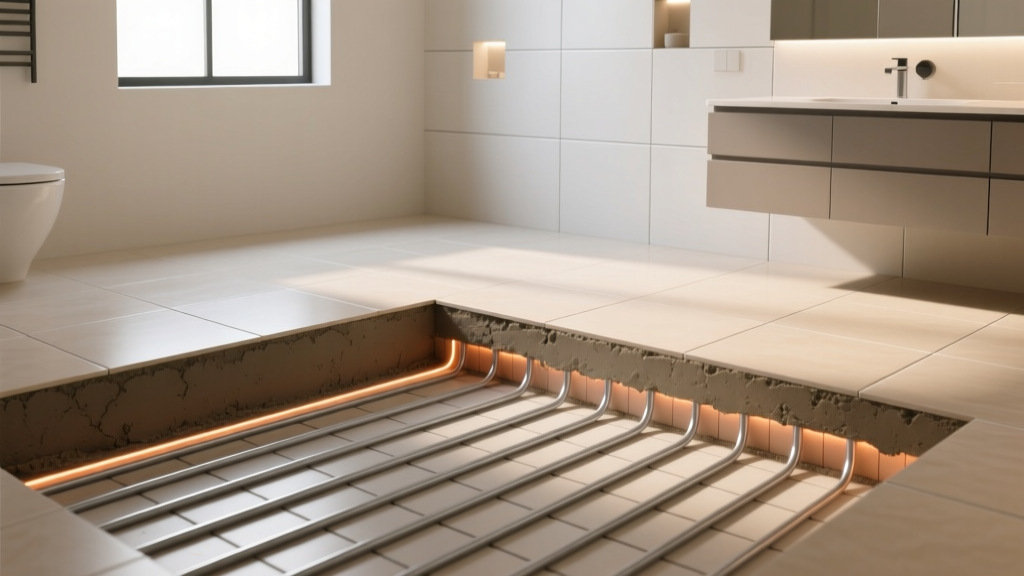
Flooring Compatibility Matrix: What Can Handle the Heat?
A radiant system is only as effective as the floor covering above it. Thermal conductivity and dimensional stability are the two non-negotiable metrics when pairing flooring with heating elements.
Ceramic, Porcelain, and Natural Stone
Tile and stone are the optimal partners for radiant heat due to their high thermal conductivity and dimensional stability. They do not expand or contract significantly with temperature fluctuations. However, large-format porcelain (edges exceeding 15 inches) is highly susceptible to cracking if the subfloor deflects or if thermal stress concentrates. Framework Rule: Always use an uncoupling membrane. Systems like Schluter DITRA-HEAT integrate the heating cables directly into a polyethylene membrane that neutralizes lateral shear stresses, effectively eliminating thermal cracking in the tile assembly.
Engineered Hardwood
Solid hardwood is generally prohibited by radiant manufacturers due to severe cupping and gapping risks. Engineered hardwood is acceptable, provided it features a multi-ply cross-grain core (minimum 5-ply) and a wear layer no thicker than 4mm. Framework Rule: Cap the maximum surface temperature at 80°F to 85°F. The wood must be either fully glued down using a urethane-based adhesive (which remains flexible) or floated. Never nail or staple engineered wood over a radiant subfloor; fasteners will inevitably pierce the heating cables or PEX tubing.
Luxury Vinyl Plank (LVP) and WPC
The LVP market has exploded, but heat compatibility remains a strict warranty boundary. Most premium LVP manufacturers (such as CoreTec or Shaw) void their warranties if the floor surface exceeds 85°F. Because LVP acts as a mild insulator, the heating element beneath it must work harder, risking localized overheating if area rugs are placed on top. Framework Rule: Only specify heating systems with built-in, dual-sensor thermostats that monitor both ambient room temperature and the physical floor temperature, hard-capping the output at 85°F.
The 4-Step Selection Framework for Your Project
Use this sequential framework to eliminate guesswork and specify the exact system architecture required for your build.
Step 1: Define the Voltage and Amperage Scope
Electric radiant systems are available in 120V and 240V configurations. The selection is dictated by the heated square footage, not the room size. A 120V system draws roughly 1 amp per 10 square feet. Standard residential circuits are 15 or 20 amps, meaning a 120V system maxes out at 150 square feet (using a 15A dedicated breaker). If your heated area exceeds 150 square feet, you must specify a 240V system, which cuts the amperage draw in half, allowing up to 300 square feet on a single thermostat. Attempting to daisy-chain multiple 120V mats to cover a 200-square-foot kitchen will trip the breaker and fail inspection.
Step 2: Subfloor Thermal Isolation
Heat migrates to cold. If you are installing electric cables over an unconditioned space (like a vented crawlspace or garage), up to 30% of your heat output will be lost downward. You must install rigid foam insulation (minimum R-5, such as 1-inch XPS) or specialized synthetic cork underlayment beneath the heating elements. For concrete slab-on-grade installations, hydronic PEX tubing must be tied to rebar or fastened to rigid foam insulation at least 2 inches below the slab surface to prevent thermal bleeding into the earth.
Step 3: Select the Embedment Method
How the cables are encapsulated dictates the floor height transition. There are three primary methods:
- Thinset Encapsulation (Mats): Pre-spaced cables on a mesh backing. Embedded directly in the thinset mortar used to set the tile. Adds 1/8' to 3/16' of height. Best for keeping floor heights flush with adjacent hardwood.
- Uncoupling Membranes: Cables pressed into the studs of a membrane (e.g., DITRA-HEAT). Adds 1/4' to 5/16'. Provides crack isolation and superior thinset adhesion.
- Self-Leveling Compound (SLC): Loose cables stapled to the subfloor, then poured over with 3/8' to 1/2' of SLC. Required for LVP, engineered wood, or carpet applications where thinset cannot be used.
Step 4: Specify Smart Controls and Zoning
Modern radiant heating requires Class A GFCI protection built directly into the thermostat, a code requirement in wet areas like bathrooms. Beyond safety, specify smart thermostats (like the nVent NUHEAT SIGNATURE or SunTouch Connect) that integrate with home automation systems. These units utilize adaptive learning algorithms to calculate the exact thermal mass of your specific floor, turning the system on hours before you wake up so the floor reaches target temperature precisely at 6:00 AM, rather than running continuously.
Critical Installation Failure Modes to Avoid
Even premium systems fail if installation protocols are violated. Document these edge cases in your project specifications to prevent costly teardowns.
The floor temperature probe must be embedded in the floor, not left in the wall cavity. It must be placed in a conduit (so it can be replaced if it fails) and positioned exactly between two heating cables. Critical Error: If the probe is installed beneath a toilet, a vanity toe-kick, or an area rug, it will read artificially high temperatures, causing the thermostat to shut off prematurely while the rest of the room remains freezing.
When pouring self-leveling compound over loose heating cables, the SLC must cover the cables by a minimum of 1/4 inch. If the subfloor is highly porous and not primed correctly, the SLC will lose moisture too quickly, shrink, and expose the tops of the cables. When the flooring installer then trowels adhesive or lays underlayment, they will slice the cable sheath, creating a dead short that destroys the system before the floor is even finished.
Require your electrical contractor to perform a Megohmmeter (Megger) test at three distinct phases: out of the box, immediately after embedding in thinset/SLC, and immediately after the final floor covering is laid. This test checks the integrity of the cable's internal insulation at high voltage. If a cable is nicked during tile installation, the Megger test will catch it before the grout cures, saving thousands in demolition costs.
By applying this framework, you transition from guessing based on marketing brochures to engineering a radiant floor system that aligns with your structural constraints, flooring choices, and long-term operational budget.
Written by
James ThorntonJames Thornton is a construction industry veteran with 25 years of hands-on experience in wood framing, lumber grading, and residential building codes. He started as a framing carpenter in rural Oregon, earned his ICC Residential Building Inspector certification, and eventually became a senior plan reviewer for the City of Portland Bureau of Development Services. James holds a B.S. in Wood Science & Technology from Oregon State University and is a certified lumber grader through the West Coast Lumber Inspection Bureau (WCLIB). He has inspected over 3,000 residential construction sites and authored the city's internal guide on advanced framing techniques (2x6 at 24" O.C.). James lives in Bend, OR, where he builds custom timber-frame cabins and competes in lumberjack sports.
More from James Thornton
View all
Insulation
Best Home Insulation Materials: Complete 2026 Guide
Compare top home insulation materials for 2026. Find R-values, installed costs per square foot, and best uses for fiberglass, spray foam, and mineral wool.
Aug 4, 2026

Sustainable Building
Certify Your Green Building Material for LEED and WELL
Step-by-step guide to certifying a green building material for LEED v5 and WELL v2. Master EPDs, HPDs, and VOC limits for 2026 project specifications.
Aug 4, 2026

Stone & Masonry
Veneer Stacked Stone Panels: Interior Design & Style Showcase
Discover how veneer stacked stone panels transform interiors. Explore modern design profiles, material pairings, and technical installation specs.
Aug 4, 2026