Crawl Space Liner Installation: Step-by-Step Encapsulation Guide
Learn the exact procedures for crawl space liner installation, from selecting 12-mil poly to seam taping and wall fastening for complete encapsulation.
Pre-Installation Preparation and Moisture Mitigation
Installing a crawl space liner is not simply unrolling plastic over dirt. The longevity of a Class I vapor retarder depends entirely on substrate preparation and moisture management prior to deployment. According to the Pacific Northwest National Laboratory (PNNL) Building America Solution Center, unvented crawl spaces require meticulous air sealing and water management to prevent structural rot and mold proliferation.
Begin by removing all organic debris, sharp rocks, and construction detritus. Any protruding object larger than 1/4 inch will eventually puncture a standard polyethylene liner under hydrostatic pressure or foot traffic. Grade the soil floor to ensure a minimum 2% slope away from the foundation walls toward a centralized sump pit or perimeter French drain. If standing water is present, install a pedestal sump pump with a cast-iron housing before laying the liner.
Apply a borate-based fungicide (such as Bora-Care or Timbor) to all exposed wooden joists and subflooring if any surface mold is detected. Allow 48 hours for the treatment to penetrate and dry completely before proceeding with the physical barrier installation.
Selecting the Right Crawl Space Liner Thickness
The International Residential Code (IRC) Section R408.3 mandates a minimum 6-mil polyethylene vapor retarder for unvented crawl spaces. However, in professional practice, 6-mil unreinforced poly is considered inadequate for long-term encapsulation due to its low tensile strength and high susceptibility to tearing. For a durable installation, always specify a string-reinforced polyethylene liner.
| Liner Type | Thickness | Tensile Strength | Perm Rating | Cost per Sq. Ft. |
|---|---|---|---|---|
| Unreinforced Poly | 6-mil | Low (Prone to tearing) | < 0.10 | $0.12 - $0.18 |
| String-Reinforced Poly | 12-mil | High (Standard Pro) | < 0.05 | $0.35 - $0.45 |
| Heavy-Duty Reinforced | 20-mil | Very High (High Traffic) | < 0.02 | $0.60 - $0.85 |
Step-by-Step Crawl Space Liner Installation
Step 1: Floor Layout and Cutting
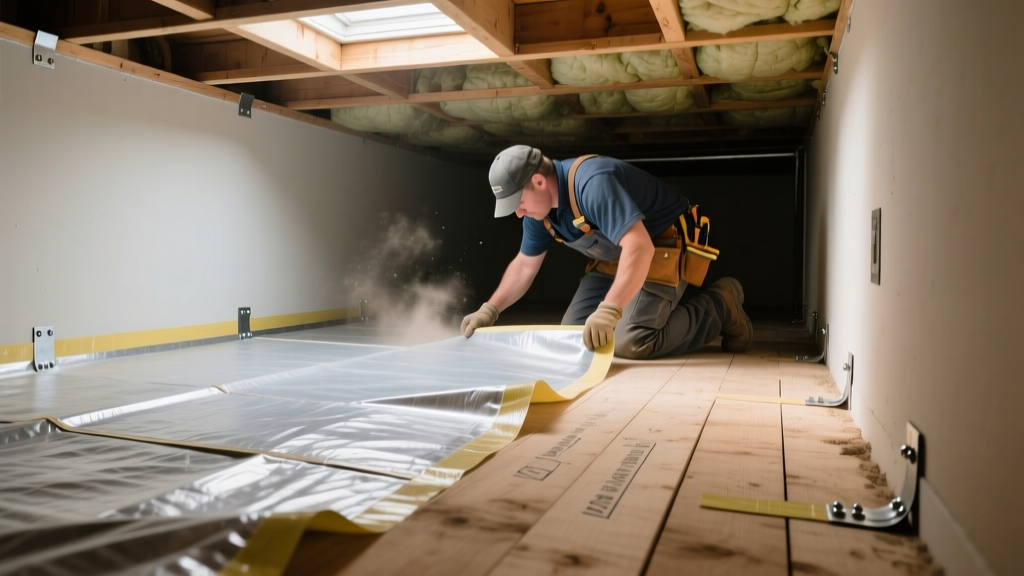
Roll out the liner across the longest dimension of the crawl space. Allow the material to acclimate to the ambient temperature for at least two hours; cold polyethylene is brittle and prone to cracking. Cut the sheets so they overlap the foundation walls by at least 12 inches. When covering wide spans, overlap adjacent sheets by a minimum of 6 to 12 inches to ensure a continuous capillary break.
Step 2: Seaming and Taping Protocols
The most common failure point in crawl space encapsulation is seam delamination. Do not use standard duct tape, Gorilla tape, or cheap acrylic construction tapes. These adhesives become brittle and lose their bond in high-humidity, high-alkalinity environments.
Use a 4-inch wide, double-sided butyl tape or a specialized cross-laminated encapsulation tape for the primary seam bond. Once the sheets are pressed together, apply a 4-inch single-sided seam tape over the top of the joint to create a secondary waterproof barrier.
Step 3: Wall and Pier Attachment
Run the liner up the foundation walls to the top of the masonry or the bottom of the wall insulation, stopping just below the top plate or band joist. In termite-prone zones, leave a 3-inch visual inspection gap down from the top of the foundation wall as required by local building codes. For concrete block walls, clean the surface with a wire brush and apply a continuous 1/4-inch bead of polyurethane construction mastic before pressing the liner into the adhesive.
For structural piers, wrap the liner tightly around the concrete or masonry columns. Secure the wrap using stainless steel hose clamps or specialized pier wrap tape, ensuring no gaps exist where ground moisture could wick upward.
Mechanical Fastening and Batten Strips
Adhesive alone is insufficient for long-term wall termination. You must mechanically fasten the liner to the foundation wall using a termination batten strip to prevent wind wash and air infiltration.
- Material: Use 1x2 PVC trim boards or pressure-treated southern yellow pine. Avoid untreated wood, which will rot and compromise the fastener grip over time.
- Fasteners: Drive 1-3/4 inch washer-capped screws (or Tapcon masonry screws with neoprene washers) through the batten strip, through the liner, and into the concrete or block wall every 16 inches on center.
- Sealing: Caulk the top edge of the batten strip with a high-quality elastomeric sealant to prevent air infiltration behind the liner.
Final Inspection and Dehumidification Integration
Once the physical barrier is installed, the crawl space must be actively conditioned. The 2021 International Residential Code requires unvented crawl spaces to have a mechanical drying system. Size your commercial dehumidifier based on the cubic footage of the space, not just the square footage. A standard rule of thumb for current energy-efficient models is 1 pint of moisture removal capacity per 50 square feet of floor area, assuming standard 3-foot ceiling heights.
Route the dehumidifier's condensate drain line through the liner and foundation wall using a sealed bulkhead fitting, ensuring the line terminates at an exterior grade level below the frost line or into the interior sump pump pit. Verify that all penetrations for plumbing, HVAC ducts, and electrical lines are sealed with closed-cell spray foam or specialized rubber gaskets.
Common Installation Failures and Troubleshooting
Even with meticulous planning, environmental factors can cause issues. Use this matrix to diagnose and correct post-installation anomalies.
| Symptom | Root Cause | Corrective Action |
|---|---|---|
| Water pooling on top of liner | Improper floor grading or negative slope | Cut relief slits in liner, re-grade soil beneath, install French drain below liner. |
| Seams peeling after 6 months | Use of acrylic tape on dusty concrete | Remove tape, wire-brush concrete, apply primer, reinstall with butyl tape. |
| White powdery residue on liner | Efflorescence from unsealed block walls | Apply silane/siloxane penetrating sealer to masonry before liner attachment. |
| Condensation on HVAC ducts | Duct insulation compromised or missing vapor jacket | Wrap ducts in closed-cell elastomeric foam insulation with sealed seams. |
Cost Breakdown for Professional vs. DIY Encapsulation
2026 Pricing Estimates for 1,500 Sq. Ft. Crawl Space
- 12-Mil Reinforced Liner Material: $525 - $675 ($0.35 - $0.45/sq ft)
- Seam Tape & Mastic Consumables: $180 - $250
- Termination Battens & Fasteners: $120 - $160
- Commercial Dehumidifier (70-pint): $1,100 - $1,600
- Total DIY Material Cost: $1,925 - $2,685
- Professional Turnkey Installation: $6,500 - $9,500
Proper execution of these procedures ensures that the crawl space liner functions as a true environmental boundary, protecting the structural integrity of the foundation and improving the overall energy efficiency of the home. Always consult local building authorities to ensure your specific encapsulation design meets regional amendments to the IRC.