Encapsulating a Crawl Space: Climate & Scenario Match Guide
Discover if encapsulating a crawl space fits your home. Match your climate, water table, and budget to the right vapor barrier and dehumidifier.
The Core Decision: Does Your Home Need Crawl Space Encapsulation?
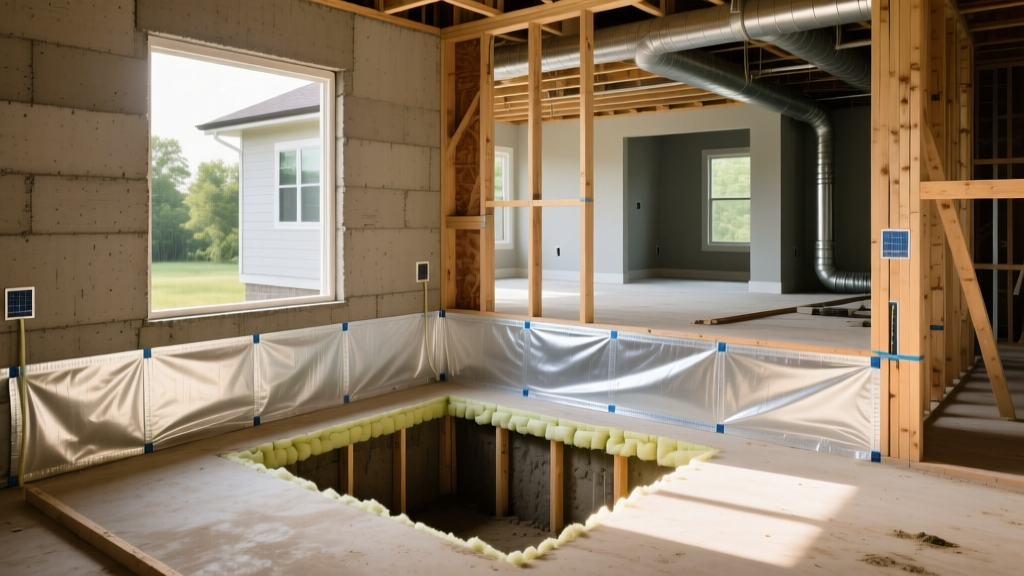
Encapsulating a crawl space is not a universal remedy for foundation moisture; it is a climate-dependent building science strategy. While sealing a dirt floor with a polyethylene vapor barrier and conditioning the air can eliminate mold, reduce HVAC loads by up to 15%, and protect structural timber, applying this method in the wrong climate or hydrostatic scenario can trap moisture and accelerate rot. The decision to encapsulate must be driven by your specific geographic climate zone, the local water table, and the existing foundation materials.
Scenario Matching Matrix: When to Encapsulate vs. When to Walk Away
| Home Scenario | Climate / Condition | Encapsulation Verdict | Required System Components |
|---|---|---|---|
| Dirt Floor, High Humidity | IECC Zones 1-3 (Hot/Humid) | Highly Recommended | 20-mil barrier, wall insulation, mechanical dehumidifier |
| Dirt Floor, Dry Climate | IECC Zones 5-8 (Cold/Dry) | Conditionally Recommended | 12-mil barrier, sealed vents, no dehumidifier needed |
| High Water Table / Flood Zone | Any Zone with Hydrostatic Pressure | Requires Engineering | Dimple drain mat, perimeter French drain, sump pump, 20-mil barrier |
| Existing Concrete Floor | Any Zone | Unnecessary | Seal concrete with silane/siloxane penetrating sealer instead |
| Vented Crawl, No Moisture Issues | Arid Climates (e.g., US Southwest) | Not Recommended | Maintain cross-ventilation; monitor with hygrometer |
Climate & Geography: The Biggest Variable in Encapsulation ROI
The International Residential Code (IRC Section R408.3) allows for unvented (encapsulated) crawl spaces, but the thermodynamics of the space change drastically based on your region. According to research by the Building Science Corporation, venting a crawl space in a hot, humid climate actually introduces more moisture than it removes, as warm ambient air condenses on the cooler foundation walls and floor joists.
In heating-dominated climates (Zones 5 and above), the stack effect pulls air from the crawl space into the living area. If the crawl space is damp, you are pulling mold spores and radon into your home. Encapsulation stops this air transfer, making it a health imperative, not just a structural one.
Material Specifications for Specific Scenarios
Generic '6-mil poly' from a big-box hardware store is entirely inadequate for a permanent crawl space encapsulation. It tears under foot traffic, degrades from soil off-gassing, and fails at the seams. You must match the material to the physical demands of the space.
Scenario A: Standard Dirt Floor (Low Foot Traffic)
- Vapor Barrier: 12-mil cross-laminated polyethylene (e.g., Raven Industries VaporGuard 12). Cost: ~$0.45 - $0.60 per sq. ft.
- Seam Tape: 4-inch wide butyl-based crawl space tape. Standard duct tape or construction adhesive will fail within 18 months due to moisture and temperature cycling.
- Wall Attachment: Mechanical fasteners with neoprene washers into the masonry, topped with closed-cell spray foam or mastic to seal the top edge.
Scenario B: High Water Table / Occasional Seepage
- Sub-Membrane Drainage: Install a dimpled drainage mat (like Delta-MS or similar geo-composite) over the dirt before laying the vapor barrier to channel hydrostatic pressure to a perimeter drain.
- Vapor Barrier: 20-mil reinforced polyethylene with a polyester scrim core. Cost: ~$0.85 - $1.15 per sq. ft.
- Water Evacuation: A 1/3 HP cast-iron sump pump (e.g., Zoeller M53) installed in a sealed basin, discharging at least 10 feet away from the foundation.
Sizing the Dehumidifier: CFM and Pint Capacity
If you are in Climate Zones 1 through 4, a vapor barrier alone is insufficient. You must actively condition the air. Sizing the dehumidifier incorrectly is the most common cause of post-encapsulation failure. Do not use portable residential dehumidifiers; they lack the static pressure to push air across a 1,500+ sq. ft. crawl space and will burn out in months.
| Crawl Space Square Footage | Required Capacity (AHAM Pints/Day) | Recommended Commercial Models (2026 Market) | Approx. Installed Cost |
|---|---|---|---|
| Up to 1,200 sq. ft. | 50 - 70 Pints | Aprilaire E070, Santa Fe Advance2 | $1,400 - $1,800 |
| 1,200 - 2,200 sq. ft. | 70 - 90 Pints | Aprilaire E100, AlorAir Storm | $1,700 - $2,300 |
| 2,200 - 3,500 sq. ft. | 100 - 135 Pints | Aprilaire E130, Santa Fe Ultra155 | $2,400 - $3,100 |
Note: The dehumidifier must be suspended from the floor joists or placed on a raised platform, with a dedicated condensate line gravity-fed to the exterior or tied into the sump pump basin.
The Insulation Shift: Walls vs. Ceiling
When encapsulating a crawl space, you are fundamentally changing the thermal boundary of the home. The U.S. Department of Energy explicitly advises against insulating the ceiling (floor joists) of an encapsulated crawl space. Once sealed, the crawl space becomes part of the conditioned building envelope.
Leaving fiberglass batts between your floor joists after encapsulation is a critical error. If the dehumidifier fails or the barrier breaches, the fiberglass will absorb moisture, sag, lose its R-value, and harbor black mold against your subfloor. Remove all ceiling fiberglass before encapsulating.
The Correct Method: Insulate the interior perimeter foundation walls using rigid foam board. Extruded Polystyrene (XPS) or Expanded Polystyrene (EPS) rated at R-10 to R-15 is standard. The foam must be adhered directly to the masonry using a compatible foam-board adhesive, and the top edge must be sealed with spray foam to prevent air bypass. In many jurisdictions, rigid foam must be covered with a thermal or ignition barrier (like a specialized intumescent paint or drywall) to meet fire codes.
Cost Breakdown & ROI Timeline (2026 Estimates)
The cost of encapsulating a crawl space varies wildly based on accessibility, preparation work (like removing old debris or mold remediation), and the hydrostatic conditions. Below is a realistic breakdown for a standard 1,500 sq. ft. crawl space with moderate access (24-inch clearance).
- Basic Encapsulation (12-mil, vents sealed, no dehumidifier): $4,500 - $7,000 ($3.00 - $4.66 / sq. ft.)
- Standard Encapsulation (12-mil, wall insulation, dehumidifier): $9,000 - $13,500 ($6.00 - $9.00 / sq. ft.)
- Premium / Wet Scenario (20-mil, dimple mat, sump pump, dehumidifier): $15,000 - $22,000 ($10.00 - $14.66 / sq. ft.)
ROI Calculation: According to the EPA, controlling moisture is the key to mold prevention. Beyond health, encapsulating typically yields a 10% to 15% reduction in annual heating and cooling costs. For a home spending $3,500 annually on HVAC, the energy savings alone can recoup a standard encapsulation investment in 7 to 9 years, not counting the preservation of structural joists and increased resale value.
Common Failure Modes & How to Avoid Them
- Capillary Action from Block Walls: Concrete masonry units (CMU) wick groundwater upward. If the vapor barrier is only laid on the floor and lapped 6 inches up the wall, moisture will bypass it. Fix: Run the barrier at least 12 inches up the wall, or all the way to the sill plate, and seal the top edge.
- Unsealed Rim Joists: The rim joist (where the wood framing meets the masonry) is notoriously leaky. If outside humid air infiltrates here, it will condense on the cool encapsulated surfaces. Fix: Apply 2-3 inches of closed-cell spray foam to the entire rim joist perimeter before installing the wall insulation.
- HVAC Duct Leaks in the Crawl Space: If your AC ducts run through the crawl space and leak, they will depressurize the space, pulling soil gases and moisture through microscopic gaps in the vapor barrier. Fix: Seal all duct mastic joints with UL-181 rated mastic paste and ensure ducts are insulated to at least R-8.