Choosing the Best Chicken Coop Roof Material for All Climates
Discover the best chicken coop roof material for your climate. Compare metal, shingles, and polycarbonate for durability, insulation, and predator defense.

The Core Threat Matrix: Weather, Predators, and Ammonia
Selecting the right chicken coop roof material requires looking beyond basic weatherproofing. A coop is a highly corrosive, biologically active environment that subjects roofing to stresses not found in standard residential applications. According to the National Poultry Extension Collaborative, proper housing must balance ventilation, thermal regulation, and structural integrity to prevent flock mortality.
Before choosing a material, evaluate your build against these three specific threats:
- Ammonia Corrosion: Decomposing uric acid in chicken manure releases ammonia gas. In poorly ventilated coops, this gas rises and traps against the roof deck, rapidly corroding standard untreated metals and degrading certain adhesives.
- Predator Shear and Puncture: Raccoons possess a bite force exceeding 50 PSI and dexterous paws capable of peeling back weakly fastened materials. Coyotes and foxes will test roof overhangs by jumping and pulling.
- Thermal Extremes and Condensation: Chickens are highly susceptible to heat stress above 85°F and respiratory infections (like Mycoplasma) caused by cold, damp conditions. The roof material directly dictates the coop's condensation profile and solar heat gain.
Material Comparison Matrix: What Actually Works?
The table below breaks down the top three viable materials based on current 2026 market availability, structural requirements, and biological safety.
| Material | Spec / Thickness | Avg Cost (per sq ft) | Lifespan | Predator Rating | Condensation Risk |
|---|---|---|---|---|---|
| Galvalume Metal | 26-Gauge (0.0179") | $1.80 - $2.50 | 40+ Years | Excellent | High (Requires Fleece) |
| Architectural Shingles | ASAE 325 lb/ft | $1.20 - $1.60 | 20-25 Years | Excellent | Low |
| Twin-Wall Polycarbonate | 8mm or 10mm | $3.50 - $4.50 | 15-20 Years | Good | Low |
Deep Dive: Corrugated Galvalume Steel
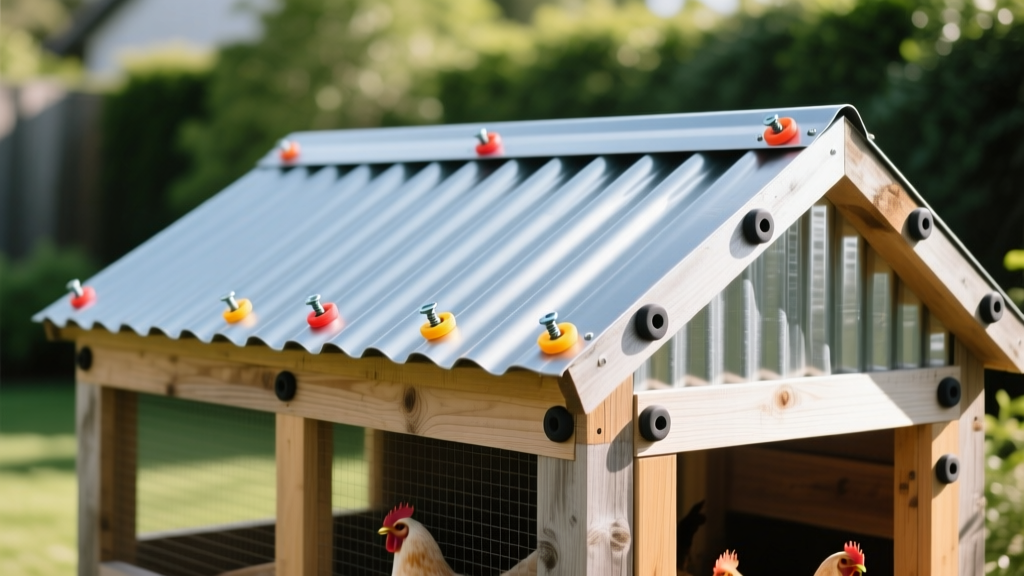
Galvalume (an aluminum-zinc alloy coating over steel) is the industry standard for agricultural and backyard poultry structures. The aluminum component provides exceptional resistance to the ammonia corrosion that destroys standard galvanized steel within a few years. For a coop roof, always specify a 26-gauge thickness rather than the cheaper 29-gauge; 26-gauge resists hail denting and provides the rigidity needed to span purlins without sagging under snow loads.
The Condensation Problem and the Fleece Solution
Metal roofs are notorious for "sweating." When the warm, moisture-heavy air from the chickens' respiration and droppings hits the cold underside of a metal roof, it condenses and drips onto the flock. Wet bedding leads to ammonia spikes and bumblefoot infections.
Pro-Tip: Do not rely solely on fiberglass batt insulation, which chickens will peck and destroy. Instead, order your metal panels factory-applied with an anti-condensation fleece backing (such as DripStop or CondenStop). This membrane absorbs moisture during the night and releases it back into the air via ventilation during the day, completely eliminating drip issues.
Fastener Specifications
Never use nails or standard wood screws to attach metal roofing to a coop. The thermal expansion and contraction of the metal will work nails loose within a single season, creating entry points for mink and weasels. Use #10 x 1-inch hex washer head self-drilling screws with EPDM (neoprene) sealing washers. Drive them perfectly plumb; an over-tightened screw compresses the washer too much, causing it to split and leak, while an under-tightened screw leaves a gap.
Deep Dive: Asphalt Architectural Shingles
If your coop is designed to match your primary residence or is located in a region with extreme temperature swings where metal's thermal conductivity is a liability, asphalt shingles are a highly durable alternative. Architectural (dimensional) shingles are vastly superior to 3-tab shingles for coops due to their higher wind ratings and thicker fiberglass mat, which resists pecking and scratching from birds that might fly up to the roof eaves.
Structural Load Requirements
The primary failure mode for shingled coop roofs is structural collapse due to dead load. Shingles require a solid substrate—typically 1/2-inch CDX plywood or 7/16-inch OSB. This decking, combined with the underlayment, shingles, and winter snow loads, adds roughly 4 to 5 pounds per square foot of dead and live load to the roof.
According to guidelines referenced by the Asphalt Roofing Manufacturers Association (ARMA), proper decking support is non-negotiable. If your coop is framed with lightweight 2x2 lumber or trusses spaced wider than 16 inches on center, the OSB will sag between the joists, causing the shingles to unseal, crack, and leak. You must frame a shingled coop roof with 2x4 trusses or rafters spaced at 16-inch or 24-inch intervals.
Deep Dive: Twin-Wall Polycarbonate Panels
Polycarbonate is the premier choice when you need to maximize natural light in the coop, which stimulates egg production during shorter winter days without relying entirely on artificial lighting. However, single-wall corrugated polycarbonate is entirely unsuitable—it sags, traps heat, and shatters under hail.
You must use twin-wall (or multi-wall) polycarbonate in an 8mm or 10mm thickness. The fluted internal structure provides an R-value of roughly 1.6 to 2.0, offering a degree of thermal insulation that single-wall plastics lack. Brands like Palram engineer these panels with a co-extruded UV-resistant layer.
The UV Installation Mistake
The most common installation error with polycarbonate is flipping the panel upside down. The UV-protective layer is only on one side, usually marked with a branded peel-off film. If installed upside down, the sun will yellow and embrittle the panel within 18 to 24 months, leading to catastrophic shattering during the first minor windstorm. Furthermore, the open flutes at the bottom edge must be sealed with breathable vent tape to allow condensation to drain while preventing wasps and spiders from nesting inside the hollow channels.
Critical Installation Details Most Guides Miss
Regardless of the chicken coop roof material you select, the detailing at the eaves and ridges determines the lifespan of the structure and the safety of the flock.
Overhangs and Predator Trenches
Never build a coop roof flush with the exterior walls. You need a minimum 12-inch overhang on all sides. This serves two vital purposes: it prevents rain from splashing back onto the siding (which rots wood and compromises wire mesh), and it forces water to drip away from the foundation, keeping the ground dry. Predators like foxes and dogs prefer to dig in soft, dry dirt right against the wall; a wet perimeter deters digging. For added security, install a 2-foot apron of 1/2-inch hardware cloth buried horizontally just below the drip line.
Ridge Ventilation vs. Drafts
Chickens need fresh air to expel ammonia and moisture, but they cannot tolerate direct drafts while roosting. A continuous ridge vent is the most biologically sound ventilation method. As warm, ammonia-laden air rises, it exits through the ridge cap. Ensure the ridge vent is baffled and covered with 1/4-inch or 1/2-inch hardware cloth to prevent snow blow-in and block entry by snakes, rats, and birds of prey. The Metal Construction Association provides excellent technical bulletins on integrating mesh-backed ridge vents with corrugated profiles.
Budget Breakdown for a Standard 8x10 Coop
Pricing below reflects early 2026 material averages for an 8x10 foot coop (80 sq ft of roof area, plus 12-inch overhangs bringing the total material footprint to approximately 110 sq ft).
| Material Choice | Roof Panels/Shingles | Substrate & Trim | Fasteners & Tape | Total Estimated Cost |
|---|---|---|---|---|
| 26-Ga Galvalume (w/ Fleece) | $220 | $65 (Purlins/Trim) | $35 | $320 |
| Architectural Shingles | $140 | $130 (OSB & Felt) | $25 (Nails/Drip Edge) | $295 |
| 8mm Twin-Wall Polycarbonate | $440 | $85 (Purlins) | $60 (Profiles & Tape) | $585 |
Materials to Strictly Avoid
When budget constraints are tight, many builders resort to shortcut materials that ultimately cost more in flock losses and replacement labor. Avoid these at all costs:
- Heavy-Duty Poly Tarps: UV radiation degrades the polyethylene weave within a single summer. More importantly, the wind-flap effect creates immense shear stress on the grommets, eventually tearing the tarp and leaving the flock exposed to aerial predators and rain. Raccoons can easily rip through multiple layers of tarp.
- Corrugated PVC Plastic: Unlike polycarbonate, standard corrugated PVC lacks impact modifiers. The plasticizers leach out under UV exposure, causing the panels to become brittle. By year two, a single golf-ball-sized hailstone will shatter the panel.
- Wood Shakes or Shingles: While aesthetically pleasing, wood shakes harbor red mites and poultry lice in their deep crevices. These parasites breed in the damp wood and migrate into the coop at night to feed on the chickens, causing severe anemia and decreased egg production.
- Standard Galvanized Steel (Non-Galvalume): The zinc coating on standard galvanized panels will react with the alkaline ammonia environment inside the coop, leading to white rust and premature panel failure, often within 5 to 7 years.
By matching your chicken coop roof material to your specific climate, framing capabilities, and flock size, you ensure a dry, draft-free, and predator-proof environment that maximizes the health and productivity of your birds.
Written by
David NakamuraDavid Nakamura is a licensed architect (AIA) and construction technology writer focused on sustainable building methods, mass timber engineering, and high-performance building envelopes. He holds a Master of Architecture from the University of Washington and is a certified Passive House Consultant (CPHC). David spent eight years at the Seattle firm Mithun, where he led the design of three LEED Platinum projects, before founding his own practice specializing in net-zero residential design. He serves on the editorial advisory board of GreenBuilder Magazine and has authored peer-reviewed papers on cross-laminated timber (CLT) connections for the Journal of Structural Engineering. In his spare time, David teaches woodworking at Pratt Fine Arts Center and kayaks the Puget Sound.
More from David Nakamura
View all
Construction Cost
Labor Cost to Build a Deck Per Sq Ft: 2026 Installation Guide
Discover the exact labor cost to build a deck per sq ft in 2026. This installation guide breaks down contractor rates, complexity factors, and hidden fees.
Aug 4, 2026

Construction Cost
How Much Does It Cost to Build a 3 Bedroom House? Financing Guide
Learn exactly how much it costs to build a 3 bedroom house and explore 2026 financing options, construction loan types, and budget frameworks for your build.
Aug 4, 2026

Construction Cost
Cost to Build a Tennis Court: 2026 Guide
How much does it cost to build a tennis court in 2026? Breakdowns for asphalt, concrete, and synthetic surfaces plus fencing and lighting.
Jul 30, 2026