How to Prep and Apply Elastomeric Roof Paint on Metal and Flat Roofs
Learn the exact preparation, priming, and application steps for elastomeric roof paint on metal and flat roofs to prevent peeling and maximize UV reflectivity.
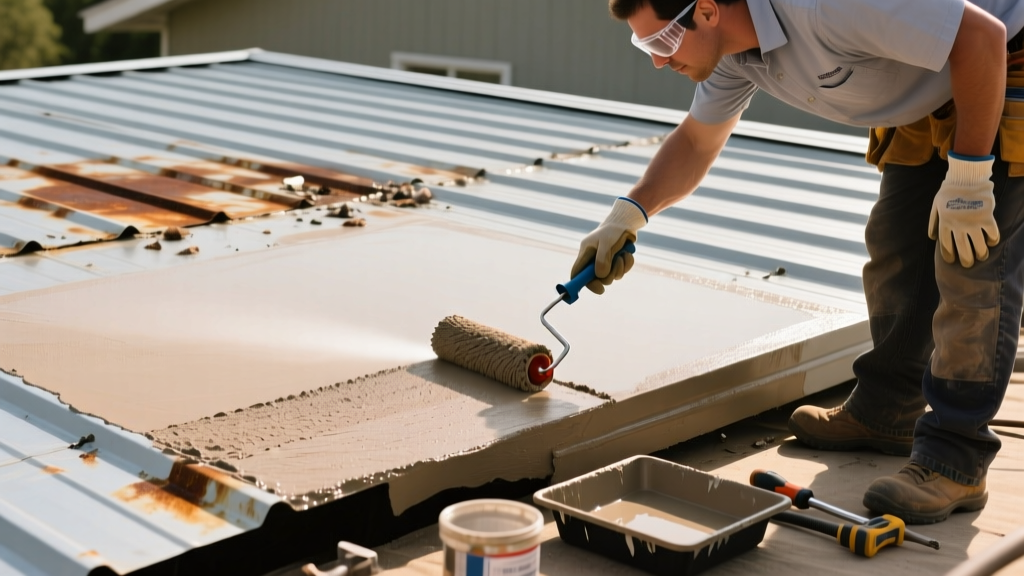
The Science of Roof Paint Adhesion: Why Prep Dictates Longevity
Applying elastomeric roof paint is not merely a cosmetic upgrade; it is a fluid-applied roofing system designed to extend the service life of an existing roof by 10 to 15 years. However, the leading cause of coating failure is not the paint itself, but inadequate substrate preparation. Elastomeric coatings—whether acrylic, silicone, or polyurethane—rely on mechanical and chemical adhesion. If the substrate contains chalk, oxidation, asphaltene bleed-through, or trapped moisture, the coating will delaminate under thermal expansion and contraction cycles.
According to the U.S. Environmental Protection Agency, highly reflective cool roof coatings can reduce peak cooling demand by 10-15%, but this thermal performance degrades rapidly if the coating blisters or peels due to poor application. This guide details the exact technical procedures for prepping, priming, and spraying roof paint on commercial flat roofs and residential metal panels.
Material Selection Matrix: Matching Paint to Substrate
Not all roof paints are interchangeable. Selecting the wrong chemistry for your specific substrate will result in immediate adhesion failure or chemical degradation. Use this matrix to select the correct system.
| Substrate Type | Recommended Coating Chemistry | Primer Required? | Top Product Examples (2026) |
|---|---|---|---|
| EPDM / TPO (Single-Ply) | 100% Silicone or Acrylic-Silicone Hybrid | Yes (Specific to membrane) | GacoRoof, Henry 885 Tropi-Cool |
| Modified Bitumen / BUR | Acrylic Elastomeric or Polyurethane | Yes (Bleed-blocking mandatory) | Henry 587 Dura-Brite, Karnak 99 |
| Galvanized / Painted Metal | 100% Acrylic Elastomeric | Yes (Rust-inhibitive / Etching) | GacoFlex, Kool Seal Elastomeric |
| Concrete / Masonry | Acrylic or Polyurethane | Yes (Alkali-resistant primer) | Sherwin-Williams ConFlex |
Phase 1: Surface Preparation and Moisture Testing
Before opening a single bucket of roof paint, the substrate must be cleaned to a 'bright and sound' condition. Skipping this step voids nearly all manufacturer warranties.
1. Infrared Moisture Scanning
Trapped moisture is the enemy of elastomeric coatings. Use a Tramex roof moisture meter or conduct an evening infrared thermography scan to identify wet insulation beneath the membrane. Any area retaining moisture must be cut out, dried, and patched with matching membrane material before coating. Applying roof paint over damp substrates guarantees blistering within the first summer heat cycle.
2. High-Pressure Washing
Use a commercial pressure washer equipped with a rotary surface cleaner. Maintain a pressure between 1,500 and 2,500 PSI. Pressures exceeding 3,000 PSI can scar single-ply membranes or force water into lap seams. For heavily oxidized metal or chalky single-ply roofs, integrate a roof-specific detergent like GacoWash or a Trisodium Phosphate (TSP) solution to break down surface chalk and biological growth. Rinse thoroughly until the water runs completely clear.
For metal and TPO roofs, perform a cross-hatch adhesion test after washing. Score a 1-inch grid into the substrate, apply high-adhesion tape, and rip it off. If more than 20% of the coating or chalk lifts, you must re-wash or apply a specialized penetrating primer to bind the chalk to the substrate.
Phase 2: Priming and Detail Reinforcement
Priming creates the chemical bridge between the substrate and the elastomeric topcoat. Detail work—addressing seams, penetrations, and fasteners—must be completed before the field coating is applied.
Addressing Asphalt Bleed-Through
When coating modified bitumen or built-up roofs (BUR), asphaltene oils will migrate through standard acrylic roof paints, causing severe yellowing and chemical breakdown. You must apply a bleed-blocking primer, such as GacoBleedTrap or Henry 295 Asphalt Emulsion, to the entire surface. Allow this primer to cure fully (usually 4-6 hours) before proceeding.
Seam and Fastener Reinforcement
Elastomeric paint alone does not have the tensile strength to bridge moving joints. All lap seams, HVAC curb flashings, and exposed fastener heads must be reinforced.
- Base Coat: Apply a 20-mil wet layer of high-solids elastomeric mastic (e.g., Henry 208R or GacoPatch) over the seam or fastener using a heavy-nap roller or trowel.
- Mesh Embedment: Immediately embed a 4-inch to 6-inch wide polyester reinforcing fabric (like Tietex T272) into the wet mastic. Smooth out all wrinkles with a dry roller.
- Capsule Coat: Apply a second layer of mastic directly over the fabric, ensuring the mesh is fully encapsulated and no white fibers are visible.
Phase 3: Application Techniques and Mil Thickness
Proper application of roof paint requires strict adherence to wet and dry mil thickness specifications. Applying the coating too thin compromises waterproofing and UV reflectivity; applying it too thick causes alligatoring and extended cure times.
Airless Sprayer Configuration
For commercial flat roofs and large residential metal roofs, an airless sprayer is mandatory for achieving uniform thickness. Brushing or rolling large areas results in uneven application and visible lap marks.
- Equipment: Use a gas-powered or heavy-duty electric airless sprayer (e.g., Graco GH 833 or Titan Impact 840) capable of sustaining 3,000 PSI at the tip.
- Tip Size: Select a reversible spray tip between .021 and .031 inches (e.g., a 521 or 625 tip). Elastomeric coatings are highly viscous and will clog smaller tips.
- Hose: Use a minimum 3/8-inch ID high-pressure fluid hose to prevent pressure drop over long distances.
Understanding Wet vs. Dry Mil Thickness
Most high-quality acrylic and silicone roof paints require a final dry film thickness (DFT) of 20 to 30 mils to achieve a Class A fire rating and full waterproofing capabilities. Because these paints contain 45% to 55% water or solvents by volume, you must apply them at roughly double the wet thickness.
Do not guess your application rate. Purchase a $10 stainless steel wet mil gauge. Drag the teeth of the gauge through the wet paint immediately after spraying. If the coating covers the '20' tooth but not the '30' tooth, you are applying at the correct 20-30 wet mil thickness. Check this every 500 square feet.
Apply the roof paint in two distinct, cross-hatched passes. Spray the first coat horizontally, allow it to become touch-dry (typically 2-4 hours depending on humidity), and spray the second coat vertically. This cross-hatching eliminates pinholes and ensures uniform coverage over textured substrates.
Common Application Failure Modes and Troubleshooting
Even experienced contractors encounter issues when environmental variables shift. Use this diagnostic matrix to identify and correct application failures in real-time.
| Failure Symptom | Root Cause | Corrective Action |
|---|---|---|
| Blistering / Bubbling | Trapped moisture in substrate or applying over a damp surface. | Slit blisters, allow to dry completely, patch with reinforced mastic, and recoat. |
| Alligatoring (Mud Cracking) | Applying the coating too thick in a single pass (exceeding 40 wet mils). | Scrape off uncured alligatored areas, re-prime, and apply two thinner, cross-hatched coats. |
| Pinholing | Spraying too far from the surface, causing the paint to dry before hitting the roof, or spraying over a porous substrate without a primer. | Maintain a 12-to-18-inch distance from the tip to the roof. Apply a thinned primer coat to fill pores before topcoating. |
| Yellowing / Staining | Asphaltene bleed-through from bitumen roofs lacking a bleed-blocking primer. | Apply a specialized stain-blocking primer (e.g., GacoBleedTrap) over the stained area, then re-topcoat. |
Curing, Weather Windows, and Maintenance
Elastomeric roof paints are highly sensitive to ambient conditions during the curing process. The U.S. Department of Energy notes that the solar reflectance of cool roofs is heavily dependent on the smooth, uninterrupted curing of the topcoat layer.
Strict Weather Parameters
- Temperature: Do not apply roof paint if the ambient temperature is below 50°F (10°C) and falling, or if the surface temperature exceeds 120°F (49°C). Ideal application occurs between 60°F and 85°F.
- Dew Point: Ensure the surface temperature is at least 5°F above the dew point to prevent invisible condensation from ruining adhesion.
- Rain Forecast: Acrylic elastomerics require a minimum of 4 to 6 hours of dry time to resist wash-off. Silicone coatings can resist wash-off in as little as 1 hour, making them preferable in regions with unpredictable afternoon thunderstorms.
Long-Term Maintenance
Once cured, the roof paint system requires minimal maintenance. Inspect the roof bi-annually, specifically checking penetrations and drains. If the roof accumulates dirt or biological growth, which lowers the solar reflectance index (SRI), clean it using a low-pressure wash and a mild, non-abrasive detergent. Avoid petroleum-based cleaners, which will dissolve acrylic and polyurethane coatings. With proper initial preparation and adherence to mil-thickness specifications, a professionally applied elastomeric roof paint system will reliably protect the substrate and reflect UV radiation for up to 15 years before a maintenance recoat is required.