Expert EPDM Roofing Installation: Adhered & Ballasted Methods
Master EPDM roofing installation with our technical guide. Learn fully adhered and ballasted methods, seam taping, and flashing details for flat roofs.
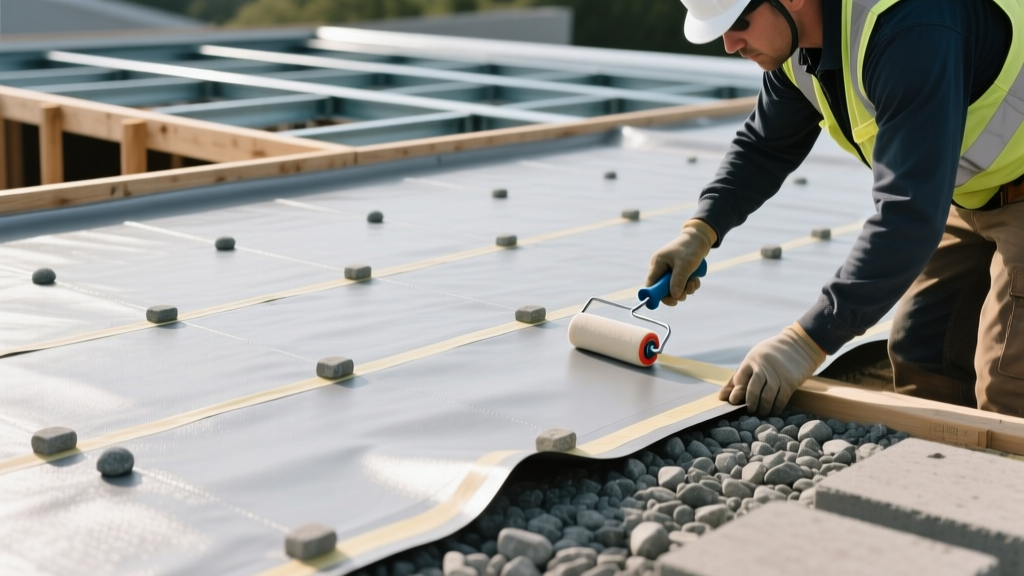
Pre-Installation Substrate Preparation
Successful EPDM roofing installation begins long before the membrane is unrolled. The substrate must be clean, dry, and structurally sound. For commercial flat roofs, the standard assembly involves a structural deck (steel, concrete, or wood), a vapor retarder (if required by climate zone), and rigid polyisocyanurate (polyiso) insulation. In 2026, best practices dictate using a High-Density (HD) polyiso cover board (typically 5/8-inch thick) directly beneath the EPDM membrane. This cover board provides crucial puncture resistance and a smooth surface for adhesive bonding.
Before laying insulation, sweep the deck completely. Any trapped debris will telegraph through the membrane and create stress points. Fasten the base polyiso layers according to the manufacturer's wind uplift specifications. For a standard 4x8-foot board in the roof field, this typically requires a minimum of 5 fasteners and plates, while perimeter and corner zones require 8 or more fasteners to resist higher uplift pressures. The HD cover board is then either mechanically fastened or adhered using a two-part polyurethane insulation adhesive.
Choosing the Attachment Method
EPDM roofing systems are categorized by how the membrane is secured to the substrate. The choice depends on deck type, wind load requirements, and budget. Below is a comparison of the three primary methods.
| Method | Best Application | 2026 Avg. Cost (Installed) | Wind Uplift Resistance |
|---|---|---|---|
| Fully Adhered | Concrete, wood, or HD cover boards; high-wind zones; aesthetic requirements. | $5.50 - $7.50 / sq ft | Excellent |
| Mechanically Attached | Steel decks; large open commercial buildings; budget-conscious projects. | $4.25 - $6.00 / sq ft | Good (Depends on fastener density) |
| Ballasted | Concrete decks; large flat areas with high parapets; minimal penetrations. | $3.75 - $5.25 / sq ft | Moderate (Relies on stone/paver weight) |
Fully Adhered EPDM Installation Procedure
The fully adhered method is the premium standard for EPDM roofing, offering superior wind uplift ratings and a smooth, wrinkle-free aesthetic. This procedure requires meticulous attention to adhesive flash-off times.
Step 1: Membrane Relaxation
Unroll the EPDM sheets (typically 10, 16, or 20 feet wide) and allow them to 'relax' for 30 to 45 minutes. EPDM is packaged under tension; failing to let it relax will result in wrinkles and fishmouths when the membrane contracts in cooler weather.
Step 2: Folding and Adhesive Application
Fold the membrane back on itself, exposing half of the substrate. Apply a uniform coat of bonding adhesive (such as Holcim Elevate Bonding Adhesive or Carlisle Sure-Weld) to both the substrate and the back of the membrane using a 3/4-inch nap roller. The application rate is generally 1.5 gallons per 100 square feet. Avoid puddling, which traps solvents.
Step 3: The Flash-Off Test
This is the most critical step. The adhesive must 'flash off' (evaporate solvents) before mating the surfaces. Perform the touch test: press your finger into the adhesive and pull away. It should feel tacky and string slightly, but no adhesive should transfer to your finger. If it transfers, it is too wet; if it feels dry and non-tacky, it has over-flashed and must be re-coated.
Step 4: Mating and Rolling
Carefully roll the membrane into the wet adhesive, using a broom to push out air pockets. Immediately follow with a 100-pound weighted roller, rolling in all directions to ensure intimate contact and squeeze out any trapped air. Overlap adjacent sheets by a minimum of 3 inches.
Seaming and Flashing Details
Because EPDM is a vulcanized rubber, it cannot be heat-welded like TPO or PVC. Seams are the most vulnerable part of an EPDM roof and rely on butyl tape and specialized primers. According to guidelines from the National Roofing Contractors Association (NRCA), improper seaming accounts for the vast majority of single-ply roof leaks.
- Clean the Seam Area: Wipe a 4-inch wide area along both sides of the overlap with a dedicated EPDM seam cleaner. Do not use mineral spirits or generic solvents, as they leave an oily residue that prevents tape adhesion.
- Apply Primer: Apply a uniform coat of primer (e.g., QuickPrime Plus) using a textured scrubber pad. Scrub vigorously until the primer turns a uniform grey/black color and no longer streaks. Allow it to flash off until it is dry to the touch.
- Apply Seam Tape: Peel the backing off a 3-inch or 6-inch butyl/EPDM seam tape and lay it directly over the overlap edge. Do not stretch the tape.
- Stitch Rolling: Use a 1.5-inch wide stitch roller to apply firm, continuous pressure (minimum 50 lbs of downward force) directly over the tape edge. This activates the butyl adhesive and creates a watertight vulcanized bond.
Termination and Penetration Flashing
Penetrations (pipes, HVAC curbs, drains) require specialized pre-molded EPDM flashings. For round pipes, use pre-molded pipe boots. After priming the membrane and the base of the boot, apply the boot over the pipe. The top of the boot must be secured with a stainless steel hose clamp and sealed with a lap sealant.
For larger penetrations or where water pooling is a risk, use a pourable sealer pocket. Install a reinforcement sheet around the penetration, create a dam, and fill the pocket with a two-part polyurethane pourable sealer. This creates a self-leveling, watertight seal that accommodates pipe vibration and thermal movement. At roof perimeters and parapet walls, terminate the membrane using a metal termination bar fastened every 8 inches, and seal the top edge with a continuous bead of polyurethane lap sealant.
Common Installation Failure Modes & Troubleshooting
Even experienced crews encounter issues. Recognizing and correcting these failure modes ensures the longevity of the EPDM roofing system.
- Fishmouths (Wrinkles in Seams): Caused by stretching the tape or failing to relax the membrane. Fix: Do not leave them. Slit the fishmouth with a utility knife, clean the area, re-prime, and apply a 6-inch patch of seam tape over the slit.
- Adhesive Blushing (Blisters): Caused by rolling the membrane before the adhesive has fully flashed off, trapping solvents that later expand in the sun. Fix: Puncture the blister, inject lap sealant, weigh it down until cured, and apply a patch.
- Membrane Shrinkage at Flashings: Unreinforced EPDM can shrink over time, pulling away from parapets. Fix: Always use reinforced EPDM (with a polyester scrim) for flashing details, and ensure the membrane is fully relaxed and not pulled taut when adhering to vertical surfaces.
Industry data from manufacturers like Holcim Elevate and Carlisle SynTec shows that a properly installed, fully adhered 60-mil EPDM roof can reliably exceed 30 years of service life, provided that seam integrity and flashing details are executed to manufacturer specifications.
Final Inspection and Handoff
Before demobilizing, conduct a comprehensive roof walk. Inspect every seam with a blunt-nosed seam probe; if the probe catches under the tape edge, the seam must be cleaned, primed, and patched. Verify that all pipe boots are clamped, all termination bars are sealed, and no tools or debris are left on the roof surface. Document all penetrations and seams with photographs for the building owner's maintenance file, ensuring the manufacturer's warranty requirements are fully satisfied.