Step-by-Step Ice and Water Roofing Material Installation Guide
Learn precise ice and water roofing material installation steps, including eave overlaps, valley sealing, and adhesion specs for a durable, leak-proof roof.

Understanding Ice and Water Roofing Material Specifications
Self-adhering polymer-modified bitumen membranes, universally referred to as ice and water roofing material, serve as the critical secondary water barrier in steep-slope roofing systems. Unlike traditional asphalt-saturated felt, these membranes feature a rubberized adhesive backing that bonds directly to the roof deck and self-seals around shingle fasteners. This self-sealing property is what prevents capillary action and wind-driven rain from infiltrating the decking during ice dam events or severe coastal storms.
Selecting the correct membrane thickness and surface texture is vital for long-term performance. Standard residential applications require a minimum thickness of 40 mils, while high-wind or severe ice-dam regions often mandate 60-mil reinforced variants.
| Product Line | Manufacturer | Thickness | Surface Type | Min. Application Temp |
|---|---|---|---|---|
| Grace Ice & Water Shield | GCP Applied Technologies | 40 mil | Granular / Film | 40°F (4°C) |
| WeatherWatch Leak Barrier | GAF | 45 mil | Granular | 40°F (4°C) |
| ProArmor Synthetic | Owens Corning | 50 mil | Film-Faced | 25°F (-4°C)* |
| WinterGuard HT | CertainTeed | 60 mil | Granular (High Temp) | 40°F (4°C) |
*Note: Film-faced synthetic barriers often utilize advanced acrylic or butyl adhesives allowing for colder application, but traditional bitumen requires strict temperature adherence.
Building Code Requirements and Deck Preparation
Before unrolling any material, the substrate must meet strict preparation standards. The International Residential Code (IRC) dictates precise coverage areas to ensure structural protection against ice dams.
IRC Section R905.2.7.1: In areas where there has been a history of ice forming along the eaves causing a backup of water, an ice barrier that consists of at least two layers of underlayment cemented together or of a self-adhering polymer-modified bitumen sheet shall be used in lieu of normal underlayment and extend from the lowest edges of all roof surfaces to a point at least 24 inches inside the exterior wall line of the building.
For proper adhesion, the OSB or plywood deck must be completely dry, free of sawdust, frost, and protruding nails. Sweep the deck thoroughly. Any existing damaged sheathing must be replaced, as the membrane will telegraph voids and fail to bridge gaps wider than 1/8 inch. According to the Asphalt Roofing Manufacturers Association (ARMA), moisture trapped beneath the membrane will vaporize under solar heat, causing blisters and breaking the adhesive bond.
Step-by-Step Installation Protocol
Phase 1: Eaves and Drip Edge Integration
The intersection of the eave, drip edge, and ice and water roofing material is the most common failure point in residential roofing. Current code and manufacturer specifications require a specific layering sequence:
- Install the Drip Edge First: Secure the metal drip edge directly to the roof deck at the eaves using 1.5-inch roofing nails spaced every 12 inches.
- Apply the Membrane: Roll the ice and water shield over the drip edge, allowing it to extend past the drip edge by exactly 1/4 to 3/8 inch. This ensures water shedding off the membrane drips directly into the gutter rather than wicking back under the metal.
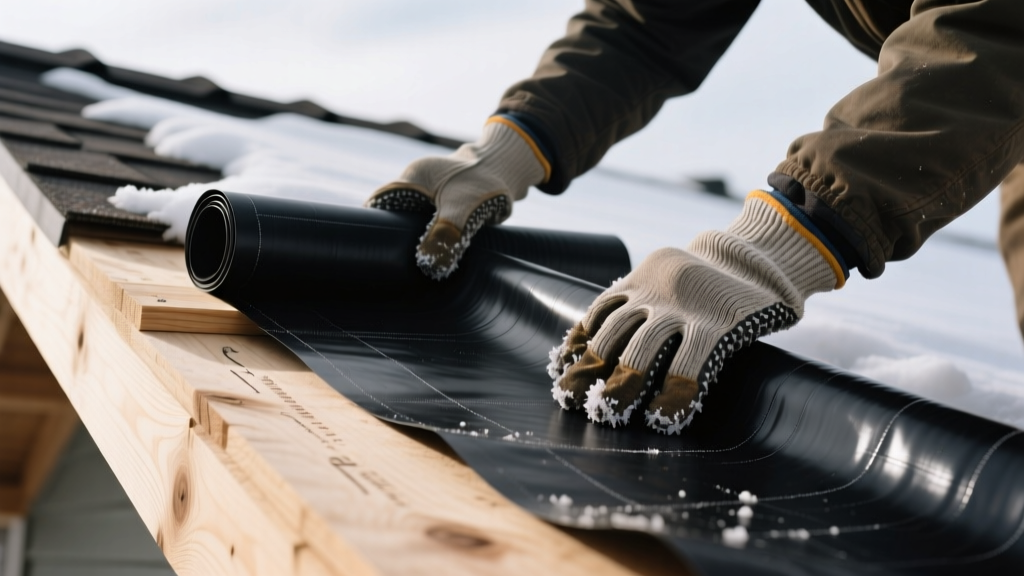
- Peel and Stick Technique: Never remove the entire release film at once. Score the release film down the center, fold the roll back, and peel the film while simultaneously pressing the membrane onto the deck. This prevents the aggressive adhesive from folding onto itself, which ruins the roll.
- Roll the Seams: Immediately after placement, run a 75-pound weighted seam roller over the entire surface, paying special attention to the 3.5-inch side laps and 6-inch end laps. You must see a slight bitumen squeeze-out at the overlaps to guarantee a watertight seal.
Phase 2: Valleys and Internal Angles
Roof valleys channel massive volumes of runoff and are highly susceptible to ice damming. Do not rely on a single sheet spanning the valley. Instead, use the woven or center-line method:
- Install a 36-inch wide strip of ice and water roofing material centered directly in the valley trough.
- Ensure the membrane extends at least 18 inches up both adjoining roof planes.
- Press the material deeply into the valley crease using a hand roller. Never stretch the membrane across the valley, as thermal contraction will pull it away from the centerline, creating a void where water can pool.
Phase 3: Penetrations and the "Bow-Tie" Method
Plumbing vents and HVAC penetrations require meticulous detailing. Cutting a simple slit and wrapping the membrane around a pipe leaves vulnerable gaps. Instead, utilize the bow-tie flashing technique:
- Cut a 12-inch square piece of ice and water shield.
- Cut an "X" in the center, stopping 1 inch short of the pipe diameter.
- Slide the membrane over the pipe and press it flat against the deck, forming four triangular flaps (the "bow-tie").
- Fold the flaps down and roll them flat. Follow this by applying a mastic-compatible pipe boot flashing over the membrane, securing it with a stainless-steel hose clamp.
Cold Weather Adhesion and Primer Requirements
Temperature dictates the chemical bonding process of polymer-modified bitumen. The National Roofing Contractors Association (NRCA) explicitly warns against installing self-adhering membranes on frozen substrates. When ambient or deck temperatures drop below 40°F (4°C), the adhesive becomes rigid and will not achieve the necessary microscopic penetration into the wood fibers.
Quality Assurance: Identifying and Fixing Common Failures
Even premium materials will fail if installation tolerances are ignored. Conduct a final visual inspection before the asphalt shingles are loaded onto the roof. Look for the following specific failure modes:
Fishmouths and Wrinkles
A "fishmouth" is a curved wrinkle that creates an open channel at the overlap. If a fishmouth is larger than 1/16 inch, water will track laterally beneath the shingles. The Fix: Do not attempt to caulk a fishmouth. Use a razor knife to slit the wrinkle flat, press it down, and apply a 4-inch patch of the same ice and water roofing material over the slit, sealing the edges with roofing mastic.
Poor End-Lap Adhesion
End laps (where two rolls meet horizontally) are prone to peeling if dust settled on the adhesive during the unrolling process. The Fix: Lift the unsealed end lap, clean both mating surfaces with a rag dampened with mineral spirits (allow to dry completely), and apply a 3-inch wide bead of manufacturer-approved lap cement before re-rolling with the 75-pound roller.
Fastener Backing Out
While the membrane self-seals around nails, it cannot seal around a nail that backs out due to wood expansion/contraction or improper driving depth. Ensure the roof deck is structurally sound and that no underlying truss movement is pushing nails upward. For detailed technical bulletins on underlayment integration, refer to the GCP Applied Technologies resource library, which provides comprehensive compatibility charts for various membrane and shingle pairings.
Proper installation of ice and water roofing material is not merely a code compliance exercise; it is the definitive safeguard against catastrophic interior water damage. By adhering to strict temperature thresholds, utilizing weighted rollers, and executing precise detailing at valleys and penetrations, roofing professionals ensure the system performs flawlessly under the most extreme winter conditions.
Written by
Priya KapoorPriya Kapoor is a real estate market analyst and construction economics researcher with expertise in housing affordability, development feasibility, and infrastructure investment. She holds a Master of Regional Planning from Cornell University and previously worked as a senior analyst at CBRE's Investment Properties group, where she modeled returns for $4B in mixed-use development pipelines. Priya now runs an independent research practice advising developers, municipalities, and REITs on construction cost forecasting and market timing. She publishes the quarterly "BuildMat Market Pulse" report tracking material price indices across 12 commodity categories. Based in Austin, TX, Priya serves on the board of Habitat for Humanity Austin and is a marathon runner.
More from Priya Kapoor
View all
Construction Cost
Cost to Build a 1600 Sq Ft Home in 2026: Full Breakdown
Accurate 2026 cost to build a 1600 sq ft home—material, labor, and regional pricing breakdowns included. Plan your budget with real-time estimates.
Aug 11, 2026

Wood & Lumber
Name the Types of Wood for Pressure Treatment and Preservation
Learn how to name the types of wood best suited for pressure treatment. Compare species treatability, chemical retention levels, and 2026 preservation costs.
Aug 4, 2026

Stone & Masonry
Stone Veneer Suppliers Lindenhurst: 2026 Cost Analysis
Analyze 2026 stone veneer costs in Lindenhurst, NY. Compare local supplier pricing, delivery fees, and Suffolk County installation labor rates.
Aug 4, 2026