How to Install Solid Deck Roof Materials: Framing to Shingles
Learn how to properly frame, deck, and install solid deck roof materials. Includes structural load specs, underlayment tips, and architectural shingle steps.

Selecting the Right Deck Roof Materials for Your Structure
Building a solid roof over an existing deck transforms a seasonal patio into a year-round living space. However, selecting and installing the correct deck roof materials requires navigating structural load limits, pitch requirements, and waterproofing challenges. Unlike standalone pergolas, a solid deck roof acts as an extension of your home's building envelope, meaning it must handle dead loads, live snow loads, and wind uplift while seamlessly shedding water away from your foundation.
Before purchasing lumber and fasteners, evaluate which primary roofing material aligns with your deck's structural capacity and the architectural style of your home.
| Deck Roof Material | Minimum Pitch | Weight (per sq ft) | Estimated 2026 Cost | Best Application |
|---|---|---|---|---|
| Architectural Asphalt Shingles | 2:12 (with peel-and-stick) | 2.5 - 3.5 lbs | $4.50 - $7.00 | Matching existing house roof; high wind zones |
| Standing Seam Metal | 1:4 (mechanical seam) | 1.0 - 1.5 lbs | $12.00 - $18.00 | Low-slope decks; heavy snow regions |
| Corrugated Polycarbonate | 1.5:12 | 0.5 - 0.8 lbs | $3.00 - $5.50 | Budget covers; light transmission needs |
| EPDM Rubber Membrane | 0.25:12 (Flat) | 1.5 - 2.0 lbs | $6.00 - $9.00 | Modern flat-roof deck extensions |
For this installation guide, we will focus on the most common and structurally demanding residential application: a framed shed-style deck roof finished with architectural asphalt shingles. This system requires precise integration with your home's existing ledger and siding.
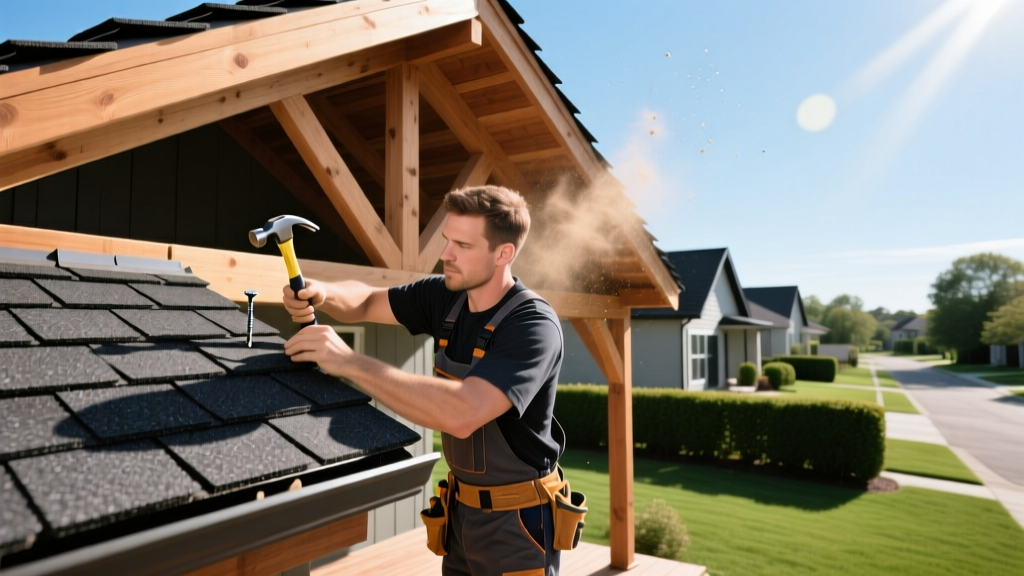
Phase 1: Ledger Board Attachment and Structural Framing
The most catastrophic failure point in any deck roof is the ledger board connection to the house. According to the American Wood Council's DCA-6 guidelines, a deck roof ledger must transfer both gravity loads and lateral wind loads directly into the home's floor joists or structural studs, never just into siding or brick veneer.
Step-by-Step Ledger Installation
- Remove Siding and Flashing: Strip the house siding to expose the sheathing and rim joist. Cut back the house wrap to integrate it later.
- Apply Peel-and-Stick Membrane: Apply a 9-inch wide strip of self-adhered flashing tape (e.g., Grace Vycor Plus) over the exposed sheathing and rim joist.
- Position and Fasten the Ledger: Use a pressure-treated 2x8 or 2x10 ledger board. Secure it using 1/2-inch hot-dipped galvanized lag screws. Space screws in a staggered pattern, 16 inches on center, ensuring they penetrate at least 1.5 inches into the solid house rim joist.
- Cap Flashing: Install Z-flashing over the top edge of the ledger, tucking the upper leg behind the existing house wrap to prevent water from migrating behind the ledger.
Framing the Rafters
For a standard 10-foot deep deck, use 2x6 or 2x8 rafters spaced 16 inches on center, depending on your local snow load requirements (typically 30 to 50 PSF in northern climates). Secure rafters to the ledger using structural joist hangers (e.g., Simpson Strong-Tie LUS series) fastened with 10d x 1.5-inch galvanized joist hanger nails. Never use screws in structural hangers unless explicitly rated by the manufacturer.
Phase 2: Sheathing and Underlayment Installation
Once the rafters are set and the ridge board or top plate is secured to the outer support beam, the deck roof requires a solid substrate. While 7/16-inch OSB is code-minimum in some areas, 5/8-inch CDX plywood is the professional standard for deck roofs due to its superior moisture resistance and nail-holding strength.
- Sheet Layout: Stagger plywood seams in a brick-lay pattern. Leave a 1/8-inch gap between sheets to allow for thermal expansion.
- Fastening: Secure sheathing with 8d galvanized ring-shank nails spaced 6 inches on center at the edges and 12 inches in the field. Ring-shank nails provide up to 40% more withdrawal resistance than smooth shank nails, critical for wind uplift.
- H-Clips: Install metal H-clips at the unsupported horizontal edges between rafters to prevent plywood sagging over time.
Underlayment and Ice & Water Shield
Because deck roofs often feature lower pitches than primary house roofs, they are more susceptible to ice damming and wind-driven rain. Apply a self-adhering ice and water shield over the bottom 3 feet of the roof deck, as well as in all valleys and where the deck roof meets the house wall. Overlap the remaining roof area with a high-quality synthetic underlayment (e.g., Tyvek Protec 120), overlapping horizontal seams by a minimum of 4 inches.
Phase 3: Flashing the Wall-to-Roof Transition
Water intrusion where the deck roof meets the house wall accounts for nearly 80% of all deck roof warranty claims. Proper step flashing and kick-out flashing are non-negotiable. The National Roofing Contractors Association (NRCA) mandates that flashing must be integrated with the wall's water-resistive barrier, not just caulked to the siding.
- Step Flashing: As you install the shingles (detailed in Phase 4), weave L-shaped step flashing pieces under the house wrap and over each successive shingle course. Never use a single continuous piece of L-flashing along the wall.
- Kick-Out Flashing: At the very bottom of the wall-to-roof intersection, install a specialized kick-out diverter. This small but critical piece of metal forces water shedding down the wall to divert outward into the gutter, rather than funneling directly behind the siding and rotting the wall sheathing.
- Counter Flashing: If tying into brick or stucco, cut a 1-inch deep reglet into the masonry and insert counter-flashing, sealing the joint with polyurethane masonry sealant.
Phase 4: Installing the Architectural Shingles
With the deck sealed and flashed, you can install the primary deck roof materials. Architectural (dimensional) shingles are preferred over 3-tab shingles for deck roofs due to their higher wind ratings and aesthetic depth.
Execution Sequence
- Drip Edge: Install aluminum drip edge along the eaves (under the underlayment) and along the rakes/gables (over the underlayment).
- Starter Course: Apply a dedicated adhesive starter strip along the eaves. Overhang the drip edge by exactly 1/4 to 3/8 of an inch. This seals the bottom edge against wind uplift.
- Field Shingles: Begin the first course of architectural shingles. Follow the manufacturer's specific exposure line (usually 5 5/8 inches). Critical: Use a 6-nail pattern per shingle instead of the standard 4-nail pattern. This upgrades the wind warranty from 110 MPH to 130 MPH, which is vital for open-backed deck structures that experience higher wind turbulence.
- Ridge Caps: Cut shingles into individual tabs or use pre-manufactured ridge caps. Bend them over the peak and fasten with 1.75-inch galvanized roofing nails, ensuring the nail penetrates through both the ridge cap and the top course of the opposing shingles.
2026 Material Cost Breakdown for a 200 Sq Ft Deck Roof
Budgeting for a solid deck roof requires accounting for both the structural framing and the finishing materials. Below is an estimated material-only cost breakdown for a 200-square-foot (2-square) shed-style roof addition in 2026.
| Material Category | Specific Components | Estimated Cost |
|---|---|---|
| Lumber & Framing | PT Ledger, 2x8 Rafters, 4x4 Posts, Beam | $850 - $1,100 |
| Hardware & Fasteners | Joist hangers, 1/2' lag screws, structural screws | $220 - $300 |
| Sheathing | 5/8' CDX Plywood (approx. 7 sheets) | $350 - $450 |
| Underlayment & Flashing | Ice & water shield, synthetic felt, step/kick-out flashing | $280 - $380 |
| Primary Roofing | Architectural shingles, starter strip, ridge caps, drip edge | $300 - $450 |
| Total Materials | Excluding labor, permits, and concrete footings | $2,000 - $2,680 |
Expert Troubleshooting: Avoiding Common Deck Roof Failures
Even with premium deck roof materials, poor execution leads to rapid degradation. Watch for these specific failure modes during your installation:
- Rafter Sagging at the Ledger: Often caused by using nails instead of structural screws or lag bolts for the joist hangers. Ensure every hole in the hanger is filled with the specified 10d joist hanger nail.
- Shingle Blistering: Deck roofs often lack the attic ventilation of a primary house roof. If the deck ceiling below is insulated and finished, you must create a ventilated air chute between the insulation and the roof sheathing, and install continuous ridge and soffit vents to prevent heat buildup that destroys shingles.
- Post Heave: If your outer support posts are set in concrete without proper drainage, frost heave will lift the outer edge of the deck roof, tearing the flashing at the house wall. Always use sonotubes poured below the local frost line, and slope the top of the concrete away from the post base.
Installing a solid deck roof is a high-stakes carpentry and roofing project. By adhering strictly to ledger load requirements, integrating kick-out flashing, and utilizing a 6-nail shingle pattern, your deck roof materials will perform flawlessly for decades, providing a watertight, structurally sound outdoor living space.
Written by
David NakamuraDavid Nakamura is a licensed architect (AIA) and construction technology writer focused on sustainable building methods, mass timber engineering, and high-performance building envelopes. He holds a Master of Architecture from the University of Washington and is a certified Passive House Consultant (CPHC). David spent eight years at the Seattle firm Mithun, where he led the design of three LEED Platinum projects, before founding his own practice specializing in net-zero residential design. He serves on the editorial advisory board of GreenBuilder Magazine and has authored peer-reviewed papers on cross-laminated timber (CLT) connections for the Journal of Structural Engineering. In his spare time, David teaches woodworking at Pratt Fine Arts Center and kayaks the Puget Sound.
More from David Nakamura
View all
Construction Cost
Labor Cost to Build a Deck Per Sq Ft: 2026 Installation Guide
Discover the exact labor cost to build a deck per sq ft in 2026. This installation guide breaks down contractor rates, complexity factors, and hidden fees.
Aug 4, 2026

Construction Cost
How Much Does It Cost to Build a 3 Bedroom House? Financing Guide
Learn exactly how much it costs to build a 3 bedroom house and explore 2026 financing options, construction loan types, and budget frameworks for your build.
Aug 4, 2026

Construction Cost
Cost to Build a Tennis Court: 2026 Guide
How much does it cost to build a tennis court in 2026? Breakdowns for asphalt, concrete, and synthetic surfaces plus fencing and lighting.
Jul 30, 2026