Installing Sam's Roofing Materials: Architectural Shingles
Master the installation of Sam's roofing materials with this step-by-step architectural shingle guide, covering deck prep, flashing, and nailing.

Pre-Installation: Roof Deck Verification and Prep
Before unrolling a single layer of underlayment, the structural integrity of the roof deck must be verified. When installing architectural shingles sourced from Sam's roofing materials, the manufacturer warranties strictly require a solid, continuous deck. For residential framing with trusses spaced 24 inches on center (o.c.), the International Residential Code (IRC) mandates a minimum thickness of 5/8-inch for both oriented strand board (OSB) and CDX plywood. If your existing deck features 1/2-inch sheathing or exhibits sagging between trusses, full replacement of the compromised sheets is mandatory.
Inspect all panel edges. For 24-inch o.c. spacing, H-clips must be installed on all unsupported horizontal edges to prevent edge deflection and subsequent shingle telegraphing. Replace any OSB panels showing signs of delamination, fungal decay, or water staining that has compromised the structural fibers. Fasten the new sheathing using 8d ring-shank nails spaced 6 inches on center at the edges and 12 inches on center in the field, adhering to the IRC Chapter 9 fastening schedules.
Drip Edge Sequencing: The Eaves vs. Rakes Rule
A frequent failure point in DIY and contractor installations is the misapplication of drip edge flashing. The IRC (Section R905.2.8.5) dictates a specific, asymmetrical installation sequence for drip edges to manage water flow correctly.
- Eaves (Horizontal Edges): Install the drip edge directly over the roof deck but under the synthetic underlayment. This ensures that any water migrating beneath the underlayment is caught by the metal and directed into the gutters.
- Rakes (Vertical/Gable Edges): Install the drip edge over the synthetic underlayment. This prevents wind-driven rain from being forced up and under the underlayment at the gable ends.
Overlap all drip edge joints by a minimum of 2 inches and secure them with 1.5-inch roofing nails spaced every 10 to 12 inches, staggered in a zig-zag pattern to prevent the metal from buckling under thermal expansion.
Underlayment and Ice & Water Shield Deployment
Modern synthetic underlayments, commonly stocked alongside Sam's roofing materials, offer superior tear resistance and slip protection compared to traditional #15 asphalt felt. Begin by applying a self-adhering polymer-modified bitumen membrane (ice and water shield) over the drip edge at the eaves. This membrane must extend from the edge of the eaves to at least 24 inches inside the exterior wall line of the building. In climates with heavy ice damming, extending this shield to 36 inches or covering the entire deck is highly recommended.
Roll out the synthetic underlayment horizontally, starting from the eave and working up to the ridge. Maintain a minimum 2-inch horizontal overlap and a 4-inch vertical end-lap. Do not use standard staples. Synthetic underlayment must be fastened using plastic-cap nails (minimum 1-inch diameter cap) to prevent the material from tearing under wind uplift before the shingles are applied. Fasten nails every 12 inches in the field and every 6 inches at the overlaps.
Valley Flashing: The Closed-Cut Method
Roof valleys channel the highest volume of water and require meticulous installation. While open-metal valleys are an option, the closed-cut valley method is the industry standard for architectural shingles due to its seamless aesthetic and reliable water shedding.
- Run a 36-inch wide strip of ice and water shield centered directly down the valley intersection.
- Install the field shingles on the lower-pitch roof plane first, allowing them to extend at least 12 inches past the valley centerline onto the adjoining roof plane.
- Install the shingles on the higher-pitch roof plane. Snap a chalk line 2 inches away from the valley centerline (on the side of the higher-pitch roof).
- Cut the shingles precisely along this chalk line. Apply a 3-inch wide continuous bead of asphalt roofing cement under the cut edge of every shingle to seal it to the layer below.
Warning: Valley Nailing Prohibition
Never drive a nail within 6 inches of the valley centerline. Nails in this zone will eventually back out due to thermal expansion and water will track directly into the deck. Rely on the adhesive strip and roofing cement to hold the valley intersections.
Starter Course and Architectural Shingle Alignment
Architectural (dimensional) shingles rely on a staggered joint pattern to create their shadow lines and prevent continuous water channels. Do not use standard 3-tab shingles as a starter course. Instead, use the manufacturer-specific starter roll or cut the tabs off the architectural shingles to create a flat starter strip.
Install the starter strip with a 1/4-inch to 3/8-inch overhang past the drip edge. For the first course of field shingles, begin at the bottom corner and work across. To achieve the proper 6-inch stair-step offset required by most architectural shingle manufacturers, cut 6 inches off the first shingle of the second course, 12 inches off the third course, and so on, until the pattern resets. This ensures that the vertical cutouts of the shingle tabs never align in consecutive courses, which would compromise wind resistance.
High-Wind Nailing Protocols and Placement
The most common cause of shingle blow-off is improper nail placement. According to the National Roofing Contractors Association (NRCA), nails must be driven flush with the shingle surface—never over-driven (which cuts the mat) or under-driven (which prevents the sealant strip from engaging).
| Parameter | Standard Zone (Up to 110 mph) | High-Wind Zone (110+ mph) |
|---|---|---|
| Nails per Shingle | 4 Nails | 6 Nails |
| Nail Type | 11-gauge, 3/8' head, 1' min length | 11-gauge, 3/8' head, 1.25' length |
| Placement Zone | 5/8' to 1' above sealant strip | 5/8' to 1' above sealant strip |
Pro Tip: The Sealant Strip Rule
Never drive a nail directly into or above the tar sealant strip. Nailing too high leaves the shingle vulnerable to tearing at the nail head during high winds. Nailing too low (into the sealant) prevents the adhesive from bonding the overlapping shingle, leading to immediate wind uplift failures.
Material Estimation and Waste Factor Matrix
When calculating the required volume of Sam's roofing materials, base measurements must be adjusted for roof pitch, complexity, and cutting waste. Architectural shingles are typically packaged in bundles, with three bundles covering one 'square' (100 square feet) of roof area. Use the matrix below to determine your final material order.
| Roof Complexity / Pitch | Base Waste Factor | Additional Valleys/Hips |
|---|---|---|
| Simple Gable (Under 6/12 pitch) | 5% - 7% | +1% per intersection |
| Standard Hip (6/12 to 9/12 pitch) | 8% - 10% | +2% per intersection |
| Complex/Steep (10/12+ pitch, dormers) | 12% - 15% | +3% per intersection |
Always order an extra bundle of shingles from the exact same manufacturing lot number to keep on-site for future ridge cap replacements or storm repairs, as dye lots vary significantly between production runs.
Ridge Cap Installation and Final Cleanup
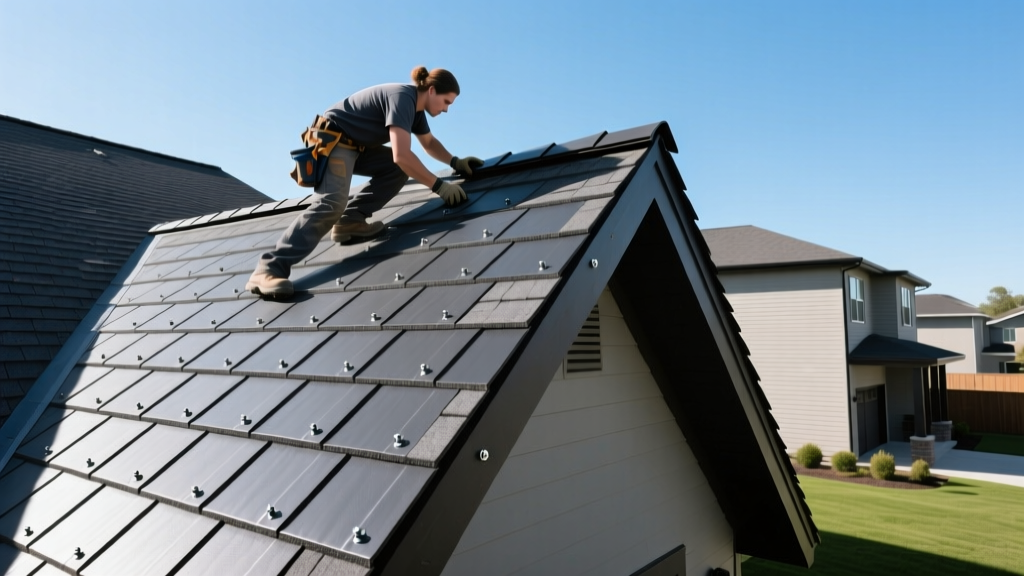
Ridge caps are created by cutting the top section of the architectural shingles (if using pre-cut ridge caps, follow the manufacturer's bending instructions). Bend each cap over the ridge and secure it with two nails, placed 5.5 inches from the exposed edge so they are completely covered by the overlapping shingle. The exposure for each ridge cap should not exceed 5 inches. Apply a small dab of roofing cement over the exposed nail heads of the final ridge cap at the end of the run.
Finally, adhere to OSHA fall protection and site safety standards during the entire process, and perform a thorough magnetic sweep of the perimeter, driveway, and landscaping to remove all stray roofing nails before considering the installation complete.
Written by
Priya KapoorPriya Kapoor is a real estate market analyst and construction economics researcher with expertise in housing affordability, development feasibility, and infrastructure investment. She holds a Master of Regional Planning from Cornell University and previously worked as a senior analyst at CBRE's Investment Properties group, where she modeled returns for $4B in mixed-use development pipelines. Priya now runs an independent research practice advising developers, municipalities, and REITs on construction cost forecasting and market timing. She publishes the quarterly "BuildMat Market Pulse" report tracking material price indices across 12 commodity categories. Based in Austin, TX, Priya serves on the board of Habitat for Humanity Austin and is a marathon runner.
More from Priya Kapoor
View all
Construction Cost
Cost to Build a 1600 Sq Ft Home in 2026: Full Breakdown
Accurate 2026 cost to build a 1600 sq ft home—material, labor, and regional pricing breakdowns included. Plan your budget with real-time estimates.
Aug 11, 2026

Wood & Lumber
Name the Types of Wood for Pressure Treatment and Preservation
Learn how to name the types of wood best suited for pressure treatment. Compare species treatability, chemical retention levels, and 2026 preservation costs.
Aug 4, 2026

Stone & Masonry
Stone Veneer Suppliers Lindenhurst: 2026 Cost Analysis
Analyze 2026 stone veneer costs in Lindenhurst, NY. Compare local supplier pricing, delivery fees, and Suffolk County installation labor rates.
Aug 4, 2026