How to Repair Scratches and Leaks in Metal Shingle Roofing Material
Learn expert techniques to repair scratches, fix leaks, and maintain metal shingle roofing material. Protect your investment with our maintenance guide.

Identifying the Root Causes of Metal Shingle Degradation
Metal shingle roofing material—encompassing stone-coated steel, stamped aluminum, and zinc alloys from manufacturers like Decra, Gerard, and Classic Metal Roofing—boasts a documented lifespan of 40 to 70 years. However, this longevity relies entirely on the integrity of the protective Galvalume (zinc-aluminum) or Galfan coatings and the factory-applied PVDF (polyvinylidene fluoride) paint systems. When these layers are compromised, the substrate becomes vulnerable to oxidation and structural fatigue.
According to technical bulletins from the Metal Construction Association, the three most common failure modes in metal shingle systems are thermal cycling fatigue, galvanic corrosion, and mechanical abrasion. Thermal expansion and contraction can cause fastener back-out if the initial installation lacked proper torque control. Meanwhile, galvanic corrosion occurs when dissimilar metals—such as copper valley flashing and steel shingles—make direct contact in the presence of an electrolyte (rainwater), rapidly eating through the steel substrate.
Never use copper or untreated steel flashing directly against aluminum or galvanized metal shingles. If you must integrate copper for architectural accents, you must install a 30-mil self-adhering rubberized asphalt membrane or a specialized dielectric separation tape between the two metals to prevent immediate electrolytic degradation.
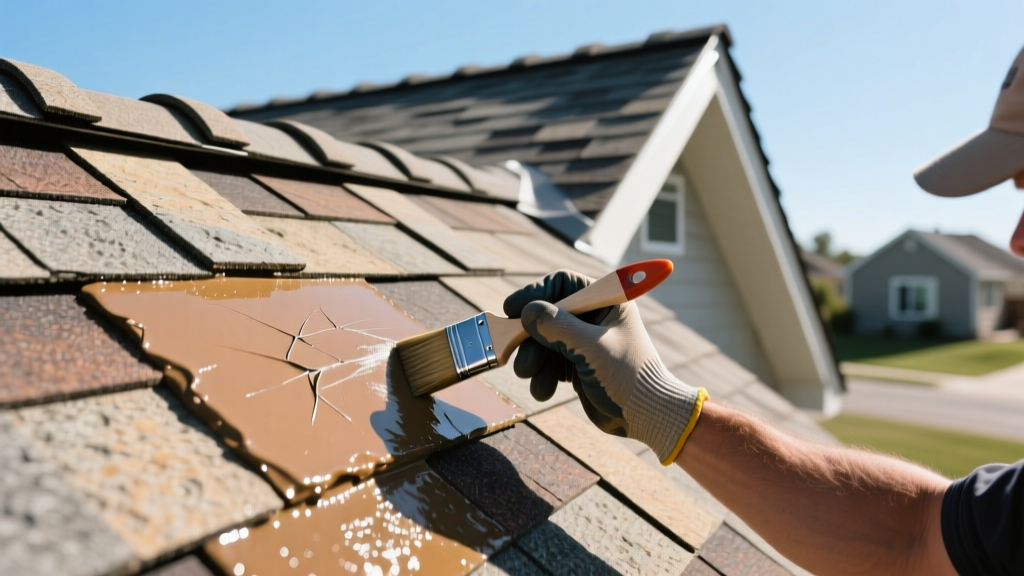
Precision Scratch and Coating Repair Protocol
Surface scratches on metal shingle roofing material are not merely cosmetic; they expose the bare metal substrate to moisture. Repairing these requires specific chemical compatibilities to ensure the patch does not chalk, fade, or peel under UV exposure.
Step 1: Surface Preparation
Do not use mineral spirits or standard paint thinners, as these leave a petroleum residue that prevents proper paint adhesion. Instead, clean the scratched area with 99% isopropyl alcohol and a lint-free microfiber cloth. If the scratch has already begun to oxidize (showing white or red rust), lightly abrade the area with a 400-grit Scotch-Brite pad until bare, shiny metal is visible, then wipe clean again.
Step 2: Selecting the Correct Touch-Up Paint
Standard acrylic or enamel touch-up paints will degrade within 24 months when exposed to direct sunlight. You must use a PVDF-based (Kynar 500® or Hylar 5000®) touch-up paint that exactly matches the manufacturer's color code. For stone-coated metal shingles, use a flat-finish PVDF paint to mimic the matte texture of the surrounding stone granules; using a gloss paint will create a highly visible reflective patch.
Step 3: Application Technique
Apply the paint using a fine-tipped artist brush (size 0 or 1), not a spray can or roller. Dab the paint directly into the scratch, keeping it strictly within the damaged boundary. Overspray on adjacent stone granules will alter their light-refraction properties, making the repair obvious from the ground. Allow the first coat to flash off for 15 minutes before applying a second micro-coat.
Fastener and Sealant Replacement Matrix
Leaks in metal shingle roofing material rarely originate from the shingle field; they almost always occur at the fastener penetrations. As of 2026, industry standards have shifted away from EPDM (neoprene) washers, which dry-rot and crack after 10 to 15 years of UV exposure, toward TPO (Thermoplastic Polyolefin) and specialized silicone seals.
If you are performing leak remediation, you must replace compromised fasteners with the correct specifications. The National Roofing Contractors Association recommends upgrading to larger-diameter screws to ensure a tight bite in the roof decking if the original screw hole has become stripped.
| Component | Legacy Material (Avoid) | 2026 Standard (Use) | Lifespan Expectancy |
|---|---|---|---|
| Fastener Washer | EPDM / Neoprene | TPO or High-Temp Silicone | 30+ Years |
| Fastener Shaft | Zinc-plated steel | 304 Stainless Steel or Ceramic-Coated | 50+ Years |
| Sealant (Flashing) | Asphalt roofing cement | Polyurethane (e.g., Sikaflex) or Tripolymer | 20-30 Years |
Expert Insight: When replacing a stripped fastener in a metal shingle system, step up the screw diameter by one gauge (e.g., from #9 to #10) and increase the length by 1/2 inch to penetrate fresh wood fibers in the roof deck. Never rely on caulking to seal a loose, stripped screw.
Reseating Lifted Shingle Tabs and Mechanical Interlocks
Unlike asphalt shingles that rely on adhesive tar strips, metal shingle roofing material utilizes mechanical interlocking lips and concealed clips to resist wind uplift. In regions prone to microbursts or sustained winds exceeding 90 mph, the weather edge (the bottom lip) of a shingle can lift and deform, breaking the interlock with the course below it.
- Assess the Deformation: If the interlocking lip is bent beyond a 45-degree angle, the metal has likely work-hardened and will snap if you attempt to bend it back. In this case, the shingle must be carefully unclipped and replaced.
- Re-crimping the Interlock: If the lip is only slightly lifted, use a specialized standing seam seaming tool or flat-jaw pliers fitted with rubber protective pads. Gently squeeze the interlocking lips of the upper and lower shingles back together.
- Applying Wind-Seal Adhesive: For added security in high-wind zones, inject a 1-inch bead of polyurethane roofing sealant under the weather edge before re-crimping. This provides a secondary chemical bond without restricting the metal's natural thermal expansion.
Mitigating Capillary Action in Roof Valleys
A highly specific, often misunderstood failure point in metal shingle systems is capillary draw in the valleys. When pine needles, roof grit, and organic debris accumulate in the metal valley flashing, they act as a sponge. During light rain or morning dew, surface tension pulls moisture upward against gravity, wicking water underneath the side-laps of the metal shingles.
To prevent this, valley maintenance requires more than just blowing off leaves. Install Department of Energy-recommended zinc or copper ion strips at the ridge. As rain washes over these strips, it deposits microscopic metallic ions down the valley, which inhibits the growth of algae, moss, and lichen that trap debris and accelerate capillary wicking. Furthermore, ensure the valley flashing maintains a minimum 6-inch open channel; if the metal shingles were cut too close to the valley centerline during installation, they must be trimmed back using aviation snips to restore proper water flow dynamics.
The Bi-Annual Maintenance Checklist
To maintain the warranty and structural integrity of your metal shingle roofing material, execute this targeted checklist every spring and late autumn:
- Fastener Torque Check: Inspect a randomized 10% sample of exposed fasteners (typically at ridge caps and rake edges). If the neoprene/TPO washer is not slightly compressed and bulging (the 'donut' effect), the screw has backed out and must be re-seated or replaced.
- Clear the Step Flashing: Remove all debris trapped between the metal shingles and chimney or wall step flashing. Accumulated moisture here causes hidden rot in the underlying wood decking.
- Inspect Sacrificial Anodes: If your roof features integrated zinc strips or sacrificial anodes to protect against galvanic corrosion, measure their thickness. If they have degraded by more than 50%, replace them immediately.
- Wash Protocol: If washing the roof to remove pollen or sap, never use a pressure washer exceeding 1,200 PSI. High-pressure streams will blast the stone granules off coated shingles and force water up through the side-laps. Use a low-pressure garden hose with a mild, non-ionic detergent.
Written by
James ThorntonJames Thornton is a construction industry veteran with 25 years of hands-on experience in wood framing, lumber grading, and residential building codes. He started as a framing carpenter in rural Oregon, earned his ICC Residential Building Inspector certification, and eventually became a senior plan reviewer for the City of Portland Bureau of Development Services. James holds a B.S. in Wood Science & Technology from Oregon State University and is a certified lumber grader through the West Coast Lumber Inspection Bureau (WCLIB). He has inspected over 3,000 residential construction sites and authored the city's internal guide on advanced framing techniques (2x6 at 24" O.C.). James lives in Bend, OR, where he builds custom timber-frame cabins and competes in lumberjack sports.
More from James Thornton
View all
Insulation
Best Home Insulation Materials: Complete 2026 Guide
Compare top home insulation materials for 2026. Find R-values, installed costs per square foot, and best uses for fiberglass, spray foam, and mineral wool.
Aug 4, 2026

Sustainable Building
Certify Your Green Building Material for LEED and WELL
Step-by-step guide to certifying a green building material for LEED v5 and WELL v2. Master EPDs, HPDs, and VOC limits for 2026 project specifications.
Aug 4, 2026

Stone & Masonry
Veneer Stacked Stone Panels: Interior Design & Style Showcase
Discover how veneer stacked stone panels transform interiors. Explore modern design profiles, material pairings, and technical installation specs.
Aug 4, 2026