Repairing Common Roof Types and Materials: A Maintenance Guide
Discover targeted repair and maintenance tactics for various roof types and materials, from asphalt shingles and metal panels to EPDM membranes and clay tiles.

Properly maintaining various roof types and materials requires distinct diagnostic approaches and specialized repair protocols. A fix that preserves an asphalt shingle system will actively destroy a low-slope TPO membrane. Understanding the specific failure modes, thermal expansion characteristics, and chemical compatibilities of your roofing system is the difference between a $200 targeted repair and a premature $25,000 full replacement. This guide breaks down the exact repair methodologies for the four most common residential and commercial roofing systems.
Asphalt Shingles: Addressing Wind Uplift and Granule Loss
Asphalt shingles dominate the residential market, but they are highly susceptible to thermal cracking and wind uplift. Architectural shingles (laminated) generally withstand higher wind loads—often rated up to 130 mph under ASTM D3161 Class F—compared to 3-tab shingles, which typically fail around 60 to 70 mph.
Diagnosing and Repairing Shingle Failures
When wind breaks the factory-applied adhesive seal strip, shingles become vulnerable to tearing. Do not use standard silicone caulk for resealing; it lacks the necessary asphaltic adhesion and UV resistance.
- Resealing Tabs: Lift the compromised shingle gently using a flat pry bar. Apply three 1-inch diameter dabs of rubberized asphalt roofing cement (such as Henry 208R Wet Patch or Karnak 19) directly to the roof deck beneath the shingle tab. Press down firmly and weight it with a brick for 24 hours if temperatures are below 70°F.
- Fixing Nail Pops: Thermal cycling often pushes roofing nails upward, breaking the seal and creating leak paths. Remove the popped nail, drive a new 1.25-inch galvanized ring-shank roofing nail exactly 1 inch to the left or right of the original hole, and cover the new nail head and the old hole with a quarter-sized dab of roofing cement. Smooth it with a putty knife and embed mineral granules scraped from a spare shingle into the wet cement for UV protection.
Metal Roofing Systems: Fastener Back-Out and Seam Separation
Metal roofs expand and contract significantly with temperature fluctuations. A 50-foot run of 24-gauge steel roofing can expand by nearly an inch over a 100-degree temperature swing. This thermal cycling is the primary enemy of exposed fastener metal roofs.
Managing Fastener Degradation
In exposed fastener systems, the constant thermal movement causes screws to back out, compressing and eventually degrading the neoprene or EPDM washers. According to InterNACHI's roofing inspection guidelines, fastener washers typically require maintenance or replacement every 10 to 15 years.
- Identify Leaking Fasteners: Look for rust streaking below the screw heads or visible gaps between the washer and the metal panel.
- Upsize the Screws: Never reuse the original hole. Remove the old #9 or #10 screw and replace it with a #12 x 1.5-inch stainless steel capped screw with a fresh EPDM washer. The larger thread diameter will bite into fresh metal.
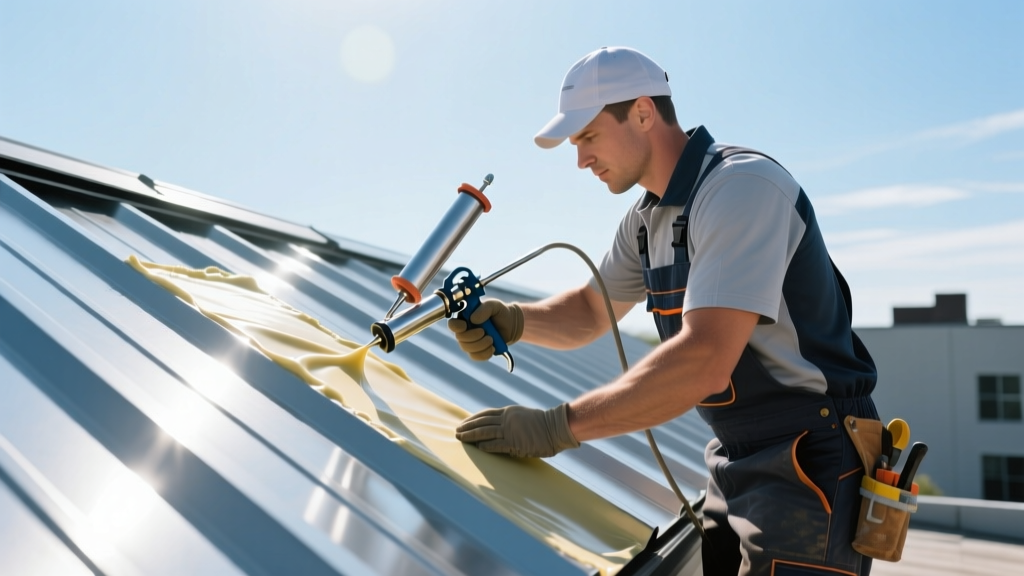
- Seam Separation: For standing seam roofs where the mechanical lock has separated due to ice damming or foot traffic, use a handheld mechanical seamer to re-crimp the joint. Apply a continuous bead of butyl tape sealant inside the seam before re-crimping.
Low-Slope Membranes (EPDM and TPO): Puncture and Seam Protocols
Flat and low-slope commercial roofs rely entirely on continuous membrane integrity. The repair chemistry for EPDM (a synthetic rubber) and TPO (a thermoplastic polyolefin) are completely incompatible. Using the wrong adhesive will result in immediate seam failure.
| Feature | EPDM (Rubber) | TPO (Thermoplastic) |
|---|---|---|
| Primary Repair Method | Peel-and-stick tape with liquid primer | Hot-air welding (minimum 800°F) |
| Required Primer | EPDM Primer (e.g., Firestone QuickPrime Plus) | None (Clean with TPO prep cleaner only) |
| Puncture Patch Size | Minimum 3 inches beyond damage on all sides | Minimum 2 inches beyond damage on all sides |
| Average Repair Cost | $4.00 - $6.00 per sq. ft. | $5.00 - $8.00 per sq. ft. |
For EPDM repairs, the surface must be scrubbed with a specialized EPDM cleaner to remove oxidation and talc before applying the primer. Once the primer is touch-dry (usually 15 to 30 minutes), apply the 6-inch wide uncured EPDM flashing tape, rolling it firmly with a 2-inch steel seam roller to ensure molecular bonding. For TPO, as noted in the Department of Energy's cool roof standards, maintaining the reflective white surface is critical for energy efficiency; ensure any TPO patches are painted with UV-reflective elastomeric coating if the patch material does not match the original albedo rating.
Concrete and Clay Tile: Barrel Cracks and Underlayment Failure
Tile roofs are exceptionally durable, often lasting 50 to 100 years. However, the tiles themselves are brittle, and the underlying felt or synthetic underlayment typically degrades after 25 to 30 years. Water infiltration in a tile roof is almost never caused by the tiles themselves, but by the underlayment beneath them.
Executing a Single Tile Replacement
Walking on a tile roof requires precise foot placement. Always step on the bottom third of the tile where it overlaps the tile below and is supported by the batten. Stepping on the unsupported middle or top will snap the tile instantly.
- Lift Surrounding Tiles: Use a specialized tile lifter or a flat bar wrapped in a cloth to gently lift the two tiles immediately above the broken one.
- Extract the Broken Tile: Slide the broken pieces out. If the tile is nailed, use a reciprocating saw with a metal-cutting blade to cut the nail flush with the deck.
- Install the Replacement: Slide the new S-tile or flat tile into place. Instead of nailing, which risks cracking the new tile, apply a generous bead of polyurethane roof tile adhesive (such as Polybond or DAP TileBond) to the top edge and the side lap of the new tile.
- Secure and Cure: Press the tile firmly into the adhesive and place a sandbag over it for 12 hours to allow the polyurethane to cure without shifting.
Decision Matrix: When to Repair vs. Full Replacement
Knowing when to stop patching and schedule a full tear-off saves capital in the long run. Use this threshold matrix to evaluate the viability of continued maintenance:
- Asphalt Shingles: If granule loss has exposed the black asphalt mat on more than 20% of the roof surface, or if multiple shingles exhibit deep thermal cracking (alligatoring), repairs are merely delaying inevitable interior water damage. Plan for replacement.
- Metal Roofing: If rust perforation (not just surface oxidation) is visible on more than 5% of the panels, or if the panel seams have stretched beyond their mechanical locking capacity due to repeated ice damming, localized repairs will fail. Panel replacement is required.
- Flat Membranes (EPDM/TPO): The industry standard '25% Rule' applies. If the cost of annual seam repairs and puncture patches exceeds 25% of the cost of a new roof overlay, or if moisture surveys reveal wet insulation across more than 25% of the roof deck, the membrane must be replaced. Wet insulation loses its R-value and will cause deck rot.
- Tile Roofs: If more than 10% of the tiles are cracked, or if the underlayment is over 30 years old and leaking, you must budget for a 'lift and relay'—removing the tiles, replacing the underlayment, and reinstalling the original tiles (supplemented with new matching tiles to replace breakage).
Written by
Sarah WhitfieldSarah Whitfield is a chartered quantity surveyor (MRICS) and construction cost analyst with 15 years of experience in material pricing, procurement strategy, and project budgeting. She earned her degree in Construction Management from the University of Reading (UK) and has worked on projects ranging from $2M custom homes to $180M mixed-use developments across North America and Europe. Sarah currently leads cost estimating for BuildMat Insight, maintaining a proprietary database of 4,000+ material price points updated quarterly. She is a frequent contributor to RSMeans cost data panels and has presented at the International Cost Engineering Council (ICEC) congress. Based in Denver, CO, Sarah is an avid trail runner and volunteer mentor for Women in Construction.
More from Sarah Whitfield
View all
Wood & Lumber
What Are the Different Types of Wood? A Builder's Guide
Compare structural softwoods, finish hardwoods, and engineered lumber. Analyze Janka ratings, MOE values, and 2026 pricing for construction.
Aug 4, 2026

Walls & Panels
Steel Framing vs Wood Framing: Corrosion and Moisture Defense
Compare steel framing vs wood framing for moisture resistance. Learn about galvanized coatings, condensation risks, and corrosion protection strategies.
Jul 21, 2026

Stone & Masonry
How to Cut Stone Veneer: Wet Saw vs Grinder Comparison
Compare the best tools for cutting stone veneer. We review wet saws, angle grinders, and chop saws to help you achieve clean, chip-free cuts.
Jul 21, 2026