How to Repair and Maintain EPDM Roofing Materials: Expert Guide
Learn how to inspect, repair, and maintain EPDM roofing materials. Discover exact adhesives, patching steps, and costs to extend your rubber roof's lifespan.

The Anatomy of EPDM Roof Failures
Ethylene Propylene Diene Monomer (EPDM) is a highly durable synthetic rubber membrane favored for low-slope commercial and residential roofs. However, when EPDM roofing materials fail, the leaks rarely originate from the center of the membrane. According to the Whole Building Design Guide (WBDG), over 85% of low-slope roof leaks occur at flashings, penetrations, and seams. Understanding the specific failure modes of EPDM is the first step toward effective repair.
Never use asphalt-based products, bitumen, or petroleum-distillate solvents on EPDM roofing materials. Petroleum causes the rubber to swell, absorb oils, and eventually degrade into a brittle, cracked state. Always use EPDM-specific splice washes and sealants.
Primary Failure Modes
- Membrane Shrinkage: Over 15-20 years, non-reinforced EPDM can shrink, pulling away from parapet walls and HVAC curbs, exposing the underlying substrate to water intrusion.
- Seam Delamination: Older EPDM systems relied on liquid contact adhesives that degrade under UV exposure and thermal cycling, causing lap seams to peel open.
- Puncture Vulnerabilities: Non-reinforced EPDM (typically 45-mil or 60-mil) is highly susceptible to punctures from dropped tools, hail, or unauthorized foot traffic.
Essential Tools and EPDM-Specific Repair Materials
Successful repairs require chemical compatibility and proper mechanical pressure. Below is a breakdown of the exact materials required for professional-grade EPDM maintenance in 2026, along with current market pricing.
| Material / Tool | Specific Application | Est. Cost (2026) |
|---|---|---|
| EPDM Splice Primer | Prepares membrane surface for tape adhesion | $35 - $50 / quart |
| 3" or 6" Splice Tape | Seaming horizontal membrane laps | $40 - $75 / roll |
| Uncured EPDM Flashing | Molding around pipes, corners, and HVAC curbs | $60 - $90 / roll |
| EPDM Lap Sealant | Edge-sealing tape perimeters and patch borders | $15 - $25 / tube |
| Silicone Seam Roller | Expelling air and ensuring tape-to-membrane bond | $20 - $35 |
Step-by-Step Seam and Puncture Repair Protocol
When addressing a split seam or a localized puncture in EPDM roofing materials, follow this exact sequence to ensure a watertight, long-lasting bond. This methodology aligns with manufacturer specifications from leading producers like Carlisle and Elevate.
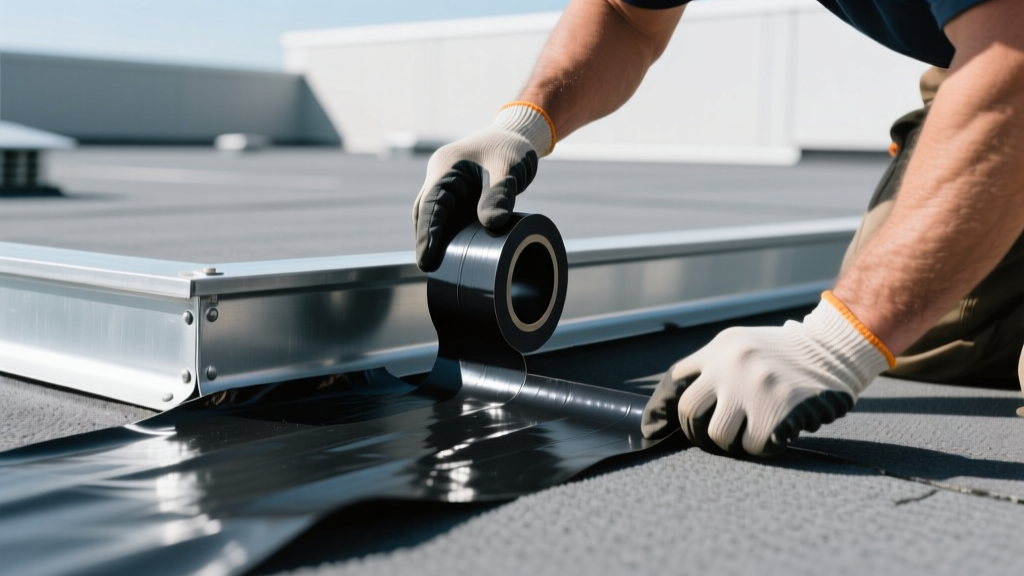
- Clean the Substrate: Scrub the repair area with a dedicated EPDM splice wash or a mild, non-petroleum degreaser. Remove all dirt, oxidation, and old sealant. The surface must be completely dry before proceeding.
- Apply Primer: Using a clean rag or a specialized primer applicator pad, apply a uniform coat of EPDM splice primer to both sides of the seam or the perimeter of the puncture. Expert Tip: Wait 30 to 45 minutes for the primer to flash off. It is ready when it feels tack-free and does not transfer to a clean, dry finger.
- Position the Tape or Patch: Peel the backing off the EPDM splice tape (for seams) or uncured flashing (for complex shapes). Center it over the defect. For punctures, ensure the patch extends at least 3 inches beyond the damage in all directions.
- Roll and Bond: Using a 2-inch wide silicone seam roller, apply firm, overlapping pressure across the entire patch. Roll from the center outward to expel trapped air pockets. Air bubbles left under the tape will expand in the heat and cause future delamination.
- Seal the Leading Edges: Apply a continuous 1/4-inch bead of EPDM-compatible lap sealant around the entire perimeter of the patch or tape. Tool the sealant with a putty knife to create a smooth, water-shedding transition.
Proactive Maintenance: The Bi-Annual Checklist
Relying solely on reactive repairs drastically shortens the lifespan of EPDM roofing materials. Implementing a bi-annual maintenance schedule (typically late spring and late fall) prevents minor defects from becoming catastrophic interior leaks.
Spring and Fall Inspection Points
- Drains and Scuppers: Clear all debris. Ponding water exceeding 48 hours accelerates UV degradation and adds immense structural dead-load to the roof deck.
- Pitch Pockets: Inspect the sealant in metal pitch pockets. If the pourable sealer is cracked or pulling away from the penetrations, dig it out and replace it with a high-quality polyurethane sealant.
- Walkway Pads: Verify that sacrificial walkway pads are correctly positioned along high-traffic routes (e.g., paths to HVAC units). Replace any pads that have shifted or worn through.
- Ballast Distribution (If applicable): For ballasted EPDM systems, ensure river-washed stone is evenly distributed and hasn't washed away from corners or drains, leaving the membrane exposed to wind uplift.
Industry Insight: According to technical bulletins from Mule-Hide Products, regular removal of biological growth (algae and moss) using a soft-bristle brush and a diluted, EPDM-safe cleaner prevents the retention of moisture that can degrade seam adhesives over time.
Liquid Coatings for Aging EPDM
When EPDM roofing materials reach the 20-year mark and exhibit widespread UV chalking or minor seam fatigue, a liquid-applied roof coating can extend the system's life by 10 to 15 years without the expense of a full tear-off. As of 2026, the two dominant coating technologies for EPDM are:
Silicone Coatings
Best for: Roofs with chronic ponding water.
Pros: Highly UV stable, does not chalk excessively, impervious to standing water.
Cons: Higher material cost ($3.50 - $5.50 per sq. ft.), can be slippery when wet, requires a specialized EPDM primer or bleed-tracker to prevent the black rubber oils from staining the white silicone.
Acrylic Coatings
Best for: Steep-slope or well-draining flat roofs.
Pros: Lower cost ($2.00 - $3.50 per sq. ft.), excellent initial reflectivity, easy water cleanup.
Cons: Will degrade and peel if subjected to ponding water for more than 48 hours. Requires a strict re-coat cycle every 5-7 years.
Patch vs. Replace: A Decision Framework
Determining whether to continue repairing EPDM roofing materials or to invest in a full replacement requires an objective assessment of the membrane's physical condition. Use the following matrix to guide your capital expenditure decisions.
| Condition Indicator | Action Required | Estimated Cost Impact |
|---|---|---|
| Isolated punctures or seam splits (< 10% of roof) | Patch & Maintain. Use splice tape and lap sealant. | $400 - $900 per professional service visit. |
| Widespread seam fatigue, minor shrinkage, UV chalking | Restore. Clean, prime, and apply a silicone or acrylic coating. | $2.50 - $5.50 per sq. ft. |
| Severe shrinkage pulling from edges, saturated insulation, >30% seam failure | Replace. Tear off and install new reinforced EPDM or TPO. | $8.00 - $14.00+ per sq. ft. |
Maintaining EPDM roofing materials is highly cost-effective when approached with the correct chemistry and systematic inspection routines. By avoiding incompatible asphalt products, utilizing proper primers and tapes, and adhering to a strict bi-annual maintenance schedule, facility managers and homeowners can reliably push the lifespan of an EPDM roof well past the 30-year mark.
Written by
Priya KapoorPriya Kapoor is a real estate market analyst and construction economics researcher with expertise in housing affordability, development feasibility, and infrastructure investment. She holds a Master of Regional Planning from Cornell University and previously worked as a senior analyst at CBRE's Investment Properties group, where she modeled returns for $4B in mixed-use development pipelines. Priya now runs an independent research practice advising developers, municipalities, and REITs on construction cost forecasting and market timing. She publishes the quarterly "BuildMat Market Pulse" report tracking material price indices across 12 commodity categories. Based in Austin, TX, Priya serves on the board of Habitat for Humanity Austin and is a marathon runner.
More from Priya Kapoor
View all
Construction Cost
Cost to Build a 1600 Sq Ft Home in 2026: Full Breakdown
Accurate 2026 cost to build a 1600 sq ft home—material, labor, and regional pricing breakdowns included. Plan your budget with real-time estimates.
Aug 11, 2026

Wood & Lumber
Name the Types of Wood for Pressure Treatment and Preservation
Learn how to name the types of wood best suited for pressure treatment. Compare species treatability, chemical retention levels, and 2026 preservation costs.
Aug 4, 2026

Stone & Masonry
Stone Veneer Suppliers Lindenhurst: 2026 Cost Analysis
Analyze 2026 stone veneer costs in Lindenhurst, NY. Compare local supplier pricing, delivery fees, and Suffolk County installation labor rates.
Aug 4, 2026