How to Repair and Maintain Synthetic Thatch Roof Materials
Learn expert techniques for repairing and maintaining synthetic thatch roof materials, including fixing wind damage, cleaning, and ridge cap replacement.

The Reality of Synthetic Thatch Degradation
While often marketed as a "maintenance-free" alternative to natural reed or palm, synthetic thatch roof materials—primarily manufactured from High-Density Polyethylene (HDPE) and Polyvinyl Chloride (PVC)—require specific, proactive maintenance to achieve their advertised 20- to 30-year lifespans. As of 2026, advanced HALS (Hindered Amine Light Stabilizer) packages have significantly improved UV resistance, but mechanical fatigue, fastener corrosion, and biological staining remain critical failure points. Understanding the exact degradation mechanisms of polymer-based thatch is the first step in executing effective repairs.
UV and Thermal Cycling Damage
HDPE shingles expand and contract with temperature fluctuations. In high-heat environments, thermal cycling can cause the nailing strip to warp or micro-crack around the fastener holes. While UV inhibitors prevent the material from turning brittle and snapping, prolonged exposure can still cause surface "chalking" (a powdery residue) and color fading, particularly in darker shades like cedar or rustic brown. When chalking becomes severe, the shingle's water-shedding capabilities diminish, requiring surface treatment or course replacement.
Wind Uplift and Fastener Fatigue
Unlike natural thatch, which tears under extreme wind load, synthetic thatch roof materials typically fail at the attachment points. If wind gets underneath the eaves, it creates a positive pressure zone that can pull the shingle's nailing strip through the fastener head. According to wind mitigation guidelines from the Federal Emergency Management Agency (FEMA), edge and corner zones of a roof experience the highest uplift forces, making these areas the most common sites for synthetic thatch detachment.
Step-by-Step Repair Guide for Synthetic Thatch Shingles
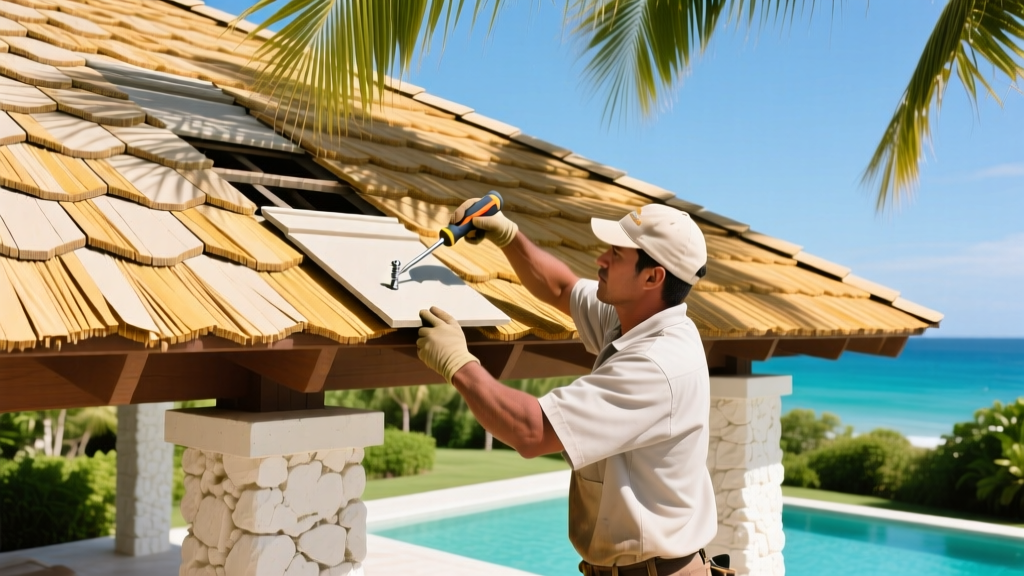
When individual shingles are cracked, warped, or torn by falling debris, they must be replaced without disturbing the surrounding weather-tight courses. Because synthetic thatch is installed in overlapping tiers (typically with a 5-inch to 7-inch exposure per course), accessing the fasteners requires careful maneuvering.
- Identify and Access the Damaged Course: Locate the damaged shingle. You will need to gently lift the overlapping shingle in the course directly above it. Use a flat, padded pry bar to avoid creasing or cracking the HDPE material of the upper course.
- Remove Compromised Fasteners: Extract the corroded or backed-out screws from the nailing strip of the damaged shingle. If the screw head is stripped, use a screw extractor bit to prevent damaging the roof decking underneath.
- Extract the Damaged Shingle: Slide the broken shingle out laterally. If it is wedged tightly, use tin snips to cut it into two pieces for easier removal without pulling on the adjacent shingles.
- Install the Replacement Shingle: Slide the new synthetic thatch shingle (ensure it is the exact same model, e.g., Palmex Aloha or Viro Java, to match the profile and color lot) into place. The top edge must slide completely under the overlapping course above.
- Secure with Proper Fasteners: Drive 1.5-inch Type 316 stainless steel ring-shank nails or self-drilling screws with neoprene washers through the designated nailing strip. Do not overdrive the fastener; the neoprene washer should be snug against the polymer strip without compressing or dimpling the plastic.
Ridge Cap and Eave Maintenance Protocols
The ridge cap is the most vulnerable component of any synthetic thatch system. Because it sits at the peak, it receives maximum UV exposure and is subjected to wind from multiple directions. Furthermore, the installation of ridge caps often involves exposed fasteners and overlapping bends that can separate over time.
Securing the Ridge Cap
Inspect the ridge cap bi-annually. If the overlapping segments have separated due to thermal expansion, do not attempt to seal them with standard silicone or polyurethane caulking. These adhesives do not bond effectively to HDPE or PVC. Instead, clean the joint with isopropyl alcohol and apply a high-quality butyl flashing tape, or use a specialized plastic-bonding adhesive like 3M Scotch-Weld DP8005. If the ridge cap is severely warped, it must be unfastened, heated gently with a heat gun to restore its factory bend, and re-secured with 2-inch stainless steel screws featuring oversized neoprene washers.
Eave Trimming and Pest Deterrence
Synthetic thatch eaves are typically cut on-site to create a natural, staggered look. Over time, these cut edges can fray or lift. Use heavy-duty shears to trim any lifted fibers. To prevent birds from nesting in the hollow channels of the synthetic shingles at the eave line, install a UV-stabilized polyethylene eave closure strip or a stainless steel bird comb beneath the first course during your annual maintenance check.
Cleaning and Biological Growth Management
Although synthetic thatch does not rot, its textured surface provides an ideal substrate for algae, moss, and lichen spores, particularly in shaded, humid environments. Biological growth retains moisture, which can lead to the degradation of the underlying roof decking and cause unsightly streaking. The EPA Safer Choice program recommends using environmentally benign cleaning agents that do not harm surrounding landscaping or waterways.
| Stain / Growth Type | Recommended Treatment | Application Method | Dwell Time |
|---|---|---|---|
| Algae & Moss | Sodium Percarbonate (Oxygen Bleach) | Pump Sprayer (Low Pressure) | 15-20 Minutes |
| Bird Droppings | Enzymatic Cleaner | Soft Bristle Brush | 10 Minutes |
| Hard Water / Mineral | White Vinegar (5% Acetic Acid) | Spray Bottle | 5-10 Minutes |
| General Dust / Dirt | Mild Dish Soap & Water | Garden Hose | Immediate Rinse |
If mechanical washing is necessary, never exceed 1,200 PSI. Use a 40-degree (white) nozzle tip and maintain a minimum distance of 18 inches from the shingle surface. High-pressure streams or narrow nozzle angles will permanently scar the HDPE surface, creating micro-grooves that trap dirt and accelerate future biological growth.
Long-Term Maintenance Cost Analysis (2026 Outlook)
When evaluating the total cost of ownership, facility managers and homeowners must compare the ongoing maintenance of synthetic thatch roof materials against traditional natural thatch. While the initial installation of synthetic thatch is highly competitive, the long-term maintenance delta is where the material proves its value. According to roofing lifecycle data published by the National Roofing Contractors Association (NRCA), polymer-based roofing systems significantly reduce the frequency of catastrophic interventions.
| Cost Metric (Per Sq. Ft.) | Synthetic Thatch (HDPE/PVC) | Natural Reed / Palm Thatch |
|---|---|---|
| Initial Installed Cost (2026) | $9.50 - $14.00 | $16.00 - $28.00 |
| Annual Maintenance / Cleaning | $0.10 - $0.20 | $0.80 - $1.50 |
| Ridge Cap Replacement Interval | 10 - 15 Years | 3 - 5 Years |
| Full Roof Replacement Interval | 20 - 30 Years | 8 - 12 Years |
| Fire Retardant Treatment | Not Required (Class A Rated) | Required Every 2-3 Years ($0.40/sq ft) |
Expert Sourcing and Material Matching
The most common mistake in synthetic thatch repair is attempting to mix shingle profiles or polymer blends. A Palmex shingle will not interlock correctly with a Viro or thatch.com shingle, leading to immediate water infiltration at the repair site. Furthermore, HDPE and PVC have different thermal expansion coefficients; mixing them on the same roof plane will cause buckling as the materials expand at different rates under solar loading.
Always source replacement materials using the exact lot number from the original installation if color matching is critical, as UV exposure will have altered the hue of the existing roof over time. If the original lot is unavailable, request a "weathered" sample from the manufacturer to match the current state of the roof, or plan to replace the entire affected roof plane to maintain a uniform aesthetic. Keep a minimum of 5% overage material in climate-controlled storage post-installation to ensure seamless future repairs.
Written by
Priya KapoorPriya Kapoor is a real estate market analyst and construction economics researcher with expertise in housing affordability, development feasibility, and infrastructure investment. She holds a Master of Regional Planning from Cornell University and previously worked as a senior analyst at CBRE's Investment Properties group, where she modeled returns for $4B in mixed-use development pipelines. Priya now runs an independent research practice advising developers, municipalities, and REITs on construction cost forecasting and market timing. She publishes the quarterly "BuildMat Market Pulse" report tracking material price indices across 12 commodity categories. Based in Austin, TX, Priya serves on the board of Habitat for Humanity Austin and is a marathon runner.
More from Priya Kapoor
View all
Construction Cost
Cost to Build a 1600 Sq Ft Home in 2026: Full Breakdown
Accurate 2026 cost to build a 1600 sq ft home—material, labor, and regional pricing breakdowns included. Plan your budget with real-time estimates.
Aug 11, 2026

Wood & Lumber
Name the Types of Wood for Pressure Treatment and Preservation
Learn how to name the types of wood best suited for pressure treatment. Compare species treatability, chemical retention levels, and 2026 preservation costs.
Aug 4, 2026

Stone & Masonry
Stone Veneer Suppliers Lindenhurst: 2026 Cost Analysis
Analyze 2026 stone veneer costs in Lindenhurst, NY. Compare local supplier pricing, delivery fees, and Suffolk County installation labor rates.
Aug 4, 2026