Repairing Different Types of Roofing Material: Maintenance Guide
Expert repair protocols for all types of roofing material. Learn failure modes, patching techniques, and cost data for asphalt, metal, and membrane roofs.

Roof longevity is dictated less by the initial installation and more by the precision of ongoing maintenance. Because every roofing system expands, contracts, and sheds water differently, a one-size-fits-all approach to repairs accelerates degradation. Understanding the specific mechanical and chemical vulnerabilities of your roof covering is the first step in preventing minor weathering from escalating into structural water intrusion.
This guide details the exact failure modes, diagnostic thresholds, and repair protocols for the most common types of roofing material used in residential and commercial applications.
Diagnostic Matrix: Failure Modes and Repair Economics
Before deploying a repair strategy, identify the primary vulnerability of your specific roof system. The table below outlines the most frequent failure points and the baseline economics for targeted interventions.
| Types of Roofing Material | Primary Failure Mode | Repair Complexity | Avg Repair Cost (per 100 sq ft) |
|---|---|---|---|
| Asphalt Shingles (Architectural) | Wind uplift and sealant strip failure | Low | $150 - $250 |
| Exposed Fastener Metal (Corrugated) | Neoprene washer degradation / screw back-out | Medium | $200 - $350 |
| Standing Seam Metal | Thermal binding at concealed clips | High | $400 - $600 |
| EPDM (Rubber Membrane) | Seam separation and UV shrinkage | Medium | $250 - $400 |
| TPO / PVC (Thermoplastic) | Membrane puncture and weld failure | High | $350 - $550 |
| Concrete / Clay Tile | Impact cracking and underlayment rot | Medium | $300 - $500 |
Asphalt Shingles: Sealant and Granule Interventions
Asphalt shingles rely on a factory-applied thermally activated sealant strip to resist wind uplift. When this strip fails, or when the mat loses its protective ceramic granules, the shingle becomes vulnerable to tearing and moisture infiltration.
Diagnosing Granule Loss Thresholds
Not all granule loss requires replacement. New shingles shed excess granules during the first year. However, if you find a buildup exceeding 1/2 inch deep across a 10-foot section of gutter, or if you can clearly see the black asphalt mat exposed on the roof surface, the shingles have reached the end of their functional lifespan. Spot repairs are ineffective at this stage; plan for a full overlay or tear-off.
Repairing Wind-Creased Shingles
If a high-wind event breaks the sealant strip but does not tear the shingle, you will see a distinct horizontal crease. To repair this without replacing the entire shingle:
- Carefully lift the damaged shingle and the overlapping shingle above it using a flat pry bar.
- Apply a 1-inch diameter dab of asphalt-based plastic cement (never use silicone or polyurethane caulk, which will not bond to the asphalt mat) directly under the broken sealant strip.
- Press the shingle down firmly and place a single brick on the tab for 24 hours to ensure adhesion while the cement cures.
Metal Roofing: Fastener and Thermal Movement Repairs
Metal roofing systems are exceptionally durable but are highly susceptible to thermal expansion and contraction. The repair approach depends entirely on whether the system uses exposed fasteners or a concealed clip design.
Exposed Fastener Panels (Corrugated / R-Panel)
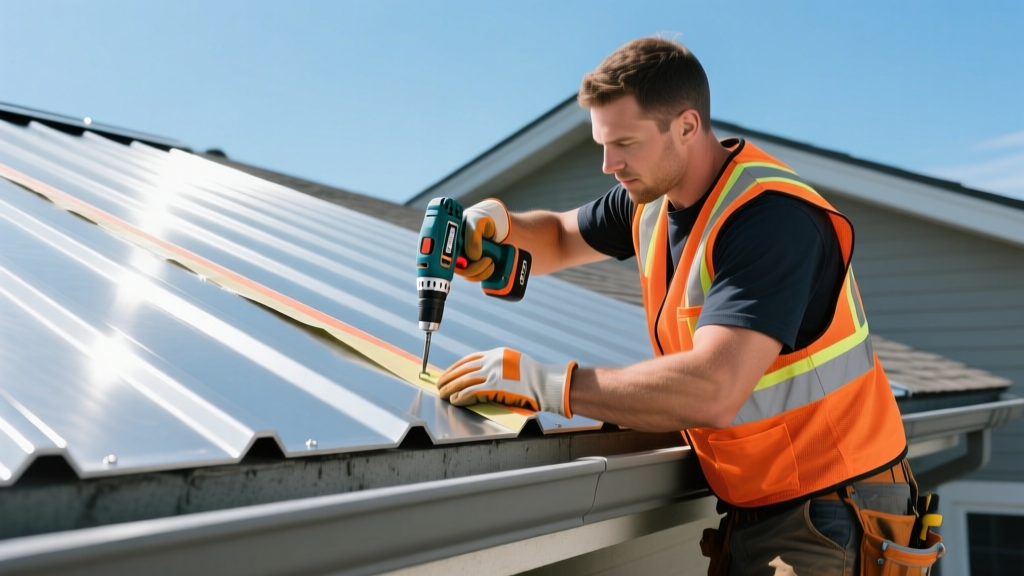
The most common failure point on exposed fastener metal roofs is the degradation of the neoprene washer on the roofing screws. UV exposure and ozone cause the rubber to dry rot and crack after 10 to 15 years, allowing water to track down the screw shaft into the decking.
The Repair Protocol: Do not simply apply caulk over the old screw heads. You must remove the compromised screws and replace them with new fasteners that are one gauge thicker and 1/4 inch longer to bite into fresh wood fibers. Use a torque-adjustable drill set to exactly 18 in-lbs. Over-driving the screw will immediately crush the new neoprene washer, defeating the purpose of the repair.
Standing Seam Systems
Standing seam roofs hide their fasteners within sliding clips to allow the metal panels to expand and contract. If a panel becomes 'bound' (unable to slide due to debris or an over-driven clip), the thermal stress will cause the panel to buckle or 'oil-can'. Repairing this requires unseaming the panel cap, freeing the clip, and re-seaming using a mechanical seamer tool—a job that requires specialized equipment and professional calibration.
Low-Slope Membranes: EPDM and TPO Patching
Flat and low-slope roofs utilize continuous membranes. Because water pools rather than sheds rapidly, any breach in the membrane or its seams leads to immediate decking saturation.
EPDM (Ethylene Propylene Diene Monomer)
EPDM seams are joined using primer and splice tape. Over time, these seams can peel back, creating a 'fishmouth' opening. To execute a permanent EPDM patch:
- Clean the area with a dedicated EPDM Splice Wash to remove oxidation and chalk. Allow it to flash off completely.
- Apply EPDM yellow primer using a lint-free scrub pad. Never use a brush, as brush strokes leave ridges that prevent the tape from making full contact.
- Wait until the primer is 'tacky' (it should not transfer to a clean knuckle when touched).
- Apply 3-inch uncured EPDM flashing tape over the seam, rolling it out with a silicone seam roller applying at least 40 lbs of pressure to activate the chemical bond.
Clay and Concrete Tile: Impact and Underlayment Care
Tile roofs are essentially a water-shedding shell over a secondary waterproofing barrier (the underlayment). The tiles themselves rarely leak; they crack from foot traffic or falling branches.
When replacing a broken concrete tile, never step on the headlap (the top overlapping portion) of the surrounding tiles, as this is their weakest structural point. Use a 5-in-1 tool or a specialized tile lifter to raise the overlapping tile. Slide the broken piece out, clean the track of any debris, and slide the replacement tile into place. Secure it using a bead of polyurethane roof tile adhesive at the nose, rather than mortar, which can crack under thermal stress and block the weep channels.
For comprehensive industry standards on tile installation and repair tolerances, refer to the guidelines published by the National Roofing Contractors Association (NRCA), which provides exhaustive technical manuals on underlayment integration and tile flashing details.
The 25% Rule: When to Abandon Repairs
Knowing when to stop repairing and start replacing is critical for capital planning. The roofing industry utilizes the '25% Rule' to determine economic viability. If more than 25% of your roof surface area requires patching, or if you are repairing a third isolated leak in the same general quadrant within a 12-month period, the underlying system has failed.
'Continuing to spot-repair a membrane or shingle system that has reached the end of its useful life results in compounding interior damage. The cost of drywall and insulation replacement will quickly eclipse the cost of a proactive roof replacement.' — Guidelines adapted from the Insurance Institute for Business & Home Safety (IBHS) FORTIFIED Home program.
Furthermore, the Asphalt Roofing Manufacturers Association (ARMA) emphasizes that applying new sealants over heavily oxidized, brittle asphalt shingles provides a false sense of security. The shingle mat will continue to degrade beneath the patch, leading to inevitable failure during the next freeze-thaw cycle.
Final Maintenance Directives
Establish a bi-annual inspection schedule (spring and late autumn). Focus your diagnostics on penetrations—pipes, vents, and chimneys—where 90% of all roof leaks originate regardless of the types of roofing material installed. Keep detailed logs of every repair, including the specific chemicals, fasteners, and membranes used, to ensure material compatibility during future interventions.
Written by
David NakamuraDavid Nakamura is a licensed architect (AIA) and construction technology writer focused on sustainable building methods, mass timber engineering, and high-performance building envelopes. He holds a Master of Architecture from the University of Washington and is a certified Passive House Consultant (CPHC). David spent eight years at the Seattle firm Mithun, where he led the design of three LEED Platinum projects, before founding his own practice specializing in net-zero residential design. He serves on the editorial advisory board of GreenBuilder Magazine and has authored peer-reviewed papers on cross-laminated timber (CLT) connections for the Journal of Structural Engineering. In his spare time, David teaches woodworking at Pratt Fine Arts Center and kayaks the Puget Sound.
More from David Nakamura
View all
Construction Cost
Labor Cost to Build a Deck Per Sq Ft: 2026 Installation Guide
Discover the exact labor cost to build a deck per sq ft in 2026. This installation guide breaks down contractor rates, complexity factors, and hidden fees.
Aug 4, 2026

Construction Cost
How Much Does It Cost to Build a 3 Bedroom House? Financing Guide
Learn exactly how much it costs to build a 3 bedroom house and explore 2026 financing options, construction loan types, and budget frameworks for your build.
Aug 4, 2026

Construction Cost
Cost to Build a Tennis Court: 2026 Guide
How much does it cost to build a tennis court in 2026? Breakdowns for asphalt, concrete, and synthetic surfaces plus fencing and lighting.
Jul 30, 2026