DIY Camper Roof Material Installation: EPDM and TPO Guide
Learn how to install EPDM and TPO camper roof material with this step-by-step DIY guide, covering prep, adhesive selection, and seam sealing.

Assessing Your RV Decking and Material Choice
Replacing a failing recreational vehicle roof is one of the most critical maintenance tasks an owner can undertake. The two dominant flexible membranes used in the industry are Ethylene Propylene Diene Monomer (EPDM) and Thermoplastic Polyolefin (TPO). While older rigs predominantly featured EPDM, TPO has surged in popularity due to its superior UV resistance, lack of chalking, and environmental profile. Before purchasing your new camper roof material, you must evaluate the structural integrity of your existing sub-roof decking.
Most travel trailers and fifth wheels utilize either 3/8-inch Oriented Strand Board (OSB) or Luan plywood as the decking substrate. Luan is notorious for delaminating when exposed to moisture. If your old roof leaked, probe the decking with a screwdriver. Any soft, spongy, or crumbling areas must be cut out and replaced with 3/8-inch exterior-grade CDX plywood or marine-grade plywood. Never install a new membrane over compromised decking, as the adhesive will fail to bond correctly, and the membrane will eventually sag or tear under wind load.
Camper Roof Material Comparison Matrix
| Material | Cost per Sq. Ft. | Expected Lifespan | Adhesive Compatibility | UV & Puncture Resistance |
|---|---|---|---|---|
| EPDM Rubber | $4.00 - $6.00 | 10 - 15 Years | Water-based or Solvent-based Contact Adhesive | Moderate UV; Prone to chalking and streaking |
| TPO Membrane | $5.00 - $8.00 | 15 - 20+ Years | TPO-specific adhesive or Double-sided Butyl Tape | Excellent UV; High puncture resistance; No chalking |
| PVC Membrane | $7.00 - $10.00 | 20+ Years | Solvent welding or PVC-specific adhesive | Superior chemical and UV resistance; Rigid in cold |
| Fiberglass (Gelcoat) | $12.00 - $18.00 | 20+ Years | N/A (Laminated with resin) | Highly durable; Prone to spider-cracking if flexed |
Tools and Materials Required for Membrane Installation
Professional results require specialized tools. Do not attempt to substitute a standard paint roller for a heavy seam roller; the adhesive activation pressure is non-negotiable.
- Membrane: EPDM or TPO RV roof membrane (typically sold in 8.5-foot or 9-foot widths to cover standard 8-foot wide campers with overhang).
- Adhesive: Alpha Systems 1010 (water-based for EPDM) or Carlisle Sure-Weld TPO bonding adhesive. Note: Never use EPDM adhesive on TPO.
- Sealants: Dicor 501LSW-1 (Self-Leveling Lap Sealant) for horizontal surfaces; Dicor 502LSW-1 (Non-Leveling) for vertical joints and sidewalls.
- Seam Roller: 75 lb. linoleum or RV-specific steel seam roller.
- Prep Solvents: Acetone or MEK (Methyl Ethyl Ketone) for cleaning the substrate and membrane backing.
- Cutting Tools: Heavy-duty utility knife with hook blades, reciprocating saw (for removing old drip rails).
- Fasteners: 1-inch stainless steel staples and a pneumatic or heavy-duty manual staple gun.
Step 1: Removing the Old Camper Roof Material
Begin by removing all roof penetrations, including the AC unit shroud, vent covers, antenna base, and solar panel mounts. Label every screw and bracket to ensure exact reinstallation. Next, remove the perimeter drip rail or trim molding. Use a reciprocating saw with a fine-tooth metal blade to carefully slice through the screws holding the aluminum trim, taking extreme care not to gouge the underlying wood decking.
Once the perimeter is clear, use a utility knife to slice the old membrane down the center longitudinally. Peel the material back from the center toward the edges. The old adhesive will likely leave a textured, hardened residue on the wood. You do not need to sand the wood perfectly smooth, but you must use a floor scraper to knock down any high spots, dried sealant globs, or loose wood splinters that could telegraph through and puncture the new membrane.
Step 2: Prepping and Repairing the Sub-Roof Decking
Clean the entire roof deck using a shop vac and a stiff bristle broom. If you are installing EPDM, the wood must be completely dry, as water-based adhesives will not cure over damp wood. If you are using a solvent-based adhesive or butyl tape, the surface must be wiped down with acetone to remove dust and oils.
If your existing OSB decking is structurally sound but heavily scarred, staple down a fresh layer of 1/8-inch Luan plywood over the entire roof. This provides a pristine, smooth surface for the adhesive to bond to, preventing the old wood grain from telegraphing through your new camper roof material.
Step 3: Applying the Adhesive and Rolling the Membrane
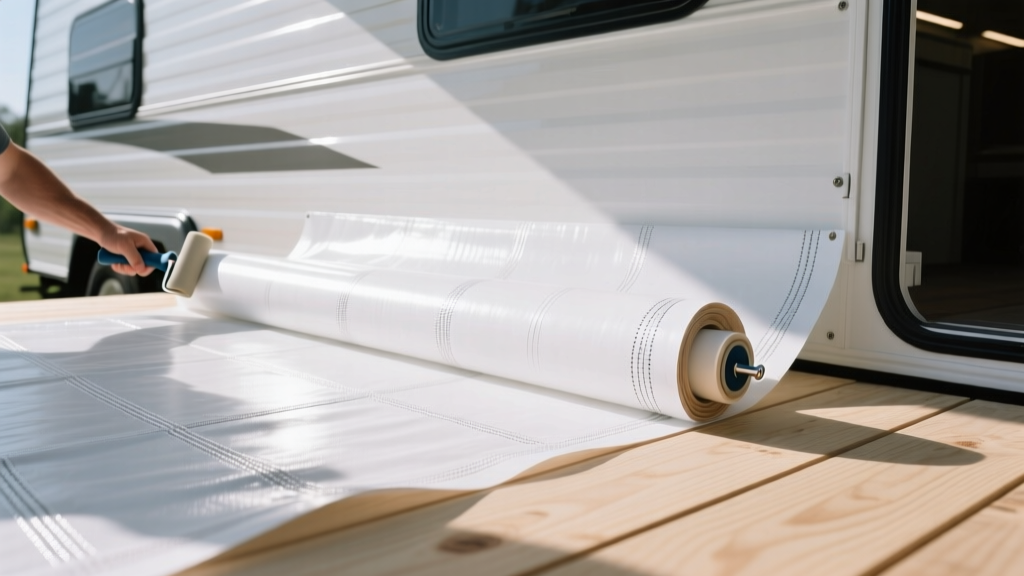
The most critical phase of the installation is the adhesive application. RV roofs are too large to apply adhesive all at once; the glue will skin over before you can lay the membrane. Professionals use the 'fold-in-half' method.
- Position the Membrane: With the help of an assistant, drape the new membrane over the roof. Ensure it is squared and hanging evenly over all four edges (at least 3 inches of overhang on the sides and front/back).
- Fold and Glue: Fold the top half of the membrane back onto itself, exposing the bottom half of the wood deck. Apply a thick, even coat of your chosen adhesive to the exposed wood using a 3/8-inch nap paint roller. Work in manageable 4-foot sections.
- Flash-Off Time: Allow the adhesive to flash off. For water-based adhesives like Alpha 1010, this takes 15 to 30 minutes depending on ambient temperature and humidity. The glue should feel tacky to the touch but should not transfer to your finger when pressed.
- Roll and Repeat: Carefully unroll the membrane over the tacky adhesive. Immediately follow behind with your 75 lb. seam roller, applying heavy, overlapping passes to squeeze out air pockets and activate the bond. Repeat the fold, glue, flash, and roll process for the top half of the roof.
TPO is a non-porous thermoplastic. Standard EPDM water-based contact adhesives will not chemically bond to the underside of a TPO membrane. If you choose TPO as your camper roof material, you must use a TPO-specific bonding adhesive (like Carlisle Sure-Weld) or high-strength double-sided butyl tape designed specifically for TPO RV applications.
Step 4: Seaming, Edge Trims, and Penetration Flashing
Once the main field of the membrane is adhered, address the perimeter and penetrations. Trim the excess overhang using a sharp hook blade, leaving exactly 1.5 inches of material to wrap over the edge of the sidewall.
Staple the membrane to the vertical sidewall every 2 inches using stainless steel staples. To seal the edges and prevent water intrusion, apply a continuous bead of Dicor 502LSW-1 Non-Leveling Lap Sealant over the staples and the membrane-to-sidewall transition. For horizontal seams, such as where the membrane meets the front or rear cap, use Dicor 501LSW-1 Self-Leveling sealant. The self-leveling formula will flow into microscopic gaps and cure into a smooth, waterproof dam.
Reinstall your roof penetrations. Bed the base of every vent, AC unit, and antenna in a generous layer of non-leveling sealant before screwing it down. Once screwed, tool a secondary bead of sealant around the perimeter of the flange, ensuring it overlaps the camper roof material by at least 1/2 inch.
Troubleshooting Common Installation Failures
Even meticulous DIYers can encounter issues during the curing process. Here is how to address the most common failure modes:
- Sub-Surface Bubbles: If you notice a bubble forming after the adhesive cures, do not ignore it. Temperature fluctuations will cause the trapped air to expand and contract, eventually tearing the membrane. Use a utility knife to slice an 'X' into the center of the bubble. Inject a small amount of liquid EPDM/TPO repair adhesive under the flaps using a syringe, press down firmly, and roll with your seam roller. Cover the slit with a patch of Eternabond tape.
- Edge Lift on Trim: If the membrane begins to pull away from the sidewall beneath the aluminum drip rail, it is usually due to insufficient stapling or adhesive failure caused by dust. Clean the lifting area with acetone, apply a layer of 4-inch wide Eternabond tape over the joint, and use a hand roller to burnish it aggressively. Eternabond features a micro-sealant butyl backing that creates a permanent, watertight bond.
- Premature Adhesive Skinning: If the adhesive dries before you can lay the membrane (common in high heat or low humidity), the bond will fail. You must re-coat the wood with a fresh, thin layer of adhesive and wait for the proper flash-off time before attempting to lay the membrane again.
Long-Term Maintenance and Environmental Impact
Maintaining your newly installed camper roof material requires bi-annual inspections and cleanings. Use a specialized RV roof cleaner (avoid harsh household degreasers or petroleum-based solvents, which will degrade EPDM and void TPO warranties). According to EPA Cool Roof Guidelines, maintaining the reflective white surface of a TPO membrane not only extends the material lifespan by reducing thermal expansion and contraction but also significantly lowers the interior cooling load of the camper during summer months. By following these precise installation protocols, your DIY camper roof replacement will provide decades of watertight reliability.
Written by
Elena RodriguezElena Rodriguez is a civil engineer and technical writer specializing in concrete technology, masonry systems, and ASTM/ACI compliance. She earned her B.S. in Civil Engineering from Texas A&M University and spent a decade at a materials testing laboratory, performing over 2,000 concrete compressive strength tests and masonry prism evaluations. Elena is an ACI-certified Field Testing Technician (Grade I) and a member of ASTM Committee C12 on Natural Building Stone. She currently consults on forensic engineering cases involving concrete failures and moisture intrusion. Based in San Antonio, TX, Elena is a proud member of the Society of Women Engineers (SWE) and coaches her daughter's FIRST Robotics team.
More from Elena Rodriguez
View all
Walls & Panels
Cost Analysis: Light Gauge Steel Framing Advantages and Disadvantages
Evaluate light gauge steel framing advantages and disadvantages through a strict cost analysis lens, comparing material, labor, and lifecycle expenses.
Aug 4, 2026

Walls & Panels
Gypsum Board Types: Exact Specifications, Thickness & Dimensions
Compare standard, Type X, and moisture-resistant gypsum board types. Get exact specifications, thicknesses, dimensions, and ASTM standards for your project.
Aug 4, 2026

Fire Resistance
Best Fire-Resistant Outdoor Decking Materials: 2026 Buyer Guide
Discover the best fire-resistant outdoor decking materials for 2026. Compare Class A PVC, aluminum, and hardwood options for WUI compliance and safety.
Aug 4, 2026