Repair and Maintenance for Different Types of Tile Roofing Material
Learn how to identify, maintain, and repair all types of tile roofing material, including clay, concrete, and slate, with expert cost and technique data.

Tile roofing systems are engineered for extreme longevity, often exceeding 50 to 100 years of service life. However, the tiles themselves are only the primary weather-shedding layer; the underlying deck, underlayment, and flashing require rigorous, material-specific maintenance. Understanding the distinct physical properties of various types of tile roofing material is critical for executing proper repairs, preventing catastrophic water intrusion, and maximizing the return on a premium roofing investment.
The Anatomy of Tile Roof Failures
Unlike asphalt shingles that degrade uniformly from UV exposure, tile roofs typically fail at specific stress points. The tiles themselves are highly resistant to UV and fire, but they are vulnerable to impact, thermal shock, and structural deflection. According to the National Roofing Contractors Association (NRCA), the most common causes of tile roof leaks are not broken tiles, but rather deteriorated underlayment, failed flashing at penetrations, and debris accumulation in the tile channels (valleys) that causes water to dam and back up under the tiles.
Furthermore, the weight of tile systems—ranging from 600 to over 1,000 pounds per square (100 sq. ft.)—means that roof deck deflection can crack tiles over time. Maintenance protocols must address both the visible tile layer and the hidden waterproofing components beneath.
Types of Tile Roofing Material: Specific Repair Protocols
Each tile material possesses unique structural characteristics, porosity levels, and failure modes. Repair techniques and replacement costs vary significantly across the three primary categories.
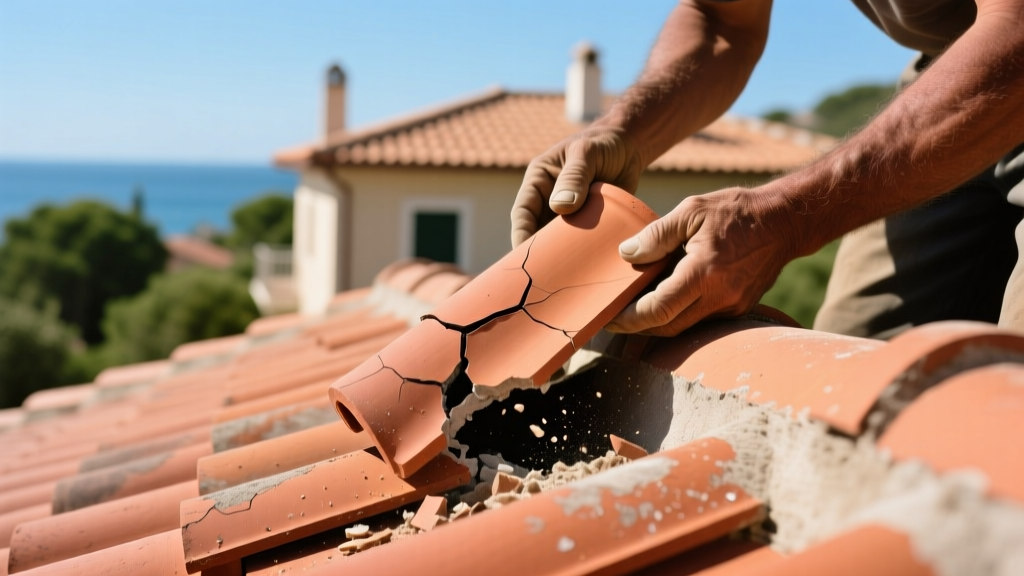
Clay Tiles (Terracotta and Barrel)
Governed by ASTM C1167 standards, clay tiles are fired at high temperatures, making them incredibly durable but highly brittle. They are common in Mediterranean, Spanish, and Mission-style architecture.
- Common Failure Mode: Impact cracking from hail or foot traffic, and spalling in freeze-thaw climates if the tile's water absorption rate exceeds 3%.
- Repair Protocol: Clay tiles cannot be reliably patched. Any cracked tile must be completely replaced. Minor surface crazing (hairline surface cracks) can be sealed with a clear, breathable silane-siloxane masonry sealer to prevent water ingress.
- Cost Data: Replacement clay tiles cost between $15 and $35 per piece, depending on the profile (e.g., flat, Roman, or barrel) and custom color matching.
Concrete Tiles
Manufactured under ASTM C1492 guidelines, concrete tiles are extruded or molded from a sand-cement-water mixture. They are heavier than clay and more porous.
- Common Failure Mode: Efflorescence (white, powdery salt deposits), moisture retention leading to freeze-thaw fracturing, and color fading due to the degradation of the acrylic or slurry coating.
- Repair Protocol: Broken concrete tiles are removed and replaced similarly to clay. However, concrete tiles often require re-sealing every 10 to 15 years with a penetrating siloxane water repellent to maintain their freeze-thaw resistance. Efflorescence should be dry-brushed; acid washing is strictly prohibited as it degrades the cementitious matrix.
- Cost Data: Concrete tiles are more economical, averaging $5 to $12 per replacement tile.
Slate Tiles (Natural and Synthetic)
Natural slate is a metamorphic rock split into thin sheets, while synthetic slate is typically a molded polymer-rubber composite. Natural slate is the premium tier of tile roofing.
- Common Failure Mode: For natural slate, delamination (flaking along the cleavage planes) and nail fatigue (the copper or stainless steel nails corroding or pulling through the slate) are primary issues. Synthetic slate may experience UV brittleness or thermal warping.
- Repair Protocol: Natural slate repairs require specialized tools. A broken slate is extracted using a slate ripper to cut the holding nails, and a new slate is slid into place and secured using a copper or stainless-steel slate hook, or by face-nailing and covering the nail head with a copper bib flashing.
- Cost Data: Natural slate replacement is highly specialized, costing $20 to $50+ per tile, heavily dependent on the quarry origin (e.g., Vermont vs. imported Chinese slate).
Walking directly on clay, concrete, or slate tiles will cause micro-fractures that lead to premature failure. The Tile Roofing Institute Alliance (TRIA) mandates that contractors use specialized foam roof pads, roof ladders, or walk only on the reinforced lower third of the tile (the headlap area) where the tile rests on the batten. Never step on the unsupported tail or the crown of a barrel tile.
Step-by-Step: Replacing a Broken Field Tile
When a localized impact damages a field tile, prompt replacement prevents underlayment degradation. Follow this precise extraction and installation sequence:
- Isolate the Damage: Identify the broken tile and the overlapping tiles directly above it. You will need to temporarily lift the overlapping tiles to access the broken piece.
- Lift the Overlappers: Insert wooden wedges or specialized tile-lifting wedges under the tiles in the course directly above the damaged tile to create clearance. Do not use excessive force, which will snap the overlapping tiles.
- Extract the Broken Tile: Slide a flat pry bar or a specialized tile removal tool under the broken tile. If it is mechanically fastened (nailed or clipped), use a reciprocating saw with a metal-cutting blade to carefully cut the fastener, or use a slate ripper to hook and pull the nail.
- Clear the Batten: Remove all debris, broken shards, and old sealant from the underlying batten and underlayment. Inspect the underlayment for punctures; if torn, patch it with a 6-inch square of self-adhering flashing membrane (e.g., Grace Ice & Water Shield).
- Install the New Tile: Slide the replacement tile into position. If the system relies on mechanical fastening, drill a pilot hole in the top lug and secure it with a 2-inch corrosion-resistant roofing nail or a stainless-steel tile clip.
- Seal and Set: Apply a bead of high-quality polyurethane roofing sealant (such as Geocel 2300 or Henry 208) to the underside of the overlapping tiles before removing the wooden wedges. This re-establishes the weather seal without rigidly locking the tiles together, preserving the roof's ability to flex under thermal expansion.
Underlayment and Flashing: The Hidden Maintenance Factors
A common misconception is that the tiles provide 100% of the waterproofing. In reality, tile roofs are "water-shedding" systems. The tiles deflect approximately 70% to 80% of rainwater, while the remaining 20% to 30% (driven by wind uplift or capillary action) is managed by the underlayment.
Historically, 30-pound asphalt-saturated organic felt was the standard underlayment, carrying a lifespan of 15 to 20 years. Modern synthetic underlayments (woven polypropylene) and self-adhered polymer-modified bitumen membranes extend this lifespan to 40 to 50 years. If a tile roof is leaking extensively and the tiles are intact, the underlayment has likely reached the end of its service life. Replacing underlayment requires a complete "lift and relay" of the entire tile roof, a labor-intensive process costing between $8.00 and $14.00 per square foot.
Material Comparison and Maintenance Matrix
| Tile Material | Avg. Repair Cost (Per Tile) | Primary Failure Mode | Expected Tile Lifespan | Maintenance Frequency |
|---|---|---|---|---|
| Clay (Barrel/Flat) | $15 - $35 | Impact cracking, spalling | 75 - 100+ Years | Bi-annual inspection |
| Concrete | $5 - $12 | Efflorescence, freeze-thaw | 50 - 75 Years | Re-seal every 10-15 yrs |
| Natural Slate | $20 - $50+ | Delamination, nail fatigue | 100 - 150+ Years | Annual flashing check |
| Synthetic Slate | $10 - $25 | UV degradation, warping | 40 - 60 Years | Bi-annual inspection |
Preventative Maintenance Framework
Proactive maintenance drastically reduces the need for emergency leak repairs. Implement this seasonal framework to preserve the integrity of your tile roof:
- Debris and Channel Clearing (Fall/Spring): Tile profiles create natural channels. Leaves, pine needles, and wind-blown dirt accumulate in these valleys, creating dams that force water uphill under the tiles. Use a leaf blower (never a high-pressure washer) to clear the vertical channels and horizontal headlaps.
- Biological Growth Treatment: Moss and algae retain moisture against porous concrete and clay tiles, accelerating freeze-thaw damage. Treat affected areas with a zinc sulfate or potassium salt-based moss killer. Never use pressure washing, as the high PSI will strip the protective surface layer of concrete tiles and force water beneath the underlayment.
- Flashing and Penetration Audits: 90% of tile roof leaks occur at penetrations (chimneys, plumbing vents, skylights). Inspect the lead or copper base flashings annually. Look for cracking in lead pipe jacks (common in areas with high temperature swings) and ensure counter-flashing is securely anchored into the masonry or siding.
- Attic Space Verification: Maintenance isn't limited to the exterior. Inspect the underside of the roof deck from the attic during heavy rain. Look for dark staining on the wood sheathing or active dripping, which indicates underlayment failure rather than simple tile breakage.
"A tile roof is a system, not just a surface. Homeowners who focus solely on replacing broken tiles while ignoring the 25-year lifecycle of the underlying synthetic underlayment are setting themselves up for catastrophic interior water damage." — Technical Guidelines, Tile Roofing Institute Alliance
By understanding the specific repair requirements and maintenance schedules for your exact type of tile roofing material, you can protect the structural integrity of your property and ensure the roof performs flawlessly for its maximum engineered lifespan.
Written by
David NakamuraDavid Nakamura is a licensed architect (AIA) and construction technology writer focused on sustainable building methods, mass timber engineering, and high-performance building envelopes. He holds a Master of Architecture from the University of Washington and is a certified Passive House Consultant (CPHC). David spent eight years at the Seattle firm Mithun, where he led the design of three LEED Platinum projects, before founding his own practice specializing in net-zero residential design. He serves on the editorial advisory board of GreenBuilder Magazine and has authored peer-reviewed papers on cross-laminated timber (CLT) connections for the Journal of Structural Engineering. In his spare time, David teaches woodworking at Pratt Fine Arts Center and kayaks the Puget Sound.
More from David Nakamura
View all
Construction Cost
Labor Cost to Build a Deck Per Sq Ft: 2026 Installation Guide
Discover the exact labor cost to build a deck per sq ft in 2026. This installation guide breaks down contractor rates, complexity factors, and hidden fees.
Aug 4, 2026

Construction Cost
How Much Does It Cost to Build a 3 Bedroom House? Financing Guide
Learn exactly how much it costs to build a 3 bedroom house and explore 2026 financing options, construction loan types, and budget frameworks for your build.
Aug 4, 2026

Construction Cost
Cost to Build a Tennis Court: 2026 Guide
How much does it cost to build a tennis court in 2026? Breakdowns for asphalt, concrete, and synthetic surfaces plus fencing and lighting.
Jul 30, 2026