How to Install Pergola Roofing Materials: A Complete Guide
Learn how to install pergola roofing materials like polycarbonate, metal, and louvered aluminum with exact measurements, framing tips, and fastener specs.

Structural Framing Prerequisites for Pergola Roofs
Before unboxing any pergola roofing materials, the underlying timber or aluminum frame must be engineered to handle both dead loads (the weight of the roof) and live loads (wind uplift, snow accumulation, and water pooling). A failure in the substructure will compromise even the most premium roofing panels.
Roof pitch is the most critical framing metric. Flat pergola roofs are a primary cause of material failure due to water ponding and debris accumulation. According to structural guidelines outlined by Fine Homebuilding, a minimum slope is mandatory for water shedding:
- Corrugated Metal: 3:12 pitch minimum (or 1:4 with specialized lap sealant).
- Multiwall Polycarbonate: 1.5:12 pitch minimum to prevent capillary action in the flutes.
- Louvered Aluminum: Built-in pitch is engineered into the extrusions, but the supporting frame must be perfectly level to ensure the internal gutter system drains correctly.
Installation Protocols by Material Type
Different pergola roofing materials require distinct fastening techniques, overlap measurements, and thermal management strategies. Below are the exact installation protocols for the three most common rigid pergola roofing systems.
1. Multiwall Polycarbonate Panels
Multiwall polycarbonate (such as Palram's Suntuf or Tuffak lines) is favored for its high impact resistance and light diffusion. However, it expands and contracts significantly with temperature fluctuations. If fastened rigidly without expansion allowances, the panels will buckle and tear.
- Prepare the Edges: Seal the top edge of each panel with solid aluminum tape to prevent moisture ingress. Seal the bottom edge with breathable vent tape to allow condensation to escape while blocking insects.
- Install Closure Strips: Adhere foam closure strips to the purlins. This provides a continuous bearing surface and prevents the panels from vibrating in high winds.
- Pre-Drill Oversized Holes: Never drive screws directly through polycarbonate without pre-drilling. Drill holes 1/8-inch larger than the screw shaft diameter to allow for thermal expansion. Polycarbonate expands at a rate of approximately 1/8-inch per 3 feet of panel length for every 30°F temperature change.
- Fasten with Profiles: Use aluminum H-profiles to join panels side-by-side. Fasten through the profiles and panels into the purlins using #10 x 1-inch stainless steel screws with EPDM washers. Tighten until the washer just makes contact; do not compress the polycarbonate.
2. Corrugated Metal Sheeting (Steel and Aluminum)
Corrugated metal offers superior longevity and a modern industrial aesthetic. The primary installation challenge is managing the side-laps and end-laps to prevent wind-driven rain infiltration.
- Determine Overlap: Side laps must cover a minimum of 1.5 corrugations (ribs). End laps must be at least 6 inches, with a continuous bead of butyl tape sealant applied between the overlapping sheets before fastening.
- Crest vs. Valley Fastening: For roof applications, always fasten screws on the crest (the high rib) of the corrugation, never in the valley. Water runs through the valleys; piercing the valley guarantees a leak. (Note: Wall applications use valley fastening, but pergola roofs require crest fastening).
- Screw Placement: Use 1.5-inch self-drilling metal screws with neoprene washers. Place screws in every other rib at the eaves and ridges, and in every third rib along the intermediate purlins.
- Cut Management: Cut metal panels using electric shears or a nibbler. Avoid abrasive cutting wheels, as the heat destroys the galvanized coating and voids the manufacturer's warranty on the cut edge.
3. Motorized Louvered Aluminum Systems
Extruded aluminum louvered roofs (like those from StruXure or Azek) represent the premium tier of pergola roofing. These are not simply panels laid over rafters; they are integrated mechanical systems with hidden gutters and pivot mechanisms.
- Post and Beam Alignment: The supporting posts must be perfectly plumb, and the beams perfectly level. A deviation of just 1/4-inch over a 12-foot span will cause the louver blades to bind in their tracks and burn out the actuator motors.
- Track and Pivot Installation: Mount the pivot tracks to the primary beams using the provided structural lag bolts. Do not substitute the hardware; the sheer load on the pivots during high wind events requires the exact tensile strength of the OEM fasteners.
- Gutter and Downspout Integration: Louvered systems capture water in a hidden perimeter gutter. Connect the internal downspouts (minimum 2x3 inch rectangular PVC or aluminum) to the corner posts. Ensure the downspout exits at the base of the post with a 45-degree elbow directing water away from the pergola's concrete footings.
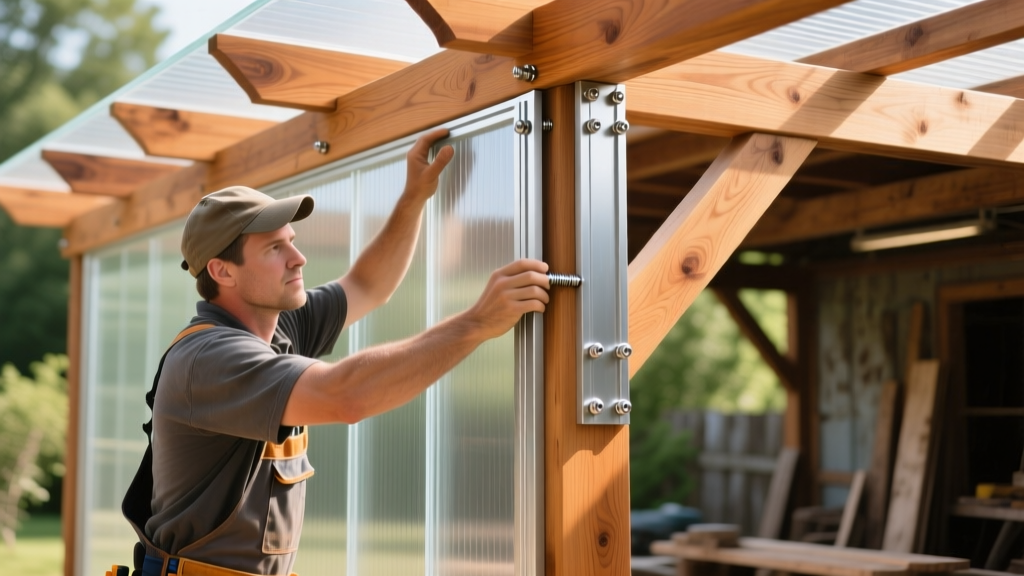
Fastener and Hardware Matrix
Selecting the correct fastener is just as important as selecting the pergola roofing materials themselves. Using the wrong screw type leads to stripped heads, rust streaks, and wind uplift failures.
| Roofing Material | Fastener Type | Washer Material | Spacing / Pattern |
|---|---|---|---|
| Multiwall Polycarbonate | #10 x 1' Stainless Steel | EPDM Rubber | Every purlin, via H-profile |
| Corrugated Steel (26ga) | #10 x 1.5' Self-Drilling | Neoprene | Every 2nd rib (eaves), 3rd rib (field) |
| Corrugated Aluminum | #10 x 1.5' Stainless (No carbon steel) | EPDM Rubber | Every 2nd rib (eaves), 3rd rib (field) |
| Louvered Aluminum | OEM Structural Lag Bolts | N/A (Metal-to-metal) | Per manufacturer track specs |
Wind Load and Building Code Compliance
Pergolas are highly susceptible to wind uplift because they are often open-sided structures, allowing wind to enter from below and create upward pressure on the roof panels. When installing pergola roofing materials, you must adhere to local building codes, which are typically based on the ASCE 7-22 (American Society of Civil Engineers) standard for minimum design loads.
In coastal or high-wind velocity zones (HVHZ), standard corrugated panels may not meet the required uplift resistance. In these regions, consult the Metal Roofing Alliance manual for specific pull-out resistance values and consider upgrading from 26-gauge to 24-gauge metal, or utilizing structural standing seam panels that feature concealed mechanical clips rather than exposed fasteners.
Always check with your local building department (often governed by the International Code Council standards) to determine if your pergola requires a permit. In most jurisdictions, any pergola with a solid roof (including polycarbonate and metal) that exceeds 120 square feet requires a structural permit and engineered footing plans.
Troubleshooting Common Installation Failures
Even experienced builders make mistakes when transitioning from traditional home roofing to lightweight pergola systems. Here is how to identify and fix the three most common failures:
- Symptom: Polycarbonate panels are buckling and warping in the summer heat.
Cause: The installer failed to pre-drill oversized holes or over-tightened the screws, locking the panel in place and preventing thermal expansion.
Fix: Back out all fasteners, ream the holes to 1/8-inch oversized, and retighten so the EPDM washer is just snug, not compressed. - Symptom: Corrugated metal roof leaks only during wind-driven rainstorms.
Cause: Inadequate side-lap overlap or missing butyl sealant at the end-laps. Wind pushes water up the slight incline, bypassing the physical overlap.
Fix: Lift the overlapping sheet, apply a 1/4-inch bead of UV-stable polyurethane or butyl sealant, and re-fasten with stitch screws spaced 12 inches apart along the lap. - Symptom: Water overflows the hidden gutters on a louvered pergola during heavy downpours.
Cause: The internal gutter trough is undersized for the roof's square footage, or the downspout is clogged with pollen and debris.
Fix: Ensure the downspout diameter matches the roof area (minimum 2x3 inch per 100 sq ft). Install leaf guards on the downspout intake grates and verify the perimeter gutter has a 1/8-inch per foot slope toward the drain.
Proper installation of pergola roofing materials bridges the gap between a temporary backyard shade structure and a permanent, weather-tight architectural feature. By respecting thermal dynamics, utilizing the correct fastening matrices, and engineering for wind uplift, your pergola roof will perform flawlessly for decades.
Written by
Sarah WhitfieldSarah Whitfield is a chartered quantity surveyor (MRICS) and construction cost analyst with 15 years of experience in material pricing, procurement strategy, and project budgeting. She earned her degree in Construction Management from the University of Reading (UK) and has worked on projects ranging from $2M custom homes to $180M mixed-use developments across North America and Europe. Sarah currently leads cost estimating for BuildMat Insight, maintaining a proprietary database of 4,000+ material price points updated quarterly. She is a frequent contributor to RSMeans cost data panels and has presented at the International Cost Engineering Council (ICEC) congress. Based in Denver, CO, Sarah is an avid trail runner and volunteer mentor for Women in Construction.
More from Sarah Whitfield
View all
Wood & Lumber
What Are the Different Types of Wood? A Builder's Guide
Compare structural softwoods, finish hardwoods, and engineered lumber. Analyze Janka ratings, MOE values, and 2026 pricing for construction.
Aug 4, 2026

Walls & Panels
Steel Framing vs Wood Framing: Corrosion and Moisture Defense
Compare steel framing vs wood framing for moisture resistance. Learn about galvanized coatings, condensation risks, and corrosion protection strategies.
Jul 21, 2026

Stone & Masonry
How to Cut Stone Veneer: Wet Saw vs Grinder Comparison
Compare the best tools for cutting stone veneer. We review wet saws, angle grinders, and chop saws to help you achieve clean, chip-free cuts.
Jul 21, 2026