Repair Guide for the Most Common Roofing Material: Asphalt Shingles
Learn how to inspect, maintain, and repair asphalt shingles, the most common roofing material, with expert tips on fixing leaks, curling, and granule loss.

Understanding the Most Common Roofing Material
Asphalt shingles are undeniably the most common roofing material in North America, protecting roughly 80% of residential structures. Their dominance stems from a highly optimized balance of cost, ease of installation, and reliable weather resistance. Modern architectural (dimensional) fiberglass shingles, manufactured to Asphalt Roofing Manufacturers Association (ARMA) standards, typically carry warranties ranging from 30 to 50 years. However, reaching that lifespan requires proactive maintenance and precise, targeted repairs when localized failures occur.
Unlike metal or tile systems, asphalt shingles rely on a layered defense: a fiberglass mat for tensile strength, oxidized asphalt for waterproofing, and ceramic-coated granules for UV reflection. When any of these three layers is compromised, the degradation cascade accelerates. This guide provides field-tested repair protocols and maintenance frameworks to maximize the lifecycle of asphalt shingle roofs.
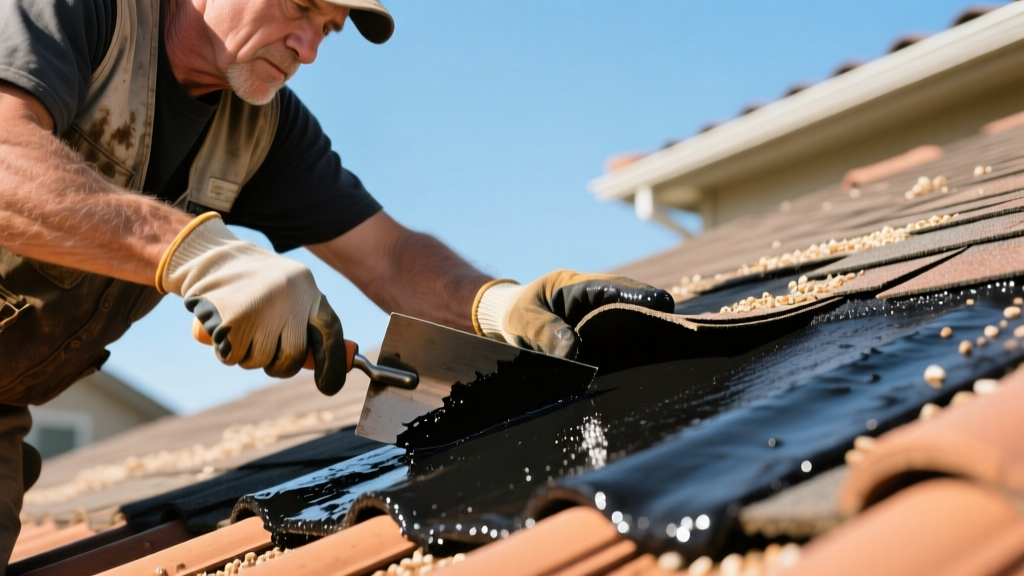
Diagnostic Matrix: Identifying Shingle Failure Modes
Before initiating any repair, you must accurately diagnose the failure mode. Misidentifying the root cause leads to recurring leaks and wasted materials. Use the following diagnostic matrix to map visual symptoms to their underlying structural or environmental causes.
| Visual Symptom | Root Cause | Required Action |
|---|---|---|
| Upward Curling (Cupping) | Moisture accumulation in the roof decking or severe attic under-ventilation causing differential thermal expansion. | Verify attic NFVA (Net Free Ventilation Area). Replace affected shingles only after moisture source is resolved. |
| Downward Curling (Clawing) | Normal end-of-life aging; the asphalt binder has lost its volatiles and shrunk, pulling the edges down. | Prepare for full roof replacement. Spot repairs are ineffective for widespread clawing. |
| Surface Blistering | Trapped moisture within the fiberglass mat during manufacturing, exacerbated by extreme attic heat. | Monitor. Do not pop blisters. If granules are lost and asphalt is exposed, apply a dab of roofing cement. |
| Wind Creasing / Tearing | Uplift forces exceeding the shingle's ASTM D3161 Class F wind rating, often due to improper nail placement (high nailing). | Seal creases immediately with plastic roofing cement to prevent water infiltration into the mat. |
Targeted Repair Protocols
Executing repairs on the most common roofing material requires specific tools and compounds. Never use silicone or polyurethane caulks on asphalt shingles; they fail to bond with the petroleum-based asphalt and will peel off within a single freeze-thaw cycle. Always use a plasticizer-based asphalt roofing cement (such as Henry 208 or Karnak 19).
Protocol A: Sealing Lifted Tabs and Wind Creases
High winds can break the factory-applied adhesive strips, leaving shingle tabs vulnerable to water intrusion and further tearing.
- Assess Temperature Limits: Only perform this repair when ambient temperatures are above 45°F (7°C). Below this threshold, the fiberglass mat becomes highly brittle and will snap when lifted.
- Clean the Substrate: Use a stiff-bristle brush to remove dirt, debris, and loose granules from the underside of the lifted tab and the top of the shingle below it.
- Apply Cement: Using a caulking gun or a 3-inch putty knife, apply a continuous bead or two distinct dollops (roughly 1 inch in diameter) of asphalt plastic cement to the underside of the lifted tab. Do not over-apply; excess cement will ooze out and create a dirt-catching ridge.
- Secure and Weight: Press the tab firmly into place. If the shingle has been creased, place a standard clay brick over the repair for 24 hours to ensure a permanent bond while the cement cures.
Protocol B: Surgical Shingle Replacement
When a shingle is physically torn, severely blistered, or missing, it must be surgically removed without damaging the surrounding interlocking matrix.
- Break the Seal: Slide a flat pry bar (shingle ripper) under the shingle directly above the damaged one. Gently break the adhesive seal. Repeat this for the shingle above that one, as nails from the target shingle will be driven through the course two layers up.
- Extract Fasteners: Use the pry bar to carefully pull the 11- or 12-gauge galvanized roofing nails securing the damaged shingle. Support the surrounding shingles to prevent creasing.
- Remove and Prep: Slide the damaged shingle out. Inspect the exposed underlayment and decking. If the decking is rotted, cut out the damaged OSB/plywood and patch it before proceeding.
- Install Replacement: Slide the new architectural shingle into place. Ensure the butt joints are offset by at least 6 inches from adjacent shingles to maintain the staggered pattern.
- Fasten and Seal: Drive four 1.25-inch hot-dipped galvanized roofing nails into the designated nail line (never above the cutout slots). Apply a quarter-sized dab of roofing cement over each nail head on the overlapping shingle above to ensure watertight integrity.
Proactive Maintenance: Extending the 25-Year Lifecycle
Repairing the most common roofing material is only half the battle; proactive maintenance prevents minor issues from escalating into catastrophic decking failures.
Managing Biological Growth
The black streaks frequently seen on north-facing roof slopes are not dirt, but Gloeocapsa magma, a cyanobacteria that feeds on the limestone filler used in modern asphalt shingles. While primarily cosmetic, severe moss buildup (which retains moisture against the granules) can cause premature granule loss and wood rot.
- Chemical Treatment: Apply a zinc sulfate or potassium salt of fatty acids solution. Avoid copper sulfate, which is highly toxic to surrounding landscaping and aquatic systems.
- Mechanical Removal: Never use a pressure washer on asphalt shingles. The high-velocity water will strip the protective ceramic granules and force water under the shingle laps. Use a low-pressure garden sprayer and a soft-bristle push broom, working from the ridge down to the eaves.
- Preventative Strips: Install 3-inch galvanized zinc or copper strips just below the ridge cap. As rain washes over the metal, it deposits trace ions down the roof plane, creating an environment hostile to algae and moss.
The Ventilation Imperative
According to data from the Insurance Institute for Business & Home Safety (IBHS), poor attic ventilation is a leading cause of premature shingle failure. Without adequate airflow, attic temperatures can exceed 150°F in the summer, baking the asphalt binder from the underside and causing it to lose its waterproofing volatiles.
Verify that your roof system meets the IRC Section R806 requirement of 1:150 Net Free Ventilation Area (NFVA) ratio, or 1:300 if a balanced system (50% intake at eaves, 50% exhaust at ridge) is installed. If your soffit vents are blocked by attic insulation, install baffles to maintain a clear 2-inch air channel.
The 25% Threshold: When to Abandon Repairs
While targeted repairs are highly cost-effective for isolated storm damage or localized wear, there is a strict economic threshold where patching becomes a liability. Industry standard dictates the '25% Rule': if more than 25% of the roof surface area requires repair, or if leaks are originating from multiple unrelated failure points (e.g., widespread nail pops, systemic granule loss in the gutters, and flashing failures), spot repairs are no longer financially viable.
At this stage, the labor cost of chasing individual leaks exceeds the amortized cost of a full tear-off and replacement. Furthermore, layering new shingles over an existing compromised layer (a 'nail-over') is strongly discouraged, as it masks decking rot, voids manufacturer warranties, and adds excessive dead load to the roof trusses. When the 25% threshold is crossed, transition from a repair mindset to planning a comprehensive roof replacement.
Written by
Priya KapoorPriya Kapoor is a real estate market analyst and construction economics researcher with expertise in housing affordability, development feasibility, and infrastructure investment. She holds a Master of Regional Planning from Cornell University and previously worked as a senior analyst at CBRE's Investment Properties group, where she modeled returns for $4B in mixed-use development pipelines. Priya now runs an independent research practice advising developers, municipalities, and REITs on construction cost forecasting and market timing. She publishes the quarterly "BuildMat Market Pulse" report tracking material price indices across 12 commodity categories. Based in Austin, TX, Priya serves on the board of Habitat for Humanity Austin and is a marathon runner.
More from Priya Kapoor
View all
Construction Cost
Cost to Build a 1600 Sq Ft Home in 2026: Full Breakdown
Accurate 2026 cost to build a 1600 sq ft home—material, labor, and regional pricing breakdowns included. Plan your budget with real-time estimates.
Aug 11, 2026

Wood & Lumber
Name the Types of Wood for Pressure Treatment and Preservation
Learn how to name the types of wood best suited for pressure treatment. Compare species treatability, chemical retention levels, and 2026 preservation costs.
Aug 4, 2026

Stone & Masonry
Stone Veneer Suppliers Lindenhurst: 2026 Cost Analysis
Analyze 2026 stone veneer costs in Lindenhurst, NY. Compare local supplier pricing, delivery fees, and Suffolk County installation labor rates.
Aug 4, 2026