How to Inspect and Repair Failing Roof Deck Materials
Learn how to inspect, repair, and replace water-damaged roof deck materials. Discover exact plywood grades, fastener specs, and patching techniques.

The Critical Role of Roof Deck Materials in Structural Integrity
The roof deck (or sheathing) is the structural diaphragm that transfers wind, snow, and seismic loads from the roof covering to the underlying trusses or rafters. When roof deck materials fail due to moisture intrusion, biological growth, or mechanical stress, the entire roofing system is compromised. Modern building codes, including the latest 2024 and 2026 International Residential Code (IRC) updates, increasingly mandate sealed roof decks in high-wind zones to prevent catastrophic water intrusion if shingles are lost. Consequently, understanding how to properly inspect, patch, and replace failing roof deck materials is essential for any roofing professional or advanced DIYer.
Repairing a roof deck is not simply about cutting out the soft spots and nailing down new wood. It requires precise material matching, strict adherence to fastener schedules, and an understanding of how different engineered wood products react to moisture over time.
Diagnosing Roof Deck Material Failure: Symptom Matrix
Before swinging a hammer, you must accurately diagnose the extent and cause of the degradation. Use the following matrix to map surface symptoms to underlying structural issues.
| Observable Symptom | Primary Cause | Most Affected Material | Repair Urgency |
|---|---|---|---|
| Spongy feel underfoot | Prolonged moisture saturation, fungal rot | OSB, Plank Decking | Critical (Immediate) |
| Ridging or buckling at seams | Thermal expansion without proper gaps | CDX Plywood, OSB | Moderate (Pre-install) |
| Dark stains on attic underside | Condensation, ice dam backup, or nail pops | All Materials | High (Investigate Source) |
| Visible edge swelling (OSB) | Breach of factory wax edge coating | OSB | High (Replace Panels) |
| Delamination of plies | Chronic wet/dry cycling, adhesive failure | CDX Plywood | Critical (Replace Panels) |
Material-Specific Repair Protocols
Different roof deck materials require distinct repair strategies. Applying a plywood repair technique to an OSB deck, or vice versa, can lead to premature failure of the patch.
CDX Plywood (The Standard)
CDX plywood is graded with a 'C' face and 'D' back, with the 'X' denoting Exposure 1. Exposure 1 means the panel can withstand weather exposure during construction delays but is not intended for permanent outdoor exposure. When repairing localized rot in CDX plywood, you can often patch the damaged area if the surrounding plies remain firmly bonded. However, if you observe delamination—where the thin wood veneers separate and trap moisture—the structural shear strength is gone. Delaminated panels cannot be patched; the entire 4x8 sheet must be replaced. When installing replacement CDX, always orient the face grain perpendicular to the trusses to maximize bending strength.
OSB (Oriented Strand Board)
OSB is manufactured by compressing wood flakes with resin and wax. The edges are typically coated with a moisture-resistant wax seal. Once water breaches this edge seal—often through a poorly sealed shingle seam or an unflashed roof penetration—the wood flakes absorb moisture and expand. OSB can swell up to 15% in thickness when saturated. Unlike plywood, which can sometimes dry out and regain partial stiffness, OSB suffers irreversible edge swelling and internal structural breakdown once delaminated. Rule of thumb: Never patch OSB. If an OSB panel shows edge swelling, flaking, or sponginess, cut out and replace the entire panel.
Plank Decking (Historical and Custom Homes)
Found in older homes and high-end architectural builds, plank decking consists of 1x6 or 1x8 dimensional lumber (often pine or fir) nailed directly to rafters. Repairing plank decking requires matching the original wood species and thickness to prevent uneven loading. If a plank is rotted, pry it up carefully to avoid splitting adjacent boards. If the underlying rafter is also compromised, you must 'sister' a new 2x4 or 2x6 alongside the damaged rafter, securing it with structural screws (like Simpson Strong-Tie SDWS) and construction adhesive before laying the new plank.
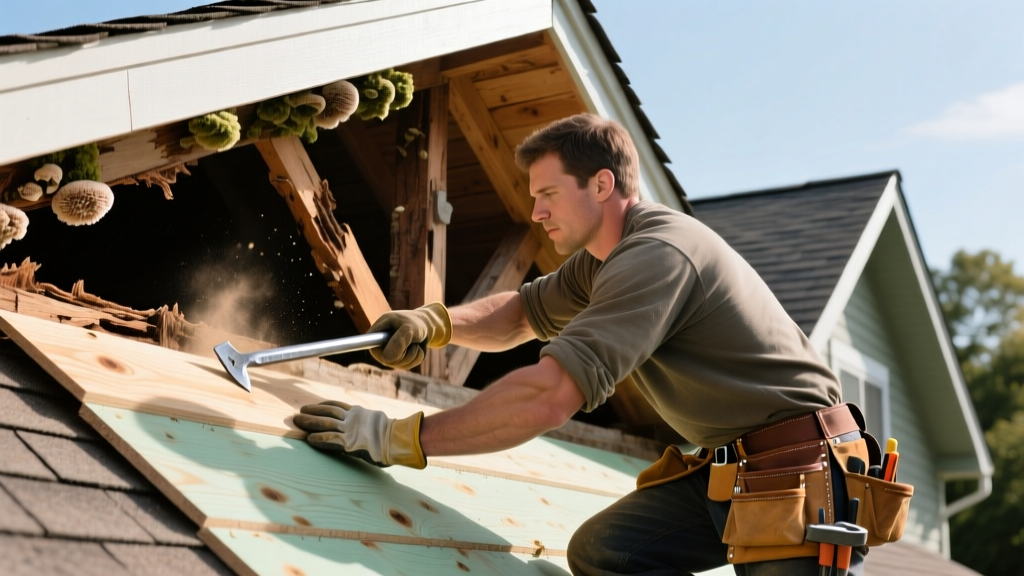
Step-by-Step Patching Procedure for Localized Rot
When patching CDX plywood or replacing a full sheet of OSB, precision is critical to maintain the roof's diaphragm strength. Follow this exact sequence to ensure code-compliant repairs.
- Locate Truss Centers: Use a stud finder from the roof surface, or measure from the attic. Mark the centerline of the trusses framing the damaged area with a chalk line.
- Establish Cut Lines: Roof deck panels must be supported by framing at all edges. If the damage does not extend to a truss centerline, snap a chalk line to the nearest truss center. Never leave an unsupported floating edge.
- Set Saw Depth: Adjust your circular saw blade depth to exactly match the thickness of the existing sheathing (typically 1/2' or 5/8'). This prevents the blade from scoring the top chord of the engineered truss, which voids the truss warranty and weakens the structure.
- Execute the Cut: Cut along the chalk lines. Use a reciprocating saw for tight corners near ridges or valleys where the circular saw cannot reach.
- Install Blocking (If Required): If your cross-cuts fall between trusses (perpendicular to the framing), install 2x4 blocking between the trusses to provide a nailing surface for the patch edges. Secure blocking with 3-inch structural screws.
- Apply Adhesive and Set Panel: Run a continuous 1/4-inch bead of polyurethane subfloor adhesive along the top of the trusses and blocking. Drop the replacement panel into place, maintaining a strict 1/8-inch gap between the new panel and existing sheathing to allow for thermal expansion.
- Fasten to Code: Secure the panel using the specified fastener schedule (detailed below).
Fastener and Adhesive Specifications
Using the correct hardware is non-negotiable for roof deck repairs. Smooth-shank nails are prone to backing out under wind-uplift cycles.
- Fastener Type: 8d (2.5-inch) hot-dipped galvanized ring-shank nails. Ring-shank nails provide up to 200% more withdrawal resistance than smooth-shank nails.
- Edge Spacing: Maximum 6 inches on center (o.c.) along all panel edges and supported joints.
- Field Spacing: Maximum 12 inches o.c. along intermediate framing members.
- Adhesive: ASTM D3498 compliant polyurethane construction adhesive (e.g., Loctite PL Premium or OSI Subfloor). Applying adhesive increases the shear stiffness of the roof deck by up to 30% and eliminates panel squeaks.
- H-Clips: If trusses are spaced 24 inches o.c. and you are using 1/2-inch sheathing, install H-clips at the unsupported horizontal edges between trusses to prevent edge sagging.
Sealing the Deck: Meeting Modern Wind Mitigation Standards
Repairing the wood is only half the battle. Once the roof deck materials are restored, the seams must be sealed to meet modern wind mitigation standards. According to the IBHS FORTIFIED Roof standards, a sealed roof deck is critical to preventing water damage during high-wind events where shingles are torn away.
For repairs, you have two primary sealing options:
- Tape Method: Apply a minimum 4-inch wide self-adhering polymer-modified bitumen flashing tape (such as Grace Vycor or Zip System tape) over all horizontal and vertical seams of the patched area.
- Peel-and-Stick Membrane: In high-risk zones, apply a full coverage of self-adhering ice and water shield over the repaired section, lapping it at least 6 inches over the existing underlayment.
The APA (The Engineered Wood Association) emphasizes that maintaining the 1/8-inch expansion gap between panels before taping or felting is critical; omitting this gap will cause the panels to buckle upward, telegraphing through the shingles and creating pockets where water can pool.
When to Replace the Entire Deck vs. Patching
Knowing when to abandon localized repairs in favor of a full tear-off saves time and prevents warranty callbacks. Use this decision framework:
- The 20% Rule: If more than 20% of the total roof deck area shows signs of moisture damage, delamination, or rot, the cost of labor to cut, block, and patch individual sections will exceed the cost of replacing the entire deck. Opt for a full replacement.
- Widespread Edge Swelling: If OSB edge swelling is present across multiple panels, it indicates a systemic ventilation or underlayment failure. Patching individual panels will not solve the underlying moisture trap.
- Truss Spacing Mismatches: If you are upgrading an older home from 1x6 plank decking to modern 4x8 sheets, the existing rafter spacing (often 16 inches o.c. or irregular) may not align with sheet edges. A full tear-off and re-decking with H-clips and proper blocking is required to meet current IRC span tables.
Preventative Maintenance to Extend Deck Lifespan
Once the roof deck materials are repaired and the new roofing system is installed, implement these maintenance protocols to ensure the sheathing lasts the full 50-year lifespan of the structural framing:
- Verify Attic Ventilation: Ensure a minimum of 1 square foot of net free ventilation area (NFVA) for every 150 square feet of attic floor space (or 1:300 if a balanced ridge/soffit system is used). Poor ventilation causes condensation to form on the underside of the deck, rotting it from the inside out.
- Inspect Pipe Boots Annually: 90% of localized roof deck rot occurs around plumbing vent pipes where rubber boots crack and fail. Replace neoprene boots every 10-15 years, or upgrade to lead flashing or metal-collar boots.
- Clear Ice Dam Zones: In northern climates, ensure heat cables or proper soffit insulation prevents ice dams from forcing meltwater back up under the shingles and onto the deck edge.
By adhering to strict material-specific protocols, utilizing ring-shank fasteners with polyurethane adhesives, and sealing the deck to FORTIFIED standards, you ensure the roof deck materials will perform flawlessly under extreme environmental stress.
Written by
David NakamuraDavid Nakamura is a licensed architect (AIA) and construction technology writer focused on sustainable building methods, mass timber engineering, and high-performance building envelopes. He holds a Master of Architecture from the University of Washington and is a certified Passive House Consultant (CPHC). David spent eight years at the Seattle firm Mithun, where he led the design of three LEED Platinum projects, before founding his own practice specializing in net-zero residential design. He serves on the editorial advisory board of GreenBuilder Magazine and has authored peer-reviewed papers on cross-laminated timber (CLT) connections for the Journal of Structural Engineering. In his spare time, David teaches woodworking at Pratt Fine Arts Center and kayaks the Puget Sound.
More from David Nakamura
View all
Construction Cost
Labor Cost to Build a Deck Per Sq Ft: 2026 Installation Guide
Discover the exact labor cost to build a deck per sq ft in 2026. This installation guide breaks down contractor rates, complexity factors, and hidden fees.
Aug 4, 2026

Construction Cost
How Much Does It Cost to Build a 3 Bedroom House? Financing Guide
Learn exactly how much it costs to build a 3 bedroom house and explore 2026 financing options, construction loan types, and budget frameworks for your build.
Aug 4, 2026

Construction Cost
Cost to Build a Tennis Court: 2026 Guide
How much does it cost to build a tennis court in 2026? Breakdowns for asphalt, concrete, and synthetic surfaces plus fencing and lighting.
Jul 30, 2026