Ridge Cap Shingles Maintenance: Cleaning & Repair Guide
Master ridge cap shingles maintenance with our 2026 cleaning playbook. Learn safe washing techniques, sealant repair, and moss removal strategies.
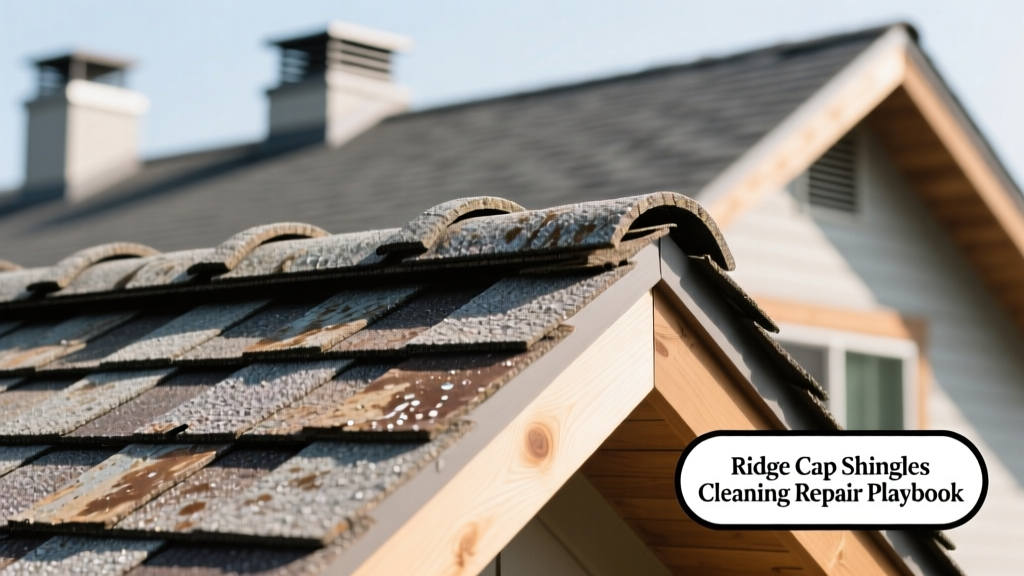
The Physics of Ridge Line Vulnerability
The ridge line is the most abused intersection on any sloped roof system. Ridge cap shingles sit at the absolute peak, enduring the highest wind uplift vectors, the most intense UV radiation, and the greatest thermal shock. While field shingles are protected by the overlapping courses above them, ridge caps are fully exposed on all sides. In 2026, with asphalt shingle manufacturing shifting toward heavier, more rigid architectural profiles, the thermal expansion and contraction rates between the field shingles and the pre-bent ridge caps often differ, leading to accelerated sealant fatigue.
Maintenance of ridge cap shingles is not merely an aesthetic exercise; it is a critical structural defense. When a ridge cap fails, water infiltrates the roof deck directly at the highest gravity point, allowing moisture to travel down the underlying rafters and cause widespread interior damage before a leak is ever spotted in the attic.
Bi-Annual Inspection Playbook: Identifying Early Failure
Do not wait for interior water stains to evaluate your ridge line. Conduct a visual inspection every six months (spring and late autumn) using binoculars from the ground, or safely via a drone. Look for these specific failure modes:
- Nail Pops and Backouts: Ridge caps require 2.5-inch galvanized roofing nails to penetrate through the underlying ridge vent and into the roof decking. Standard 1-inch field nails will back out within three years due to thermal cycling. Look for exposed nail heads or raised shingle tabs.
- Sealant Degradation: The factory-applied asphalt sealant strips on ridge caps are notoriously thin. Check for brittle, cracked, or completely detached sealant beads along the overlapping edges.
- The 'Zippering' Effect: If wind lifts the leading edge of a single ridge cap shingle, it breaks the seal of the overlapping shingle next to it, creating a cascading failure. Look for uniform lifting along the ridge.
- Granule Loss at the Bend: Pre-bent ridge caps suffer from micro-fractures at the factory fold. Excessive granule accumulation in the gutters directly below the ridge line indicates the mat is exposed and nearing the end of its lifecycle.
The ARMA-Approved Cleaning Protocol
Biological growth—specifically Gloeocapsa magma (black algae), moss, and lichen—thrives on the north-facing slope of the ridge line where moisture lingers. According to the Asphalt Roofing Manufacturers Association (ARMA), aggressive mechanical cleaning destroys the UV-blocking ceramic granules on ridge caps. Pressure washing is strictly prohibited.
Step-by-Step Soft Wash Procedure
- Protect Landscaping: Saturate all shrubs, grass, and foundation plantings below the roofline with plain water. Cover delicate plants with plastic sheeting to prevent chemical burn from runoff.
- Mix the Solution: Combine a 50/50 ratio of laundry-strength liquid chlorine bleach (sodium hypochlorite, minimum 6% concentration) and water in a pump sprayer. For an eco-friendly alternative, dissolve 3 pounds of Zinc Sulfate Monohydrate per gallon of water.
- Application: Apply the solution generously to the ridge caps using a low-pressure garden sprayer. Do not scrub. Allow the chemical to dwell for 15 to 20 minutes. The algae will turn from black to white/gray as it dies.
- Low-Volume Rinse: Rinse the ridge line using a standard garden hose with a wide-fan nozzle. Spray top-down, following the water's natural path. Keep the water pressure below 500 PSI to prevent granule displacement.
'The most common mistake homeowners make is using a pressure washer to blast moss off ridge caps. This instantly strips the protective granules, exposing the asphalt mat to UV degradation and reducing the shingle's lifespan by up to 50%.' — National Roofing Contractors Association (NRCA) Technical Guidelines.
Targeted Repair Strategies for Ridge Caps
When inspection reveals localized damage, immediate spot-repair prevents the need for a full ridge line replacement. Use the following techniques based on the specific failure mode.
Fixing Exposed Nail Heads
If a nail has backed out, do not simply hammer it back down; the hole in the decking is now enlarged and will not hold. 1. Pry the ridge cap up gently with a flat bar. 2. Extract the failed nail. 3. Drive a new 2.5-inch ring-shank galvanized roofing nail exactly 1 inch adjacent to the old hole. 4. Cover the old hole and the new nail head with a 1-inch diameter dab of polyether-based sealant (such as OSI QUAD Max or Henry 885 Tropi-Cool). Standard asphalt roof cement dries brittle and will crack within a single freeze-thaw cycle.
Re-Sealing Lifted Edges
For ridge caps where the factory sealant has failed but the shingle itself is intact: 1. Clean the underside of the lifted shingle and the top of the underlying shingle with a stiff brush to remove debris and old asphalt residue. 2. Apply three 1-inch diameter dabs of polyurethane roof sealant along the overlap zone, keeping the sealant at least 2 inches away from the exposed edge to prevent visible oozing. 3. Press the shingle down firmly and place a single brick on the overlap for 24 hours to ensure a tight bond while the sealant cures.
Maintenance Cost & Frequency Matrix
Budgeting for ridge cap maintenance requires understanding the difference between preventative care and reactive repairs. The following matrix outlines standard 2026 market rates for residential single-family homes (assuming a standard 2,000 sq. ft. roof with 60 linear feet of ridge line).
| Maintenance Task | Frequency | DIY Material Cost | Professional Service Cost | Primary Risk if Ignored |
|---|---|---|---|---|
| Soft Wash Cleaning | Every 2-3 Years | $35 - $60 | $250 - $400 | Moisture retention, granule loss |
| Sealant Spot Repair | As Needed (Annual Check) | $15 - $25 per tube | $150 - $300 (Minimum call-out) | Wind uplift, zippering failure |
| Nail Pop Extraction | As Needed | $10 - $20 | Bundled with sealant repair | Direct water intrusion to deck |
| Zinc Strip Installation | Once (Lasts 15+ Years) | $80 - $120 | $350 - $600 | Recurring biological growth |
| Full Ridge Cap Replacement | End of Lifecycle (15-20 Yrs) | $150 - $250 (Materials) | $800 - $1,400 | Catastrophic roof system failure |
Long-Term Biological Prevention Strategies
If your ridge line requires cleaning more than once every three years, reactive maintenance is a poor use of capital. Instead, transition to a preventative biological control system.
Installing a 3-inch wide zinc or copper strip directly beneath the ridge cap shingles is the most effective long-term solution. As rain washes over the metal strip, it carries microscopic metallic ions down the roof slope. These ions alter the pH of the roof surface just enough to make it inhospitable to algae, moss, and lichen spores. To install, carefully lift the bottom edge of the ridge cap shingles, slide the metal strip up so it is hidden beneath the overlap, and secure it using 1.5-inch electro-galvanized roofing nails. Ensure the strip extends at least 1/4 inch below the shingle edge to allow water contact. A single zinc strip installation costs roughly $1.50 per linear foot in materials and effectively eliminates the need for chemical soft washing for the next 15 to 20 years.
When to Abandon Repair and Opt for Full Replacement
Ridge cap shingles cannot be maintained indefinitely. If your inspection reveals that more than 30% of the ridge caps exhibit severe granule loss at the factory bend, or if the underlying asphalt mat has become brittle and cracks when gently lifted, spot repairs are futile. At this stage, the cost of continuous sealant applications and leak mitigation will exceed the cost of a full ridge line tear-off and replacement. Consult a licensed roofing contractor to evaluate the structural integrity of the underlying ridge vent and decking before installing new architectural ridge caps.