How to Install Roof Drip Edge: Eaves, Rakes, and Codes
Master roof drip edge installation with our step-by-step guide. Learn the critical eaves vs. rakes sequence, material gauges, and IRC code requirements.
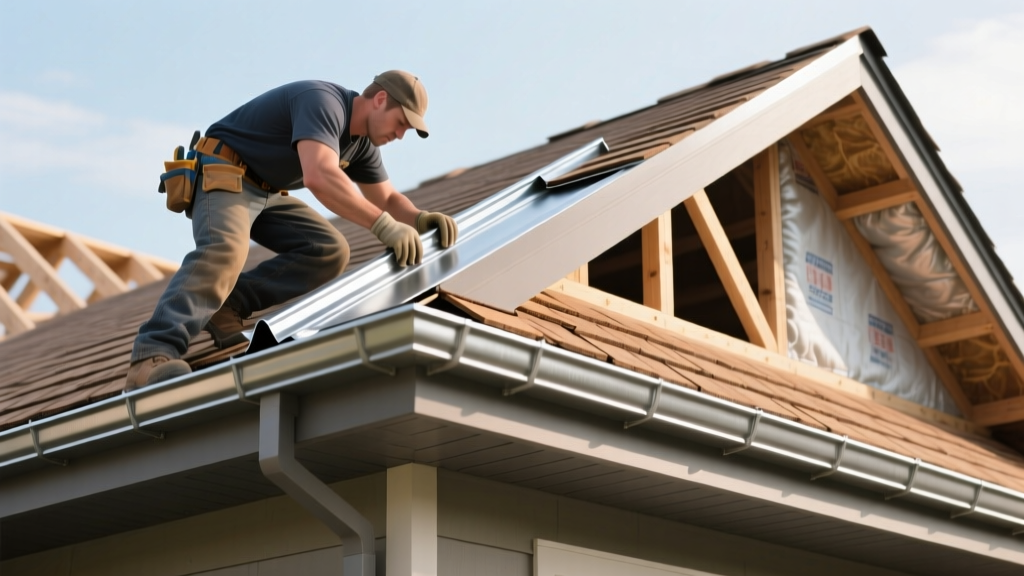
The Critical Role of Roof Drip Edge in Water Management
A roof drip edge is not merely a cosmetic trim piece; it is a primary defense against capillary action and wind-driven rain. Installed at the perimeter of the roof deck, this metal flashing directs water away from the vulnerable fascia and into the gutter system. Without it, water clings to the underside of the roof sheathing, leading to rot, mold, and premature degradation of the roof deck and fascia boards. Proper installation requires strict adherence to material specifications, fastener patterns, and the often-misunderstood sequencing of eaves versus rakes.
Under IRC Section R905.2.8.5, drip edge is mandatory for asphalt shingle roofs. The code dictates that adjacent segments must overlap a minimum of 2 inches, the eave drip edge must extend 1/4 inch below the roof sheathing, and it must extend back onto the roof deck a minimum of 2 inches. Fastening is required at a maximum of 12 inches on center (O.C.). View the ICC Chapter 9 Roof Assemblies Code.
Material Selection and Gauge Specifications
Choosing the right metal and thickness is critical for longevity, especially in coastal or high-wind regions. While big-box stores often stock the thinnest options, professional roofing standards demand heavier gauges to prevent bending during installation and denting from hail or ladder contact.
| Material | Minimum Gauge/Thickness | Best Application | Est. Cost (2026) |
|---|---|---|---|
| Aluminum | 0.019" (Standard) / 0.024" (Heavy) | General residential, coastal areas (rust-proof) | $1.50 - $2.20 / lin. ft. |
| Galvanized Steel | 26-Gauge (Min) / 24-Gauge (Pref) | High-wind regions, heavy snow loads | $1.80 - $2.75 / lin. ft. |
| Copper | 16 oz. / 20 oz. | Premium architectural roofs, slate, cedar | $8.00 - $14.00 / lin. ft. |
The Golden Rule: Eaves vs. Rakes Installation Sequence
The most common mistake made by novice installers—and even some experienced roofers—is applying the drip edge and underlayment in the same sequence around the entire perimeter. According to the Whole Building Design Guide (WBDG) and major shingle manufacturers, the sequence must change depending on the roof edge.
At the Eaves (Bottom Edge): Drip Edge UNDER Underlayment
At the eaves, the drip edge is installed directly to the roof deck before the synthetic underlayment or ice and water shield is rolled out. If water penetrates the shingles and travels down the underlayment, it will flow over the drip edge and safely into the gutter. If the drip edge were placed over the underlayment here, water would be trapped behind the metal and rot the fascia.
At the Rakes (Gable Edges): Drip Edge OVER Underlayment
At the rakes, the underlayment is rolled out first, and the drip edge is installed over it. Rake edges are highly susceptible to wind-driven rain, which blows horizontally. If the drip edge were under the underlayment at the gable, wind could drive water up and under the underlayment, soaking the roof deck. Placing the metal over the felt sheds lateral water immediately.
Step-by-Step Installation Procedure
Step 1: Eave Preparation and Placement
Start at the eaves. Snap a chalk line on the roof deck exactly 2 inches up from the edge to ensure a straight, consistent overlap. Lay the first piece of L-style or T-style drip edge along the eave. Ensure the vertical leg hangs down over the fascia, extending at least 1/4 inch below the bottom of the roof sheathing to break water tension.
Step 2: Fastening Specifications
Use 11-gauge or 12-gauge hot-dipped galvanized roofing nails with a minimum 3/8-inch head. The nails must be long enough to penetrate the roof sheathing and bite into the underlying rafters or trusses—typically 1 inch to 1.5 inches in length. Space the nails 12 inches O.C. along the top flange, keeping them about 1 inch back from the top edge of the metal.
Never use electro-galvanized or bright-finish nails for drip edge installation. They lack the thick zinc coating of hot-dipped nails and will begin to rust and streak your fascia within 2 to 3 years, compromising the holding power of the flashing.
Step 3: Overlapping Joints
When joining two pieces of drip edge, overlap them by a minimum of 2 inches (3 inches is preferred in high-wind zones). Apply a 1-inch diameter bead of ASTM D4586 compliant asphalt roofing cement or polyurethane sealant between the overlap before nailing the second piece down. This prevents wind from lifting the joint and stops capillary water draw.
Step 4: Rake Edge Application
Once the eaves are complete and the main field underlayment is installed, move to the rakes. Cut the rake drip edge so it overlaps the eave drip edge at the bottom corner by at least 2 inches. Install the rake drip edge over the underlayment, nailing 12 inches O.C. Continue up to the ridge, overlapping each successive piece over the one below it (shingle-style) so water sheds downward over the joints.
Understanding Drip Edge Profiles
Selecting the correct profile is dictated by your gutter system and roof geometry. The National Roofing Contractors Association (NRCA) categorizes these into three primary types:
- Type C (L-Style): The most common profile, featuring a simple 90-degree bend. Ideal for standard asphalt shingle roofs where the gutter is mounted directly to the fascia.
- Type D (T-Style): Features a vertical drop that extends further down the fascia. This is required when the fascia is exceptionally wide or when you need to protect the top edge of a brick or stone veneer below the roofline.
- Type F (Gutter Apron): Features an extended top flange (often 4 to 6 inches) and a longer vertical leg that reaches directly into the back of the gutter. This is mandatory for roofs with a very low slope or when gutters are hung low, ensuring water bypasses the gap between the fascia and the gutter.
Common Installation Failures to Avoid
- Nailing into the Gutter: When installing the final pieces near the gutter, ensure nails do not penetrate the back wall of the gutter. This creates a direct leak path into the fascia.
- Skipping the Chalk Line: Failing to snap a chalk line for the top flange results in a wavy drip edge that telegraphs through the first course of shingles, creating a visibly crooked roofline from the ground.
- Leaving Gaps at the Rake/Eave Intersection: The corner where the rake meets the eave is a prime leak location. Always wrap the rake edge over the eave edge and seal the corner fold with roofing cement.
Frequently Asked Questions
Can I install drip edge over existing shingles during a repair?
No. Drip edge must be installed directly to the roof deck. If you are replacing damaged fascia or adding drip edge to an older home that lacks it, you must carefully lift the first course of shingles, remove the nails along the bottom edge of the underlayment, slide the drip edge underneath, and re-nail the shingles. Simply nailing it over the shingles will void the shingle manufacturer's warranty and fail to protect the deck.
Is drip edge required for metal roofing systems?
While the IRC specifically mandates drip edge for asphalt shingles, the Metal Construction Association (MCA) and most standing seam metal roof manufacturers strongly require it to prevent water from wicking back under the metal panels. For metal roofs, a specialized Z-flashing or extended drip edge is often used to accommodate the thicker profile of the metal panels and closure strips.
How do I handle drip edge at a valley?
Drip edge does not run through a valley. Instead, the valley flashing (whether open metal or woven shingles) handles the water diversion. The drip edge from the intersecting eaves should terminate cleanly at the edge of the valley flashing, sealed with roofing cement to prevent water from migrating behind the valley metal.