What Is TPO Roofing Material? Repair and Maintenance Guide
Learn what TPO roofing material is and how to maintain it. Expert guide on TPO repair costs, seam welding, puncture fixes, and upkeep.

Understanding TPO: The Basics for Facility Managers
Thermoplastic Polyolefin (TPO) is a single-ply reflective roofing membrane widely used in commercial and residential low-slope applications. If you are asking, 'what is TPO roofing material?' the technical answer is a flexible, synthetic blend of polypropylene and ethylene-propylene rubber, reinforced with polyester scrim. Unlike EPDM (rubber) or PVC, TPO offers a unique balance of high heat reflectivity, chemical resistance, and heat-weldable seams. According to the Single-Ply Roofing Industry (SPRI), TPO currently holds over 40% of the commercial low-slope roofing market due to its energy efficiency and cost-effectiveness.
However, TPO is not invincible. Thermal shock, foot traffic from HVAC technicians, and improper initial welding can lead to membrane failures. Understanding how to inspect, repair, and maintain TPO is critical for extending its 20- to 30-year life expectancy.
2026 TPO Membrane Quick Specs
- Standard Thicknesses: 45-mil, 60-mil (current commercial standard), 80-mil (high-traffic/hail zones).
- Seam Method: Hot-air welding (creates a monolithic, permanent bond).
- Reflectivity: Initial solar reflectance of 0.80+ (Energy Star rated).
- Average Installed Cost: $5.50 to $9.00 per square foot.
Top 4 TPO Roof Failure Modes and How to Spot Them
Before initiating repairs, facility managers must correctly identify the failure mode. TPO behaves differently than modified bitumen or EPDM, and applying the wrong fix can void manufacturer warranties like those offered for GAF EverGuard TPO systems.
1. Seam Delamination and Splitting
TPO expands and contracts significantly with temperature fluctuations. If the initial installation relied on improper heat settings or contaminated surfaces, seams will split. Visual Cue: Look for 'fishmouths' (small triangular openings at seam overlaps) or visible peeling along the 3-inch weld lines.
2. Punctures and Abrasions
While the polyester scrim provides tensile strength, the top ply can be punctured by dropped tools, sharp gravel, or unauthorized foot traffic. Visual Cue: Localized tears, often concentrated around HVAC units, skylights, or roof hatches.
3. Fastener Back-Out (Tenting)
In mechanically attached TPO systems, wind uplift and thermal movement can cause the metal fasteners to back out of the insulation board, pushing up against the membrane. Visual Cue: Small, raised bumps or 'tents' in a grid pattern across the roof field, often wearing through the membrane over time.
4. Biological Growth and Dirt Accumulation
TPO resists algae, but dirt accumulation in ponding water areas creates a substrate for mold and biological growth, which degrades the reflective properties and can seep into micro-fissures. Visual Cue: Dark, streaky patches in low-lying areas or near clogged drains.
Step-by-Step TPO Puncture and Seam Repair Guide
Repairing TPO requires specialized equipment. You cannot use standard asphalt cements or EPDM peel-and-stick tapes on TPO membranes. The repair must be chemically and thermally compatible. Below is the professional protocol for repairing a standard 4-inch puncture.
Required Tools and Materials
- Hot-air welding gun (e.g., Leister Triac S with a 40mm flat nozzle)
- 60-mil TPO repair membrane (matching the existing manufacturer if possible)
- TPO splice wash or specialized membrane cleaner
- Silicone seam roller
- Blunt-nosed seam probe
The Repair Protocol
- Clean the Area: Wipe a 6-inch radius around the puncture using TPO splice wash and a clean, lint-free rag. Allow it to flash off completely. Dirt or moisture will cause the weld to fail.
- Cut the Patch: Cut a piece of 60-mil TPO membrane that extends at least 2 inches beyond the puncture in all directions. Crucial Step: Round the corners of the patch with scissors. Sharp corners catch wind and peel up over time.
- Set the Welder: Set your hot-air gun between 1,000°F and 1,150°F. (Note: Ambient temperature dictates exact settings; colder days require higher heat and slower speeds).
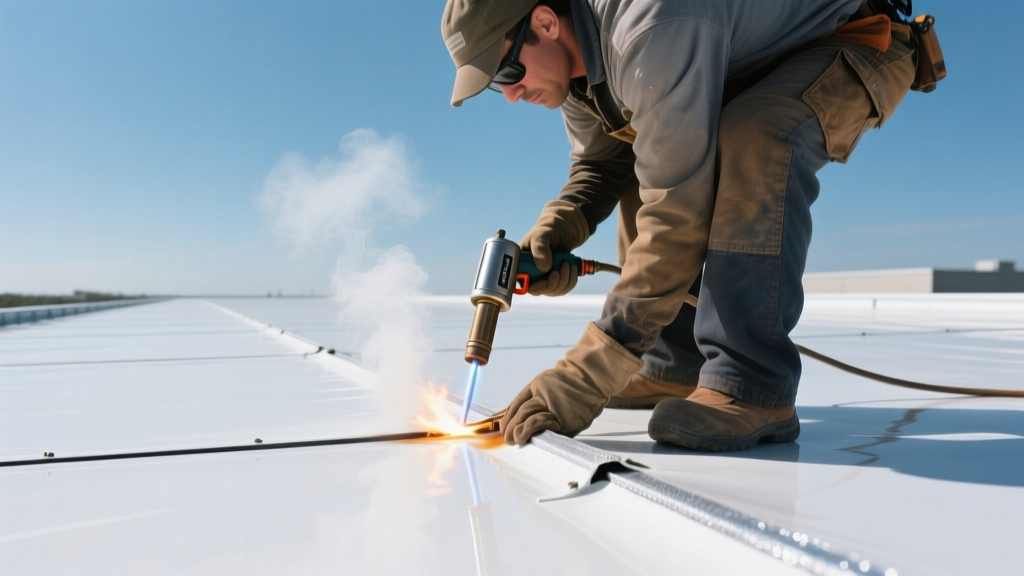
- Execute the Weld: Insert the flat nozzle between the patch and the existing roof membrane. Move the gun steadily while immediately following behind with the silicone roller, applying firm, even pressure to fuse the layers.
- Probe the Seam: Once cooled (usually 30 seconds), run a blunt-nosed seam probe along the entire perimeter of the patch. If the probe catches or slips under the edge, re-weld that specific spot.
TPO Repair vs. Replacement: A Cost-Benefit Matrix
Deciding whether to patch, re-cover, or fully replace a TPO roof depends on the extent of the degradation. Use this matrix to evaluate your 2026 budget allocation.
| Issue Scope | Recommended Action | Estimated Cost (2026) | Life Expectancy Added |
|---|---|---|---|
| Isolated punctures (<10% of roof) | Spot heat-weld patches | $350 - $600 per service call | Maintains original warranty |
| Widespread seam failure / UV chalking | Acrylic or Silicone Roof Coating | $3.00 - $5.50 per sq. ft. | 10 - 15 years |
| Saturated insulation / >25% membrane failure | Full Tear-Off and Replacement | $7.50 - $12.00 per sq. ft. | 20 - 30 years (New System) |
Preventative Maintenance: Extending Your TPO Membrane's Life
The National Roofing Contractors Association (NRCA) emphasizes that proactive maintenance is the single highest ROI activity for commercial roofing. TPO requires specific maintenance routines to prevent minor issues from escalating into interior water damage.
- Install Walkway Pads: Never allow HVAC contractors to walk directly on TPO. Install 30-inch wide TPO-coated walkway mats leading to all rooftop units, exhaust fans, and hatches.
- Bi-Annual Drain Clearing: TPO is highly resistant to water, but ponding water exceeding 48 hours accelerates dirt buildup and biological growth, which compromises the reflective coating.
- Infrared Moisture Surveys: Every 3 to 5 years, hire a certified thermographer to scan the roof. This identifies trapped moisture beneath the TPO membrane in the polyiso insulation before it causes structural deck rot.
Expert Warning: Never use asphalt-based roof cements, aluminum coatings, or EPDM lap sealants on a TPO roof. The petroleum distillates in these products will chemically attack the TPO membrane, causing it to swell, blister, and permanently degrade.
Frequently Asked Questions (FAQ)
Can I coat an aging TPO roof instead of replacing it?
Yes, provided the membrane is structurally sound and the insulation is dry. TPO must be thoroughly power-washed and primed with a specialized TPO adhesion promoter (like GAF TPO Bonding Adhesive or Carlisle TPO Primer) before applying a silicone or urethane roof coating. Skipping the primer will result in the coating peeling off within 12 months.
How do I find a leak on a large TPO commercial roof?
Water can travel horizontally beneath the TPO membrane for dozens of feet before dripping through the roof deck. The most reliable method is electronic leak detection (ELD) or vector mapping, which uses low-voltage electricity to pinpoint exact breaches in the membrane, even if they are microscopic.
Does TPO shrink over time like EPDM?
No. Unlike EPDM, which is a thermoset rubber that can shrink and pull away from flashings over decades, TPO is a thermoplastic. It does not experience the same permanent dimensional shrinkage, making it highly stable around perimeter edge metals and penetrations.
Written by
David NakamuraDavid Nakamura is a licensed architect (AIA) and construction technology writer focused on sustainable building methods, mass timber engineering, and high-performance building envelopes. He holds a Master of Architecture from the University of Washington and is a certified Passive House Consultant (CPHC). David spent eight years at the Seattle firm Mithun, where he led the design of three LEED Platinum projects, before founding his own practice specializing in net-zero residential design. He serves on the editorial advisory board of GreenBuilder Magazine and has authored peer-reviewed papers on cross-laminated timber (CLT) connections for the Journal of Structural Engineering. In his spare time, David teaches woodworking at Pratt Fine Arts Center and kayaks the Puget Sound.
More from David Nakamura
View all
Construction Cost
Labor Cost to Build a Deck Per Sq Ft: 2026 Installation Guide
Discover the exact labor cost to build a deck per sq ft in 2026. This installation guide breaks down contractor rates, complexity factors, and hidden fees.
Aug 4, 2026

Construction Cost
How Much Does It Cost to Build a 3 Bedroom House? Financing Guide
Learn exactly how much it costs to build a 3 bedroom house and explore 2026 financing options, construction loan types, and budget frameworks for your build.
Aug 4, 2026

Construction Cost
Cost to Build a Tennis Court: 2026 Guide
How much does it cost to build a tennis court in 2026? Breakdowns for asphalt, concrete, and synthetic surfaces plus fencing and lighting.
Jul 30, 2026