Rubber Roofing Material: Complete EPDM Guide for Flat Roofs
Discover everything about EPDM rubber roofing material, including 2026 costs, installation steps, thickness choices, and common failure modes.

The Anatomy of EPDM Rubber Roofing Material
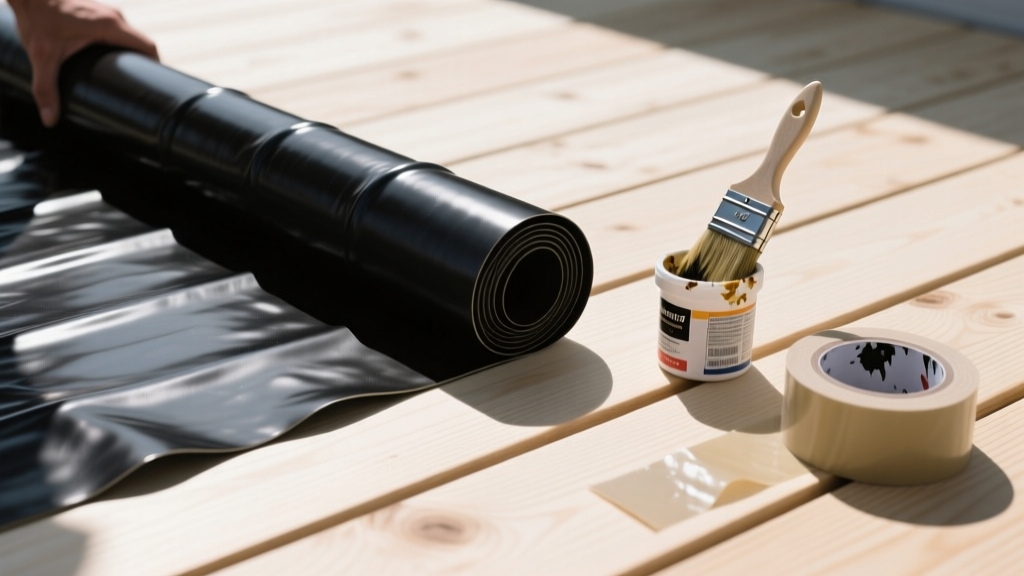
Ethylene Propylene Diene Monomer (EPDM) is a synthetic rubber membrane engineered specifically for low-slope and flat roof applications. Unlike thermoplastic membranes such as TPO or PVC, which are heat-welded at the seams, EPDM is a thermoset material. This means its molecular structure is cross-linked during manufacturing, preventing it from melting or re-softening under high heat. Instead, seams are chemically bonded using specialized primers and butyl-backed seam tapes.
The material is primarily manufactured in two colors: black and white. Black EPDM contains carbon black, which inherently protects the membrane from ultraviolet (UV) radiation by absorbing the UV rays and converting them into heat. White EPDM utilizes titanium dioxide to reflect UV rays, offering superior cool-roof energy efficiency but requiring strict surface preparation protocols before splicing to remove the powdery surface residue.
Membrane Thickness and Reinforcement Matrix
Selecting the correct mil thickness and reinforcement type dictates the membrane's puncture resistance and overall lifespan. While 45-mil was the industry standard decades ago, modern building codes and insurance requirements frequently mandate 60-mil as the baseline for commercial structures.
| Specification | Thickness | Puncture Resistance | Best Application | Relative Material Cost |
|---|---|---|---|---|
| Non-Reinforced | 45-mil | Low | Residential garages, covered porches | $ |
| Non-Reinforced | 60-mil | Medium | Standard commercial flat roofs, residential low-slope | $$ |
| Polyester-Reinforced | 60-mil | High | Mechanically attached systems, high-wind zones | $$$ |
| Non-Reinforced | 90-mil | Very High | Heavy foot traffic roofs, ballasted systems | $$$$ |
2026 Cost Breakdown: Material and Labor
Pricing for rubber roofing material fluctuates based on petroleum byproducts and supply chain logistics. As of 2026, here is the realistic cost breakdown for a standard 60-mil black EPDM system:
- Membrane Only (60-mil Black): $1.15 to $1.45 per square foot.
- Membrane Only (60-mil White): $1.60 to $1.95 per square foot (white carries a premium due to titanium dioxide and specialized manufacturing).
- Accessories (Primer, Tape, Adhesives, Flashing): $0.80 to $1.20 per square foot.
- Insulation (Polyiso, 2-inch R-13): $1.30 to $1.70 per square foot.
- Total Installed Cost: $5.50 to $8.50 per square foot for a fully adhered system over new polyiso insulation.
Installation Systems: Adhered vs. Mechanically Attached
The method used to secure the rubber roofing material to the substrate fundamentally alters the roof's wind uplift rating and aesthetic finish.
Fully Adhered Systems
In a fully adhered system, the membrane is glued directly to the insulation cover board using a low-VOC water-based or solvent-based bonding adhesive (e.g., Elevate Bonding Adhesive). Pros: Superior wind uplift resistance, smooth aesthetic without fastener dimples, ideal for complex roof geometries. Cons: Highly weather-dependent during installation; adhesive will not cure properly if applied below 40°F (4°C) or in high humidity.
Mechanically Attached Systems
The membrane is secured using specialized batten bars and screws driven into the structural deck, with the seams overlapping the fasteners. Pros: Faster installation, less dependent on ambient temperature, lower material cost (no expensive bonding adhesive). Cons: Visible fastener lines (billowing in high winds), requires reinforced membrane, lower overall wind uplift rating compared to fully adhered.
Critical Failure Modes and Edge Cases
While EPDM boasts a 30- to 50-year lifespan, improper detailing leads to premature failure. According to the Whole Building Design Guide (WBDG), the majority of low-slope roof failures occur at penetrations and transitions, not in the field of the membrane.
EPDM is highly resistant to water, but chronic ponding water (standing for more than 48 hours) accelerates the breakdown of seam primers. Furthermore, as EPDM ages, it naturally shrinks. If the membrane was installed without adequate slack at the perimeter and penetrations, this shrinkage will pull the membrane taut, causing it to tear away from edge metal or HVAC curbs.
The White EPDM Splicing Gotcha
If you are installing white EPDM, you cannot simply apply primer and tape as you would with black. The titanium dioxide used to create the white color leaves a microscopic powdery residue on the surface. If you apply primer directly over this dust, the chemical bond will fail within months. You must scrub the seam area with a specialized cleaner (like Carlisle Splice Wash) and a Scotch-Brite pad until the rag wipes completely clean before applying primer.
The 5-Step Seam Taping Protocol
Seam failure is the number one cause of leaks in rubber roofing systems. Follow this exact protocol for 3-inch or 6-inch butyl seam tape applications:
- Clean the Seam: Wipe a 6-inch wide area along the overlap with a clean rag and membrane cleaner to remove dirt and oils.
- Apply Primer: Using a specialized primer applicator pad (not a standard paint roller), apply a thin, even coat of seam primer (e.g., QuickPrime Plus) to both the top and bottom mating surfaces.
- The Knuckle Test (Dwell Time): Allow the primer to flash off. This typically takes 10 to 20 minutes depending on temperature. Test by pressing the back of your knuckle into the primer; it should feel tacky but should NOT transfer to your skin. If it transfers, it is too wet and will trap solvents, causing the tape to bubble later.
- Apply Tape: Peel the backing off the butyl tape and center it over the seam. Use a heavy silicone seam roller, applying firm pressure from the center outward to eliminate air pockets.
- Roll the Edges: Finish by rolling the extreme edges of the tape with a metal edge roller to ensure a watertight seal against the membrane.
Industry Standards and Maintenance
To ensure your installation meets rigorous industry benchmarks, always refer to the guidelines published by the Single-Ply Roofing Institute (SPRI). SPRI provides critical testing standards for wind uplift, edge detailing, and membrane durability.
Maintenance for EPDM is minimal but non-negotiable. Conduct bi-annual inspections focusing on three areas: the integrity of the perimeter edge metal sealant, the condition of pipe boot flashings (which degrade faster than the field membrane due to thinner material), and the adhesion of lap seams. If you notice the edges of a seam tape lifting, do not simply caulk over it with silicone. Cut out the failed section, re-prime, and apply a patch of uncured EPDM flashing tape to restore the chemical bond.
Written by
Sarah WhitfieldSarah Whitfield is a chartered quantity surveyor (MRICS) and construction cost analyst with 15 years of experience in material pricing, procurement strategy, and project budgeting. She earned her degree in Construction Management from the University of Reading (UK) and has worked on projects ranging from $2M custom homes to $180M mixed-use developments across North America and Europe. Sarah currently leads cost estimating for BuildMat Insight, maintaining a proprietary database of 4,000+ material price points updated quarterly. She is a frequent contributor to RSMeans cost data panels and has presented at the International Cost Engineering Council (ICEC) congress. Based in Denver, CO, Sarah is an avid trail runner and volunteer mentor for Women in Construction.
More from Sarah Whitfield
View all
Wood & Lumber
What Are the Different Types of Wood? A Builder's Guide
Compare structural softwoods, finish hardwoods, and engineered lumber. Analyze Janka ratings, MOE values, and 2026 pricing for construction.
Aug 4, 2026

Walls & Panels
Steel Framing vs Wood Framing: Corrosion and Moisture Defense
Compare steel framing vs wood framing for moisture resistance. Learn about galvanized coatings, condensation risks, and corrosion protection strategies.
Jul 21, 2026

Stone & Masonry
How to Cut Stone Veneer: Wet Saw vs Grinder Comparison
Compare the best tools for cutting stone veneer. We review wet saws, angle grinders, and chop saws to help you achieve clean, chip-free cuts.
Jul 21, 2026