Installing Water Resistant Laminate Flooring: Moisture-Proof Guide
Learn the exact installation steps for water resistant laminate flooring, including subfloor moisture testing, vapor barriers, and edge sealing.
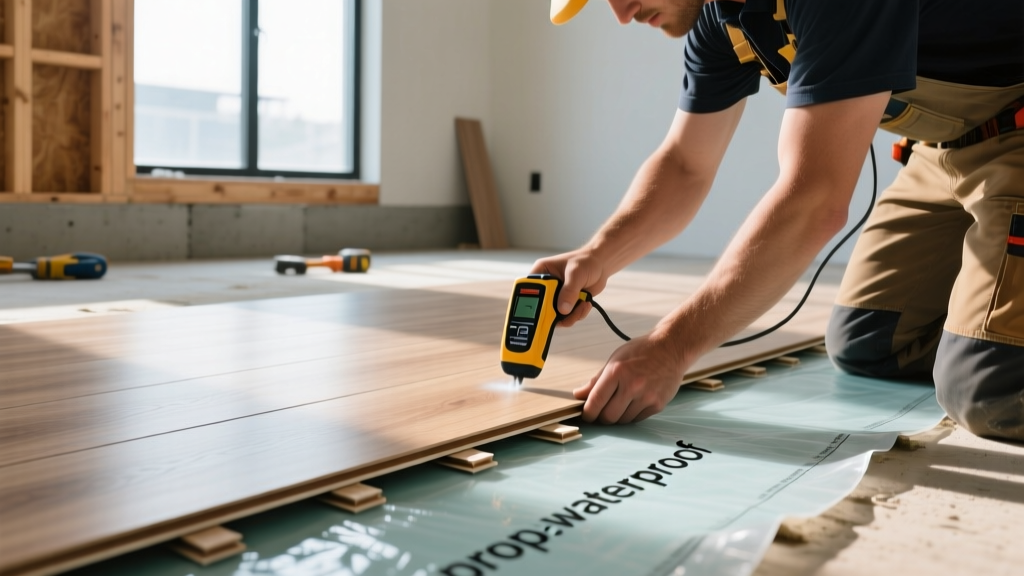
The 'Water-Resistant' Caveat: Why Installation Dictates Performance
Marketing materials often blur the line between waterproof and water-resistant. As of 2026, advanced water resistant laminate flooring features hydrophobic edge coatings—typically paraffin wax or proprietary polymeric seals—that repel surface spills for up to 72 hours. However, the high-density fiberboard (HDF) core remains inherently vulnerable to prolonged moisture exposure. The difference between a floor that survives a flooded dishwasher and one that requires total replacement lies entirely in the installation methodology. Proper subfloor moisture mitigation, precise click-lock assembly, and rigorous perimeter sealing transform a water-resistant product into a highly resilient surface.
Phase 1: Subfloor Moisture Testing and Tolerances
Installing over a damp subfloor traps moisture against the HDF core, leading to hydrostatic pressure that bypasses surface coatings and causes edge-curling. Before unboxing a single plank, you must quantify the subfloor's moisture content using industry-standard metrics. The National Wood Flooring Association (NWFA) mandates strict testing protocols to prevent post-installation failures.
| Subfloor Type | Testing Method | Maximum Allowable Limit | Recommended Tool (2026) |
|---|---|---|---|
| Concrete Slab | Calcium Chloride Test (MVER) | 3 lbs / 1,000 sq ft / 24 hrs | VapoorQuant Chloride Test Kit |
| Concrete Slab | Relative Humidity (RH) Probe | 75% RH (at 40% depth) | Tramex CME5 Concrete Encounter |
| Wood / Plywood | Pin-type Moisture Meter | 12% Moisture Content (MC) | Wagner Meters Orion 910 |
| Existing Vinyl / Tile | Visual & Tramex Surface Scan | No visible efflorescence/mold | Tramex Skipper Plus 5 |
If concrete readings exceed these thresholds, you must apply a penetrating silicate moisture mitigation system (such as Mapei Primer E or Bostik Ultra-Set) before proceeding. Attempting to install over high-moisture concrete with only a plastic vapor barrier will inevitably result in trapped alkaline moisture degrading the laminate's backing layer.
Phase 2: Vapor Retarders and Acclimation Protocols
Water resistant laminate requires a continuous vapor retarder when installed over below-grade or on-grade concrete. The industry standard is a 6-mil polyethylene film with a perm rating of less than 0.1. In 2026, many premium underlayments (like QuietWalk Luxury Vinyl or Roberts First Step) feature an attached 2-mil to 4-mil film lip. If your underlayment's attached film is thinner than 6-mil, you must lay down a separate 6-mil poly sheeting first, overlapping seams by a minimum of 8 inches and sealing them with 3-inch moisture-resistant seaming tape.
Phase 3: Click-Lock Assembly and Joint Sealing Techniques
The click-lock profile is the primary vulnerability in any laminate floor. While the top edge may feature a hydrophobic bevel, the internal locking ridges are raw HDF. When installing in moisture-prone areas (kitchens, mudrooms, half-baths), you must augment the mechanical lock with a chemical seal.
The 30-Degree Angle and Seam Sealing Method
- Apply Joint Sealant: Before engaging the short-end (head) joints of the first two rows, apply a continuous, micro-thin bead of 100% silicone or manufacturer-approved proprietary joint glue (e.g., Pergo Sealant or Unika ColorFill) into the upper groove of the click-lock profile.
- Engage the Long Edge: Hold the plank at a 20- to 30-degree angle to the installed row. Push it fully into the long-edge groove until the bottom lip seats securely.
- Drop and Lock: Lower the plank flat. As the short-end joint closes, the sealant will displace slightly, filling any microscopic gaps in the HDF locking ridges.
- Wipe Immediately: Use a damp microfiber cloth to wipe away any extruded sealant within 60 seconds. Cured silicone on a textured laminate surface is nearly impossible to remove without damaging the wear layer.
Cost Note: A standard 10oz tube of 100% kitchen-grade silicone costs between $8 and $12 in 2026 and is sufficient to seal the short joints of approximately 150 square feet of flooring.
Phase 4: Perimeter Waterproofing (The Critical Edge Seal)
The most common failure mode in water resistant laminate is not surface pooling; it is perimeter wicking. Laminate requires a 3/8-inch to 1/2-inch expansion gap around all vertical obstructions (walls, cabinets, pipes). If this gap is left open and covered only by a baseboard, surface water will migrate under the baseboard, pool in the expansion gap, and wick into the unprotected side-edges of the floor, causing severe swelling.
Step-by-Step Perimeter Sealing
- Insert Backer Rod: Push a 3/8-inch closed-cell polyethylene backer rod into the expansion gap. This prevents the silicone from bonding to the subfloor, allowing the floor to expand and contract without tearing the sealant bead.
- Apply Silicone Caulk: Run a continuous bead of 100% silicone caulk (matching the floor or baseboard color) over the backer rod, filling the gap completely to the top of the laminate surface.
- Tool the Joint: Smooth the silicone with a caulking tool or a wet finger to create a slight concave cove. This cove directs surface water away from the gap and back onto the floor.
- Install Baseboards: Install baseboards and shoe molding over the cured silicone, ensuring the trim is nailed to the wall studs, never through the laminate floor.
According to the Environmental Protection Agency (EPA), controlling indoor moisture is the primary defense against mold proliferation. Sealing the perimeter not only protects the laminate HDF core but also prevents surface spills from penetrating the subfloor where hidden mold can develop.
Common Failure Modes and Troubleshooting
Even with water resistant laminate, improper installation will void the manufacturer's moisture warranty. Watch for these specific failure indicators:
Symptom: The edges of adjacent planks rise slightly above the surface, creating a visible and tactile 'lip'.
Cause: Moisture has penetrated the unsealed expansion gap or an unglued short-end joint, causing the HDF core to expand horizontally and vertically.
Fix: If caught within 24 hours, aggressively dehumidify the room (target <30% RH) and place 50lb weights on the affected seams. If the HDF fibers have permanently ruptured, the affected planks must be unclicked and replaced.
Symptom: Planks push upward at the long seams, creating a tent-like ridge.
Cause: Insufficient expansion gap at the perimeter. As the floor absorbs ambient humidity and expands, it runs out of room and buckles upward.
Fix: Remove the baseboards and shoe molding on the nearest wall. Cut an additional 1/4-inch off the laminate edge using an oscillating multi-tool to restore the required 1/2-inch expansion gap. The floor will lay flat within 48 hours.
By treating water resistant laminate not as a waterproof membrane, but as a moisture-managed system, you ensure the flooring withstands the realities of high-traffic, spill-prone environments. The investment in precise moisture testing, chemical joint sealing, and perimeter waterproofing yields a floor that performs flawlessly for decades.