Applying Lightweight Waterproof Material: Pro Techniques
Master the application techniques for lightweight waterproof material on flat roofs. Learn substrate prep, mil-thickness control, and detailing.

Structural Load Analysis and Material Selection
When retrofitting aging commercial flat roofs or waterproofing cantilevered balconies, structural dead load is a primary constraint. Traditional modified bitumen or concrete screed overlays add 1.5 to 3.0 pounds per square foot (psf). In contrast, modern lightweight waterproof material systems—specifically liquid-applied polyurethane (PU) and high-solids silicone membranes—add only 0.15 to 0.25 psf. This 85% reduction in dead load eliminates the need for expensive structural steel reinforcement in most retrofit scenarios.
Selecting the correct lightweight waterproof material depends on the substrate and ponding water exposure. Polyurethane systems, such as Sikalastic-618, offer superior tensile strength and puncture resistance, making them ideal for high-traffic pedestrian decks. Conversely, 100% silicone coatings like GacoRoof are completely immune to ponding water degradation, making them the mandatory choice for low-slope roofs with poor drainage.
| Membrane Type | Dry Mil Thickness | Weight (psf) | Ponding Water Resistance | Material Cost (2026) |
|---|---|---|---|---|
| 100% Silicone (e.g., Gaco) | 20 - 30 mils | 0.18 - 0.22 | Excellent | $0.45 - $0.65 / sq ft |
| Polyurethane (e.g., Sika) | 45 - 60 mils | 0.20 - 0.25 | Good (requires slope) | $0.80 - $1.10 / sq ft |
| PMMA (e.g., Kemper System) | 80 - 100 mils | 0.25 - 0.30 | Excellent | $1.50 - $2.20 / sq ft |
| Modified Bitumen (Traditional) | N/A (2-ply) | 1.50 - 2.50 | Moderate | $1.20 - $1.80 / sq ft |
Substrate Preparation: The 80% Rule
Industry data from the National Roofing Contractors Association (NRCA) indicates that over 80% of liquid-applied membrane failures stem from inadequate substrate preparation. Lightweight waterproof materials rely entirely on chemical and mechanical adhesion; they do not have the mass to bridge structural gaps or resist hydrostatic pressure from trapped moisture.
Never apply a liquid membrane over a substrate with a moisture content exceeding 4% for concrete or 19% for wood decking. Use a Tramex Concrete Moisture Meter to verify. Trapped moisture will vaporize under solar thermal loading, causing catastrophic blistering and delamination.
Step-by-Step Preparation Protocol
- Mechanical Profiling: Power wash the surface at a minimum of 3,000 PSI. For concrete substrates, follow up with diamond grinding (using 30-grit segments) to open the pores and remove laitance.
- Crack Bridging: Route out all cracks wider than 1/16-inch using a V-notch grinder. Fill with a flexible polyurethane sealant like Sikaflex-1a, allowing 24 hours for full cure.
- Primer Application: Apply a specialized primer to ensure chemical bonding. For porous concrete, use an epoxy-based primer (e.g., Sika Primer-600) at a spread rate of 300 square feet per gallon. For single-ply retrofits (TPO/EPDM), use a specific adhesion promoter designed for the target polymer.
Application Techniques by Membrane Chemistry
The application methodology varies drastically between silicone and polyurethane chemistries. Treating them interchangeably is a primary cause of field failures.
100% Silicone Coatings (High-Solids)
Silicone membranes are moisture-cured and typically feature 90% to 96% volume solids. Because they do not shrink during curing, the wet mil thickness applied is nearly identical to the final dry mil thickness.
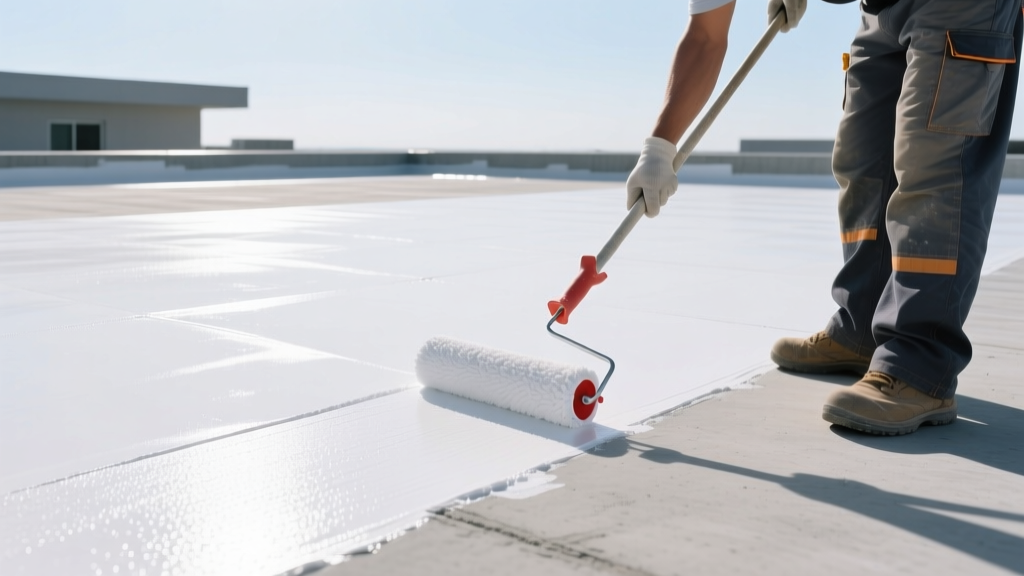
- Tooling: Use a 3/8-inch nap roller for edges and a medium-pressure airless sprayer (minimum 3,000 PSI, 0.021 to 0.025 tip size) for the field.
- Technique: Silicone traps air easily. When rolling, you must 'back-roll' immediately after the initial pass to pop micro-bubbles and force the material into the substrate pores. Failure to back-roll results in pinholing, which compromises the continuous waterproofing envelope.
- Bleed-Through Prevention: If applying over existing asphalt or bitumen, a bleed-tracker primer is mandatory. Without it, asphalt oils will migrate through the silicone, causing permanent yellow/brown staining within 60 days.
Liquid-Applied Polyurethane (PU)
Polyurethane systems are solvent-based or hybrid, meaning they contain volatile organic compounds (VOCs) that evaporate during curing. A PU membrane applied at 45 wet mils may yield only 25 dry mils.
- Tooling: Apply the base coat using a notched squeegee (1/16-inch notch) to ensure an exact, uniform thickness, followed immediately by a short-nap (1/4-inch) roller to level the ridges.
- Recoat Windows: PU systems have strict chemical recoat windows, typically between 12 and 36 hours at 70°F. If the 36-hour window is missed, the surface must be mechanically abraded and wiped with a solvent (like xylene) to re-establish the chemical link between coats.
Detailing Penetrations and Edge Terminations
The field of a lightweight waterproof material rarely fails; the failures occur at transitions, drains, and parapet walls. According to technical guidelines from Gaco Western, 90% of roof leaks originate within 3 feet of a penetration.
For all inside and outside corners, HVAC curbs, and pipe penetrations, a reinforcing fleece must be embedded into the base coat. Use a polyester or glass-fiber mat (such as Sika Reemat Premium). The application sequence is critical:
- Apply a thick band of the base membrane (approx. 40 wet mils) extending 4 inches on both sides of the joint.
- Immediately embed the reinforcing fleece into the wet material, using a stiff brush to push it down and eliminate all wrinkles and air pockets.
- Apply a second layer of membrane directly over the fleece while it is still tacky, ensuring the fabric is completely encapsulated and no white fibers are visible.
- Terminate all edge details with a metal termination bar fastened every 8 inches, sealed with a bead of polyurethane mastic, and fully encapsulated in the final topcoat.
Quality Control and Mil-Thickness Verification
Applying a lightweight waterproof material too thin voids manufacturer warranties; applying it too thick causes solvent entrapment, wrinkling, and extended cure times. Quality control requires continuous wet-mil testing.
Use a ribbon-type wet mil gauge. Drag the gauge through the freshly applied membrane immediately after the roller passes. If the target is 30 dry mils for a silicone with 95% volume solids, your wet mil reading must be 31.5 mils. Test every 2,000 square feet and document the readings with timestamped photographs for the warranty file.
Common Application Failures and Troubleshooting
Blistering and Outgassing
Cause: Applying a non-breathable membrane over a damp substrate or applying the coating too thickly in a single pass, trapping solvents.
Fix: Cut an 'X' into the blister, allow the trapped moisture/solvent to escape for 48 hours, inject a flexible sealant, and patch with reinforcing fleece and topcoat.
Alligatoring (Surface Cracking)
Cause: Exceeding the maximum single-coat thickness. In polyurethanes, applying more than 30 wet mils in one pass prevents the bottom layer from curing, leading to surface tension cracks as the top layer dries and shrinks.
Fix: Sand the alligatored surface smooth, clean with solvent, and apply two thinner coats (15-20 mils each) spaced 24 hours apart.
Poor Adhesion at Edges
Cause: 'Picture framing'—where the roller fails to push the material fully into the 90-degree corner where the deck meets the parapet.
Fix: Always use a stiff-bristled brush to 'cut in' all corners and edges before rolling the main field. Ensure a minimum 1/8-inch bead of material is built up in the cant (corner) area.
Mastering the application of lightweight waterproof materials requires strict adherence to manufacturer specifications regarding ambient conditions, mil thickness, and detailing. By prioritizing substrate preparation and utilizing precise application techniques, contractors can deliver high-performance, low-weight waterproofing systems that protect structures for decades without overloading the building envelope.
Written by
James ThorntonJames Thornton is a construction industry veteran with 25 years of hands-on experience in wood framing, lumber grading, and residential building codes. He started as a framing carpenter in rural Oregon, earned his ICC Residential Building Inspector certification, and eventually became a senior plan reviewer for the City of Portland Bureau of Development Services. James holds a B.S. in Wood Science & Technology from Oregon State University and is a certified lumber grader through the West Coast Lumber Inspection Bureau (WCLIB). He has inspected over 3,000 residential construction sites and authored the city's internal guide on advanced framing techniques (2x6 at 24" O.C.). James lives in Bend, OR, where he builds custom timber-frame cabins and competes in lumberjack sports.
More from James Thornton
View all
Insulation
Best Home Insulation Materials: Complete 2026 Guide
Compare top home insulation materials for 2026. Find R-values, installed costs per square foot, and best uses for fiberglass, spray foam, and mineral wool.
Aug 4, 2026

Sustainable Building
Certify Your Green Building Material for LEED and WELL
Step-by-step guide to certifying a green building material for LEED v5 and WELL v2. Master EPDs, HPDs, and VOC limits for 2026 project specifications.
Aug 4, 2026

Stone & Masonry
Veneer Stacked Stone Panels: Interior Design & Style Showcase
Discover how veneer stacked stone panels transform interiors. Explore modern design profiles, material pairings, and technical installation specs.
Aug 4, 2026