How to Troubleshoot Moisture Resistant Building Materials Failures
Diagnose and fix common failures in moisture resistant building materials. Expert troubleshooting for mold, delamination, and coating blisters.

The Diagnostic Framework: Identifying Moisture Intrusion
When moisture resistant building materials fail, the result is rarely a simple leak. More often, it is a systemic breakdown involving vapor drive, hydrostatic pressure, or improper substrate preparation. The term "moisture resistant" is frequently conflated with "waterproof," leading to catastrophic assembly failures in high-humidity environments like commercial showers, below-grade foundations, and exterior cladding systems.
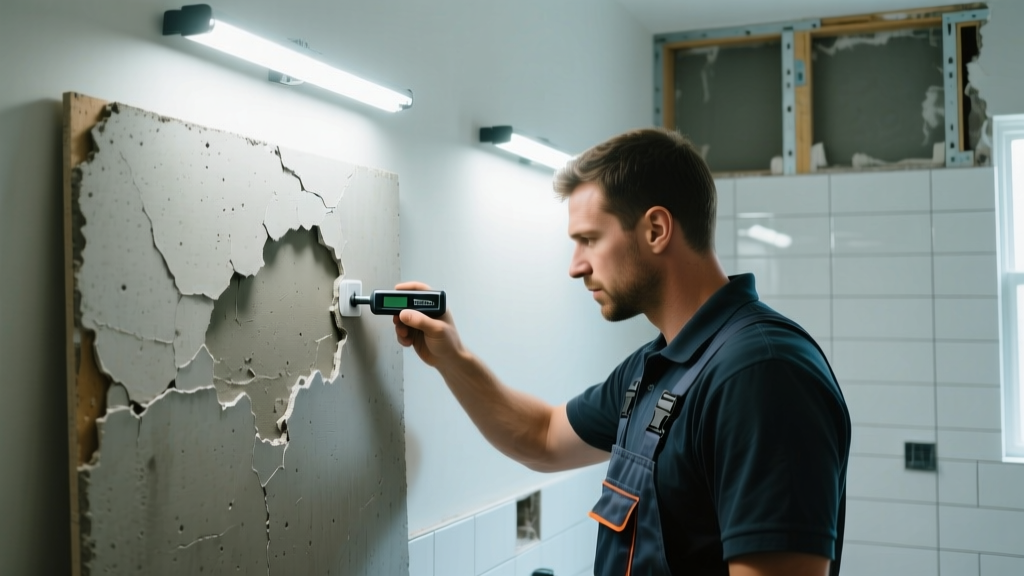
Before tearing out finishes, establish a diagnostic baseline. Use a pinless impedance meter, such as the Tramex Concrete Encounter Plus, to map the moisture gradient. Readings above 4.5% on the Tramex scale (or equivalent calcium carbide method readings) indicate that the substrate is holding excess water that will inevitably compromise secondary moisture barriers.
Surface pin meters only measure the top 1/4 inch of a substrate. A surface reading of 8% might mask a deeper core reading of 2%. Always pair surface scanning with deep-probe relative humidity testing (ASTM F2170) for concrete, or invasive probe testing for wood and cementitious assemblies.
Symptom 1: Blistering and Peeling Liquid Membranes
Liquid-applied waterproofing membranes, such as Laticrete Hydro Ban or Custom Building Products RedGard, are highly effective when installed correctly. However, they frequently blister, peel, or fail to cure in wet areas.
Root Cause Analysis
- Hydrostatic Pressure: Applying a liquid membrane to the negative side (interior) of a below-grade concrete wall will result in failure if the positive side (exterior) lacks proper drainage. Water pressure pushes the membrane off the substrate.
- High Alkalinity (pH): Fresh concrete and cementitious backer boards have a pH between 12 and 13. Most liquid membranes require a substrate pH of 10 or lower. High alkalinity breaks down the polymer emulsion, preventing adhesion.
- Improper Mil Thickness: Applying one thick coat instead of two cross-rolled thin coats traps solvents and water inside the film, leading to micro-blisters as the trapped moisture attempts to escape.
The Fix
- Test the substrate pH using a digital concrete pH meter. If above 10, neutralize the surface with a 5% muriatic acid solution, rinse thoroughly, and allow to dry.
- Verify the moisture vapor emission rate (MVER) using an ASTM F1869 calcium chloride test. The MVER must be below 5 lbs per 1,000 sq ft per 24 hours.
- Apply the membrane in two coats. For Hydro Ban, the wet film thickness must be 30-35 mils per coat, achieving a total dry film thickness of 20-25 mils. Use a wet mil gauge during application to verify.
Symptom 2: Cement Board Delamination and Fastener Pop
Cementitious backer boards, like USG Durock or James Hardie HardieBacker, are the industry standard for tile underlayments in wet areas. When these boards swell, delaminate, or exhibit fastener pop, the entire tile assembly is compromised.
Root Cause Analysis
The most common cause of cement board failure is treating it like drywall. Installers frequently screw the board directly to the subfloor or studs without a bedding layer, and they often use standard galvanized or phosphated drywall screws.
Standard screws corrode when exposed to the high alkalinity of the cement board and the moisture from the thinset. As the screw head rusts away, it loses its clamping force, leading to board movement, grout cracking, and eventual delamination. Furthermore, omitting the thinset bedding layer beneath the board creates a void space where water can pool and migrate.
Cement board does not add structural rigidity; it provides a dimensionally stable, water-resistant bonding surface. The 1/4-inch polymer-modified thinset bed beneath the board is mandatory to eliminate voids and transfer loads directly to the subfloor, preventing flex that breaks the moisture barrier.
The Fix
- Fasteners: Replace all corroded screws with alkali-resistant, self-drilling cement board screws (e.g., ITW Backer-On or Teks). These feature a ceramic or epoxy coating specifically designed to withstand high-pH environments.
- Bedding: Lift the board, apply a 1/4-inch notch trowel bed of ANSI A118.4 polymer-modified thinset to the subfloor, and re-seat the board immediately.
- Seams: Fill all joints with alkali-resistant fiberglass mesh tape and the same polymer-modified thinset. Never use standard drywall paper tape or joint compound in wet assemblies.
Symptom 3: Interstitial Condensation and Mold in Wall Cavities
When mold appears behind "waterproof" interior finishes, the issue is rarely bulk water intrusion. It is almost always interstitial condensation driven by a vapor drive imbalance. This occurs when moisture resistant building materials are used to create a "double vapor barrier," trapping ambient moisture inside the wall cavity.
Root Cause Analysis
According to the EPA's Guide to Mold and Moisture, mold requires moisture, a food source, and the right temperature. In modern, tightly sealed buildings, moisture generated indoors (from showers, cooking, or humidifiers) migrates outward during winter. If the exterior sheathing is wrapped in an impermeable foil-faced polyisocyanurate insulation, and the interior features a Class I vapor retarder (like polyethylene sheeting behind a tile shower), the moisture becomes trapped in the fiberglass or mineral wool batt insulation.
As the warm, moist interior air hits the cold exterior sheathing, it drops below the dew point, condensing into liquid water. The Building Science Corporation extensively documents how this double-barrier effect leads to concealed rot and mold growth within a single heating season.
The Fix
To resolve this, you must restore the drying potential of the wall assembly. The US Department of Energy recommends using variable-permeance (smart) vapor retarders in mixed climates.
- Remove the interior polyethylene sheeting or foil-faced rigid insulation.
- Install a smart vapor retarder, such as CertainTeed MemBrain. This material has a permeability of less than 1 perm when interior humidity is low (preventing winter vapor drive outward) but opens to over 15 perms when humidity rises (allowing the wall cavity to dry to the interior).
- Ensure the exterior cladding features a minimum 3/8-inch ventilated rainscreen gap to promote outward drying of the sheathing.
Moisture Tolerance Thresholds for Common Materials
Understanding the exact failure thresholds of your substrate is critical for troubleshooting. Refer to this matrix before applying any secondary moisture barrier or finish.
| Substrate Material | Max Moisture Content (CM / Pin Meter) | Max MVER (ASTM F1869) | Max Alkalinity (pH) | Common Failure Mode if Exceeded |
|---|---|---|---|---|
| Concrete Slab (On-Grade) | 4.0% CM | 3-5 lbs/1000 sq ft/24h | 9.0 | Adhesive emulsion breakdown, flooring cupping |
| Cement Backer Board | N/A (Dimensionally stable) | N/A | 10.0 (Pre-coating) | Liquid membrane peeling, fastener corrosion |
| Exterior Plywood (CDX) | 19.0% (Wood Moisture Equivalent) | N/A | N/A | Delamination, fungal decay, fastener withdrawal |
| Gypsum Wallboard (Moisture Resistant) | 1.0% (Surface) | N/A | N/A | Paper facing degradation, core softening, mold |
| Masonry / CMU | 6.0% Tramex Scale | N/A | 10.0 | Efflorescence, coating blistering, spalling |
Advanced Diagnostic Protocols and ASTM Standards
Relying on visual inspection alone is insufficient for diagnosing failures in moisture resistant building materials. Implement these standardized testing protocols to gather defensible data:
The ASTM D4263 Plastic Sheet Test: A rapid, qualitative field test for concrete moisture. Tape a 16x16 inch clear plastic sheet tightly to the concrete substrate. Wait 16 hours. If condensation forms on the underside of the plastic or the concrete darkens, the moisture vapor emission rate is too high for moisture-sensitive coatings or adhesives.
Thermal Imaging for Concealed Leaks
Use a FLIR or Seek Thermal infrared camera to identify thermal anomalies. Water has a high specific heat capacity and high thermal conductivity. A wet area inside a wall cavity will appear cooler than the surrounding dry insulation during the day (as evaporation cools the surface) and warmer at night. Look for temperature differentials of at least 2°F (1.1°C) to confidently map the extent of hidden moisture migration behind cementitious or tile assemblies.
Troubleshooting moisture failures requires moving beyond surface-level assumptions. By combining precise diagnostic tools, an understanding of vapor drive physics, and strict adherence to manufacturer thresholds for pH and moisture content, you can permanently resolve assembly failures and ensure the long-term integrity of your moisture resistant building materials.
Written by
James ThorntonJames Thornton is a construction industry veteran with 25 years of hands-on experience in wood framing, lumber grading, and residential building codes. He started as a framing carpenter in rural Oregon, earned his ICC Residential Building Inspector certification, and eventually became a senior plan reviewer for the City of Portland Bureau of Development Services. James holds a B.S. in Wood Science & Technology from Oregon State University and is a certified lumber grader through the West Coast Lumber Inspection Bureau (WCLIB). He has inspected over 3,000 residential construction sites and authored the city's internal guide on advanced framing techniques (2x6 at 24" O.C.). James lives in Bend, OR, where he builds custom timber-frame cabins and competes in lumberjack sports.
More from James Thornton
View all
Insulation
Best Home Insulation Materials: Complete 2026 Guide
Compare top home insulation materials for 2026. Find R-values, installed costs per square foot, and best uses for fiberglass, spray foam, and mineral wool.
Aug 4, 2026

Sustainable Building
Certify Your Green Building Material for LEED and WELL
Step-by-step guide to certifying a green building material for LEED v5 and WELL v2. Master EPDs, HPDs, and VOC limits for 2026 project specifications.
Aug 4, 2026

Stone & Masonry
Veneer Stacked Stone Panels: Interior Design & Style Showcase
Discover how veneer stacked stone panels transform interiors. Explore modern design profiles, material pairings, and technical installation specs.
Aug 4, 2026