Waterproof Jacket Material: Application Techniques for Pipes
Learn expert application techniques for waterproof jacket material on exterior pipes. Prevent CUI with proper PVC, aluminum, and elastomeric installs.
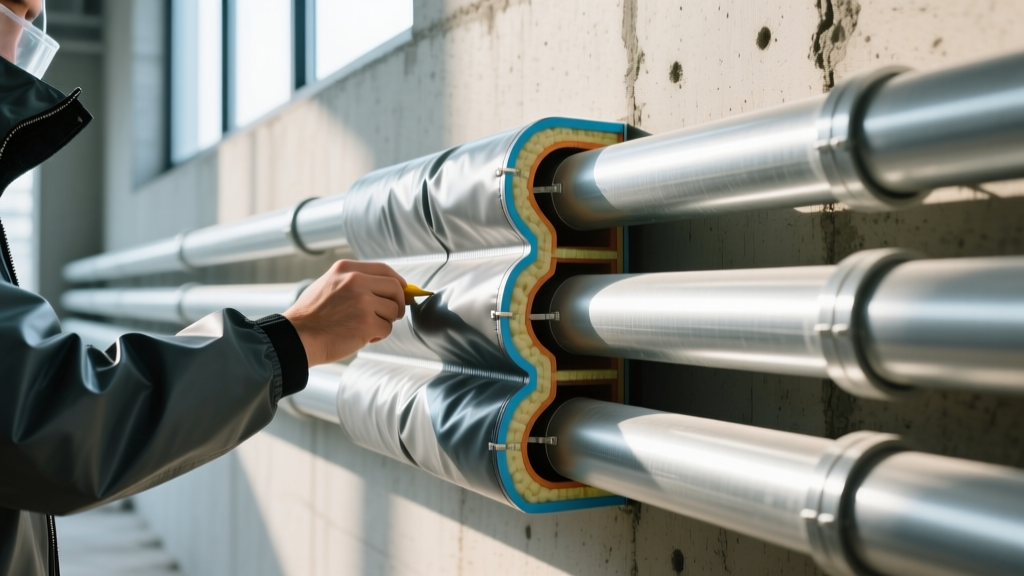
The Engineering Imperative: Preventing CUI Through Proper Jacketing
Corrosion Under Insulation (CUI) remains one of the most destructive and costly failure modes in commercial and industrial piping systems. When moisture breaches the thermal insulation layer, it becomes trapped against the pipe surface, accelerating oxidation and leading to catastrophic structural failures. The primary defense against this is the correct selection and meticulous application of a waterproof jacket material. As of 2026, advancements in polymer chemistry and metallurgical coatings have expanded the options available to contractors, but the fundamental application techniques dictate the system's lifespan. A premium jacket installed with improper overlap sequencing will fail faster than a budget jacket installed with precision fluid dynamics in mind.
According to the National Insulation Association (NIA) Design Guide, the jacketing system must function as a continuous, weather-tight envelope that accommodates thermal expansion while shedding water at every joint. This guide details the field-proven application techniques for the three dominant waterproof jacket materials used in modern mechanical insulation.
Material Selection Matrix: PVC vs. Aluminum vs. Elastomeric
Before initiating application, the specific environmental and thermal demands of the pipe run must dictate the material choice. The table below outlines the performance characteristics and 2026 market pricing for standard exterior applications.
| Material Type | Thickness / Spec | Max Temp Limit | UV & Impact Resistance | Avg. Cost (per sq. ft.) |
|---|---|---|---|---|
| Rigid PVC (Polyvinyl Chloride) | 0.020" - 0.030" (ASTM C1785) | 150°F (65°C) | Excellent UV / High Impact | $1.80 - $2.40 |
| Aluminum (Smooth/Corrugated) | 0.016" - 0.024" (ASTM C1729) | 1000°F+ (Non-combustible) | Good UV / Low Impact (Dents) | $2.50 - $3.20 |
| Elastomeric (EPDM/Neoprene) | 0.040" - 0.060" | 220°F (105°C) | Superior UV / Moderate Impact | $3.50 - $4.80 |
Step-by-Step Application Techniques for Rigid PVC Jackets
Rigid PVC is the dominant waterproof jacket material for commercial chilled water and exterior HVAC lines due to its cost-effectiveness and inherent moisture impermeability. Proper installation requires strict adherence to dimensional tolerances and sequencing.
1. Substrate Preparation and Moisture Verification
Never apply a waterproof jacket over damp insulation. Use a calibrated pin-type moisture meter on the underlying fiberglass or mineral wool. Readings must be below 8% moisture content by weight. If the insulation is compromised or wet, it must be stripped and replaced. Applying a jacket over wet insulation guarantees CUI, as the jacket will trap the existing moisture against the pipe.
2. Sizing, Cutting, and the 2-Inch Rule
PVC jackets are typically extruded in 4-foot or 8-foot lengths. When cutting to size, always maintain a minimum 2-inch longitudinal overlap and a 1.5-inch circumferential overlap. Use fine-toothed carbide blades for cutting to prevent micro-fractures at the edges, which can propagate into cracks during thermal cycling.
When installing horizontal pipe runs, the longitudinal overlap must be positioned at the side or top of the pipe, never at the bottom. For circumferential joints (where two pipe lengths meet), the upstream jacket must overlap the downstream jacket like roof shingles. Installing the overlap backwards will create a direct funnel for wind-driven rain into the insulation cavity.
3. Adhesive Application and Solvent Welding
For PVC systems, mechanical fasteners alone are insufficient for waterproofing. Apply a continuous 1/4-inch bead of high-VOC-compliant PVC contact adhesive (such as Proto #75 or equivalent) to both mating surfaces of the longitudinal seam. Allow the adhesive to become tacky (typically 3 to 5 minutes depending on ambient humidity) before pressing the seam together. For a permanent, monolithic seal, solvent welding using a THF-based PVC primer and cement is recommended for high-wind zones.
4. Mechanical Securing and Banding
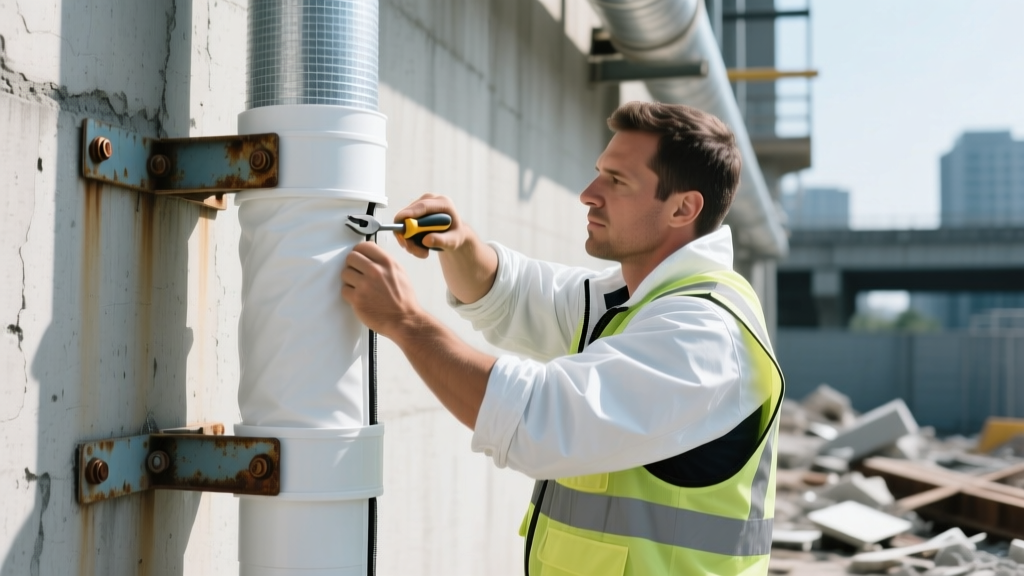
While adhesives seal the seams, mechanical banding provides structural integrity against wind load and physical impact. Use 0.020-inch thick, 1/2-inch wide 304 or 316 stainless steel bands. Place bands every 12 to 18 inches along the pipe run. Ensure the banding tool tensioner is calibrated to 150-200 lbs of tension; over-tensioning will crush the underlying insulation and create a thermal bridge.
Sealing Flashings and Complex Geometries
The Department of Energy (DOE) notes that over 85% of CUI incidents originate at fittings, valves, and termination points rather than the straight pipe runs. Waterproofing these complex geometries requires specialized techniques.
- Valve and Flange Covers: Use pre-formed, two-piece PVC or aluminum valve covers. Seal the mating halves with a continuous bead of exterior-grade silicone or butyl rubber sealant. Do not rely on tape for flange covers, as the complex angles will cause tape to bridge and fail under UV degradation.
- Vertical to Horizontal Transitions: When a vertical pipe run transitions to a horizontal run, the vertical jacket must overlap the horizontal jacket by at least 3 inches. Apply a 2-inch wide layer of self-adhering butyl flashing tape (minimum 30 mil thickness) over the seam, followed by a brush-on coat of elastomeric mastic to encapsulate the tape edges.
- Termination Points: Where the insulation system ends at a wall penetration or equipment connection, install a manufactured stainless steel or PVC termination ring. Seal the gap between the jacket and the termination ring with a polyurethane expansion sealant to allow for pipe movement without tearing the waterproof envelope.
Integration of Weep Holes in Vertical Runs
Even with flawless application, condensation can form on the interior surface of the waterproof jacket material due to temperature differentials, particularly on chilled water lines. To manage this incidental moisture, weep holes are mandatory.
Drill 3/16-inch weep holes at the lowest point of every vertical drop and at 10-foot intervals along horizontal runs. Space the holes 180 degrees apart on the bottom quadrant of the pipe. Install manufactured plastic weep hole grommets to prevent the insulation from expanding and blocking the drainage path. Never drill weep holes at the top of the pipe, as this defeats the purpose of the waterproof envelope.
Quality Assurance and Post-Application Inspection
A rigorous inspection protocol ensures the waterproof jacket material will perform for its intended 15-to-20-year lifecycle. Conduct the following checks immediately after installation and again after the first major rain event:
- Visual Seam Inspection: Verify that no adhesive squeeze-out is missing along longitudinal seams. Check that all circumferential overlaps follow the correct shingle direction.
- Tap Test: Lightly tap the jacket with a rubber mallet. A solid sound indicates proper adhesion and insulation contact; a hollow sound suggests a delaminated seam or crushed insulation void that could pool water.
- Band Tension Check: Ensure stainless steel banding seals are crimped flush and that no sharp edges are protruding, which could tear adjacent jacket sections during thermal expansion.
- Mastic Curing Verification: Confirm that all brush-applied mastics and sealants at fittings have fully cured and are not tacky to the touch, indicating proper cross-linking.
Frequently Asked Questions
Can I install a waterproof jacket material directly over bare pipe without insulation?
No. Waterproof jacketing materials like PVC and thin-gauge aluminum lack the structural rigidity to span unsupported distances. They are designed to be supported by the underlying thermal insulation. Installing them over bare pipe will result in immediate sagging, pooling water, and seam failure.
How does thermal expansion affect the application technique?
Pipes expand and contract significantly with temperature changes. If the waterproof jacket is rigidly bonded to the pipe or equipment flanges without expansion loops or flexible termination seals, the thermal movement will tear the jacket seams apart. Always incorporate flexible elastomeric sealants at fixed anchor points and allow for slight longitudinal sliding at expansion joints.
Written by
James ThorntonJames Thornton is a construction industry veteran with 25 years of hands-on experience in wood framing, lumber grading, and residential building codes. He started as a framing carpenter in rural Oregon, earned his ICC Residential Building Inspector certification, and eventually became a senior plan reviewer for the City of Portland Bureau of Development Services. James holds a B.S. in Wood Science & Technology from Oregon State University and is a certified lumber grader through the West Coast Lumber Inspection Bureau (WCLIB). He has inspected over 3,000 residential construction sites and authored the city's internal guide on advanced framing techniques (2x6 at 24" O.C.). James lives in Bend, OR, where he builds custom timber-frame cabins and competes in lumberjack sports.
More from James Thornton
View all
Insulation
Best Home Insulation Materials: Complete 2026 Guide
Compare top home insulation materials for 2026. Find R-values, installed costs per square foot, and best uses for fiberglass, spray foam, and mineral wool.
Aug 4, 2026

Sustainable Building
Certify Your Green Building Material for LEED and WELL
Step-by-step guide to certifying a green building material for LEED v5 and WELL v2. Master EPDs, HPDs, and VOC limits for 2026 project specifications.
Aug 4, 2026

Stone & Masonry
Veneer Stacked Stone Panels: Interior Design & Style Showcase
Discover how veneer stacked stone panels transform interiors. Explore modern design profiles, material pairings, and technical installation specs.
Aug 4, 2026