Waterproofing Crawlspace: A Scenario Matching Guide
Match the right materials to your dirt floor, concrete, or high-water-table crawlspace with this scenario-based waterproofing guide and cost breakdown.
The Core Philosophy of Scenario Matching
Waterproofing a crawlspace is not a one-size-fits-all endeavor. According to the U.S. Department of Energy, crawlspaces account for a significant percentage of residential moisture and energy loss issues, yet the most common mistake contractors make is applying a single encapsulation protocol to every home. The correct material selection depends entirely on the soil composition, local water table, climate zone, and foundation type. A 6-mil polyethylene sheet that performs perfectly in an arid Nevada crawlspace will catastrophically fail in a humid Florida dirt-floor environment. This guide breaks down the four primary crawlspace scenarios and matches them with the exact materials, thicknesses, and installation protocols required for long-term performance in 2026.
Scenario 1: Arid Climate Dirt Floors (Low Moisture, High Radon Risk)
In climate zones 2B and 3B (e.g., parts of Arizona, Nevada, and West Texas), bulk groundwater and high humidity are rarely issues. The primary concerns here are soil gas mitigation (radon) and dust suppression. Over-engineering the waterproofing in these zones wastes capital, but under-engineering it compromises indoor air quality.
Material Match: 10-Mil to 15-Mil Cross-Laminated Polyethylene
Standard 6-mil clear poly is obsolete for professional applications due to its high tear rate during installation. For arid dirt floors, a 10-mil to 15-mil cross-laminated polyethylene vapor retarder (such as Stego Wrap or Raven Industries Pro Vapor) is the optimal choice. The cross-lamination provides puncture resistance against sharp gravel without the premium cost of reinforced 20-mil membranes.
- Material Cost: $0.25 to $0.40 per square foot.
- Seam Protocol: Overlap seams by 6 inches and seal with 4-inch wide acrylic vapor barrier tape. Butyl tape is unnecessary here due to low hydrostatic stress.
- Wall Termination: Run the membrane 6 inches up the foundation wall and secure it using a pressure-treated wood termination strip fastened with masonry screws. Do not rely solely on adhesive mastic in dusty environments.
Scenario 2: Humid Climate Dirt Floors (Condensation & Groundwater)
In climate zones 1A, 2A, and 3A (the Southeast and Mid-Atlantic), the stack effect pulls humid crawlspace air directly into the living space. The Environmental Protection Agency (EPA) notes that unvented, unsealed crawlspaces in humid climates are primary breeding grounds for Stachybotrys (black mold) and wood-destroying fungi. Here, a simple vapor barrier is insufficient; full encapsulation is required.
Material Match: 20-Mil Reinforced Polyurethane/Polyethylene Liner
You must use a minimum 20-mil thickness, and crucially, it must be reinforced with a polyester scrim layer. Non-reinforced 20-mil liners will stretch and tear under the thermal expansion and contraction common in humid environments. The liner must cover 100% of the dirt floor and extend fully up the foundation walls to the rim joist.
- Material Cost: $0.55 to $0.85 per square foot for reinforced 20-mil.
- Seam Protocol: Overlap seams by 12 inches. Seal with a specialized 4-inch seam tape formulated for polyethylene, and apply a bead of polyurethane sealant under the overlap for a chemical and mechanical bond.
- Insulation Integration: In encapsulated humid crawlspaces, fiberglass batt insulation in the floor joists must be removed. Instead, apply 2-inch thick closed-cell spray foam or rigid XPS foam board (sealed with canned foam) directly to the interior of the foundation walls. The vapor barrier should lap over the bottom edge of the wall foam.
- Active Drying: Encapsulation traps residual moisture. You must install a dedicated crawlspace dehumidifier (e.g., AprilAire E070 or SaniDry Sedona) sized to handle 70 to 90 pints per day, with a condensate pump routed to the exterior.
Scenario 3: High Water Table & Bulk Water Intrusion
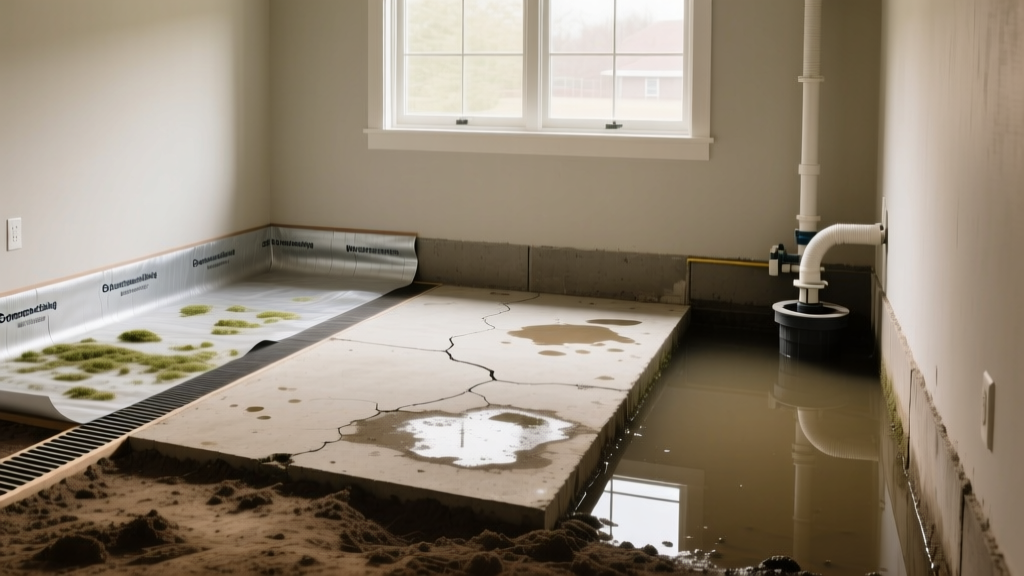
If your crawlspace experiences standing water after heavy rains, or if you have an active subterranean spring beneath the foundation, vapor barriers alone will fail. Hydrostatic pressure will push groundwater through the soil, creating a 'waterbed' effect beneath the polyethylene that eventually bursts the seams. This scenario requires bulk water management before vapor control.
Material Match: Dimpled Drainage Matting + Interior French Drain
Before laying any vapor barrier, the dirt floor must be graded toward a perimeter trench. The trench houses a 4-inch perforated PVC pipe wrapped in filter fabric, leading to a sump pump basin. The entire floor is then covered with a high-compressive-strength dimpled drainage mat (such as Delta-MS or Enkadrain) with a geotextile filter fabric facing upward.
- Drainage Mat Specs: Ensure the dimple board has a compressive strength of at least 15,000 psf (pounds per square foot) to withstand the weight of the soil and any future storage loads.
- Sump Pump Sizing: Use an 18-inch diameter by 24-inch deep basin with a 1/3 HP submersible sump pump featuring a vertical float switch. Horizontal tether switches frequently get snagged on crawlspace piers.
- Cost Impact: Adding a drainage system and sump pump increases project costs by $2,500 to $4,500 over standard encapsulation, but it is non-negotiable for bulk water scenarios.
Scenario 4: Concrete Slab Crawlspaces (Capillary Moisture)
Some older or custom-built homes feature poured concrete or block crawlspaces with a concrete slab floor. While this eliminates the dirt-floor soil gas issue, concrete is highly porous. Capillary action draws groundwater vapor up through the slab, leading to efflorescence, high humidity, and condensation on HVAC ductwork.
Material Match: Penetrating Silane/Siloxane Sealers + Epoxy Moisture Barriers
For concrete slabs, polyethylene sheeting is the wrong tool. Instead, treat the concrete chemically. First, apply a penetrating silane/siloxane water repellent (such as Prosoco Siloxa-Tek 8505) to the walls and floor. This reacts with the free lime in the concrete to form a hydrophobic resin deep within the pores, blocking liquid water intrusion while allowing the concrete to breathe.
If the slab will be used for storage or requires a strict vapor barrier for sensitive flooring above, follow the penetrating sealer with a two-part, moisture-mitigating epoxy coating (e.g., Laticrete NXT Vapor-Emit). This creates a seamless, monolithic vapor barrier bonded directly to the concrete substrate.
- Preparation: The concrete must be shot-blasted or diamond-ground to a CSP (Concrete Surface Profile) of 2 or 3. Acid etching is insufficient for epoxy adhesion in damp environments.
- Moisture Testing: Before applying epoxy, conduct an ASTM F2170 relative humidity test using in-situ probes. If the RH at 40% depth exceeds 90%, you must use a specialized high-moisture epoxy primer.
Material Decision Matrix
| Scenario | Primary Material | Thickness / Spec | Est. Material Cost (per sq ft) | Critical Companion System |
|---|---|---|---|---|
| Arid Dirt Floor | Cross-Laminated Poly | 10-mil to 15-mil | $0.25 - $0.40 | Passive radon venting |
| Humid Dirt Floor | Reinforced Poly Liner | 20-mil (Scrim reinforced) | $0.55 - $0.85 | Dehumidifier & Wall Foam |
| High Water Table | Dimpled Drainage Mat | 15,000 psf compressive | $1.50 - $2.50 | Interior French drain & Sump |
| Concrete Slab | Silane/Siloxane + Epoxy | CSP 2-3 Profile | $0.80 - $1.20 | Diamond grinding prep |
Critical Installation Details That Cause 90% of Failures
Even the most expensive 20-mil reinforced membrane will fail if the installation details are ignored. When evaluating contractor bids or executing a DIY encapsulation, scrutinize these three specific failure points:
- The CMU Block Adhesion Fallacy: Contractors frequently attempt to glue the vapor barrier directly to the top of concrete masonry unit (CMU) blocks using construction adhesive. CMU blocks are inherently dusty and porous; the adhesive bonds to the dust, not the block, and peels off within six months. The Fix: Mechanically fasten the liner to the wall using a batten strip (like a 1x2 pressure-treated furring strip) anchored with Tapcon masonry screws every 24 inches, or use a specialized non-sag polyurethane mastic applied to a wire-brushed surface.
- Pier Wrap Neglect: The wooden piers supporting the home's main beams are often left exposed or poorly wrapped. Moisture wicks up from the soil, through the concrete pier pad, and into the wood. The Fix: The vapor barrier must be wrapped entirely around every pier and sealed at the overlap using specialized 3D pre-formed pier caps or meticulously taped seams. Leave no exposed dirt inside the pier perimeter.
- The Rim Joist Gap: The intersection where the foundation wall meets the wooden rim joist is the most significant air leak in a crawlspace. If the vapor barrier stops at the top of the foundation wall, humid exterior air will bypass the encapsulation. The Fix: Extend the vapor barrier all the way up to the rim joist and seal it using closed-cell spray foam. This creates a continuous thermal and moisture boundary that ties the floor encapsulation to the wall insulation.
By matching the specific material properties to your crawlspace's unique hydrostatic and climatic scenario, you ensure the system performs as engineered, protecting the structural integrity of the home and the health of its occupants for decades.