How to Apply the Best Waterproof Material for Below-Grade Walls
Master application techniques for the best waterproof material on below-grade walls. Compare liquid, sheet, and bentonite systems with pro specs.

The phrase "best waterproof material" is a dangerous misnomer in commercial and residential construction. A premium fluid-applied polyurethane system costing $15 per square foot will catastrophically fail if applied at 30 wet mils instead of the specified 60, or if the substrate moisture exceeds the manufacturer's threshold. The true best waterproof material is not a single product, but rather the specific membrane class whose application technique perfectly aligns with your substrate profile, hydrostatic pressure load, and crew expertise.
Below-grade waterproofing is governed by strict tolerances. According to the International Code Council (ICC), structures with habitable below-grade spaces must utilize true waterproofing (not mere dampproofing) when the water table is less than 6 inches below the slab elevation. This guide details the exact application techniques for the top three below-grade membrane systems, providing the actionable specifications needed to prevent hydrostatic intrusion.
The Substrate Dictates the Material Class
Before selecting a product, you must evaluate the substrate. Poured concrete, concrete masonry units (CMU), and insulated concrete forms (ICF) all demand different material properties and application methodologies. Use the decision matrix below to identify the optimal system for your specific wall assembly.
| Substrate Type | Best Material Class | Critical Application Requirement |
|---|---|---|
| Poured Concrete | Liquid-Applied Polyurethane | Surface profile CSP 3-4; moisture < 20% |
| CMU Block | Self-Adhering Sheet Membrane | Parge coat required to fill mortar joints |
| ICF Walls | Modified Bitumen Sheet / Drainage Mat | Low-VOC primer only; no solvent-based liquids |
Liquid-Applied Polyurethane: Technique and Mil Thickness
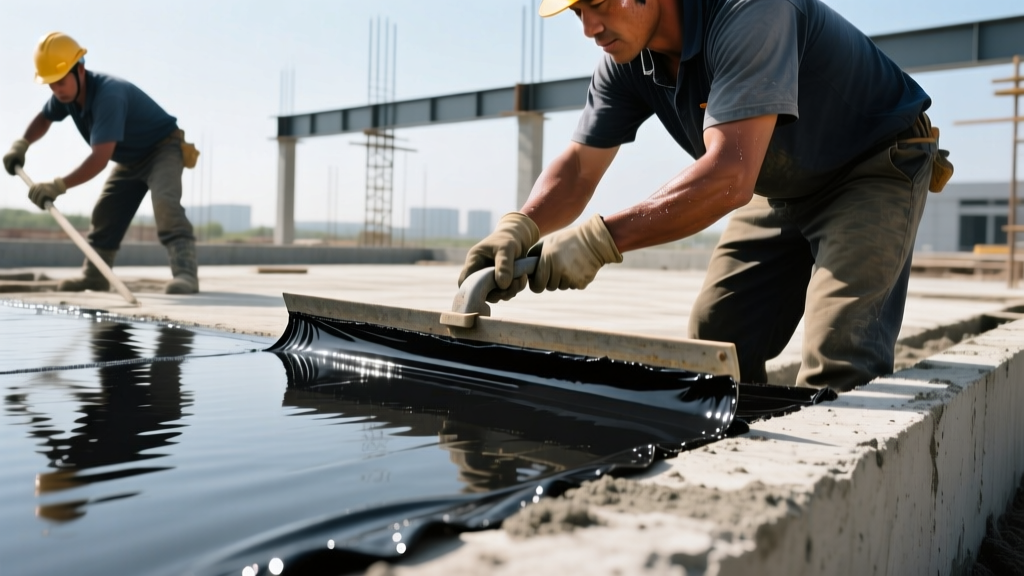
Fluid-applied polyurethanes, such as Tremco Tremproof 250GC or BASF MasterSeal, are frequently cited as the best waterproof material for complex foundations with numerous pipe penetrations. Because they cure into a seamless, monolithic elastomer, they eliminate the lap-seam vulnerabilities inherent to sheet goods. However, their performance is entirely dependent on strict mil-thickness control.
Step 1: Substrate Preparation and Moisture Testing
Concrete must be cured for a minimum of 7 days (or 28 days for standard mixes without accelerating admixtures). The surface must be mechanically profiled to a Concrete Surface Profile (CSP) of 3 or 4 using shot blasting or heavy scarification. Acid etching is strictly prohibited for waterproofing substrates, as it leaves residual salts that break down polyurethane adhesion.
Before applying primer, conduct the plastic sheet test per ASTM International standards. Tape a 16x16 inch clear polyethylene sheet to the concrete. After 16 hours, check for condensation or darkening of the concrete. If moisture is present, or if a Tramex concrete moisture meter reads above 20%, you must use a moisture-mitigating epoxy primer rather than a standard polyurethane primer.
Step 2: Detailing and Cant Strips
90% of below-grade leaks occur at the footing-to-wall cold joint. Do not rely on the liquid membrane alone to bridge this 90-degree angle. Install a pre-formed polyurethane cant strip or trowel a 1x1 inch fillet of hydraulic cement at the joint. Apply a 60-mil thick coat of the liquid membrane over the cant strip, embedding a polyester reinforcing fabric (like Tremco T-Fabric) into the wet coat to provide structural bridging.
Step 3: Field Application and Back-Rolling
Apply the main field coat using a 1/4-inch notched squeegee. The notches are mathematically designed to deposit exactly 60 wet mils of material. Immediately after squeegeeing, back-roll the material using a 3/8-inch nap roller. This step is non-negotiable; it forces the material into the concrete pores, eliminates pinholes, and ensures a uniform thickness as the solvents flash off, yielding the required 40 dry mils.
Self-Adhering Modified Bitumen Sheet Membranes
For CMU walls or sites where liquid application is hindered by high winds or extreme cold, self-adhering rubberized asphalt sheet membranes (e.g., Henry Blueskin VP100 or Grace Preprufe) serve as the best waterproof material alternative. These sheets offer a guaranteed, factory-controlled thickness of 56 to 60 mils.
Primer Tack Time and Environmental Limits
Sheet membranes require a compatible primer (usually a water-based or solvent-based asphaltic emulsion). The most common application error is applying the sheet before the primer has fully flashed off, or waiting too long, allowing dust to contaminate the tacky surface. The primer must be dry to the touch but highly tacky—typically a 15 to 30-minute window at 70°F (21°C). If ambient temperatures drop below 40°F (4°C), the adhesive bite of the membrane decreases exponentially, requiring a specialized low-temperature primer and seam tape.
Seam Laps and Roller Pressure
Horizontal and vertical laps must be a minimum of 3 inches. The National Roofing Contractors Association (NRCA) emphasizes that hand-pressing seams is insufficient for below-grade hydrostatic resistance. Every lap seam must be pressed with a 75-pound J-roller to ensure a continuous, void-free molecular bond. Unrolled seams will inevitably channel water laterally across the foundation wall.
A "fishmouth" occurs when a sheet membrane wrinkles during application, creating an open, crescent-shaped void at the lap edge. Never attempt to seal a fishmouth with mastic. You must cut a slit through the center of the wrinkle, press the material flat, and apply a 6-inch wide patch of the same membrane over the repair, fully rolling all edges.
Bentonite Waterproofing Panels: The Passive Approach
Sodium bentonite panels (such as Cetco Voltex) represent a fundamentally different philosophy. Bentonite is a natural clay that swells up to 15 times its dry volume when exposed to water, creating an impermeable gel barrier. This makes it the best waterproof material for blind-side applications (where the waterproofing is installed before the concrete is poured against shoring) and for sites with highly contaminated soils that degrade synthetic polymers.
Mechanical Fastening and Hydration
Unlike liquid or bitumen systems, bentonite panels do not adhere to the substrate. They are mechanically fastened to the footing or shoring wall using concrete nails or washers. Panels must overlap by a minimum of 2 inches, and all seams must be sealed with a continuous bead of bentonite waterstop granules. The critical limitation of bentonite is that it requires continuous moisture to remain swollen; if the soil dries out completely, the clay shrinks and cracks. Therefore, bentonite is only viable in permanently damp soils or where the water table is consistently high.
Critical Failure Points and Troubleshooting
Even when using the best waterproof material, poor execution leads to callbacks. Use this troubleshooting framework to diagnose and prevent common below-grade failures:
- Symptom: Localized damp spots on interior drywall directly opposite form-tie holes.
Cause: Form ties were snapped off flush with the concrete rather than recessed, leaving a direct pathway through the wall.
Fix: Grind form ties 1/2 inch below the surface, fill the void with hydraulic cement, and detail with a 4-inch patch of liquid membrane and reinforcing fabric. - Symptom: Membrane delamination peeling away from the CMU wall.
Cause: Mortar joints were not parged. The sheet membrane bridged the recessed joints, creating an air gap where hydrostatic pressure accumulated and blew the membrane off the masonry face.
Fix: Apply a 3/8-inch parge coat of Type S mortar over the entire CMU surface, cure for 48 hours, and re-prime before membrane application. - Symptom: Water tracking horizontally along the top of the footing.
Cause: The termination bar at the top of the waterproofing system was omitted, allowing surface runoff to migrate behind the membrane.
Fix: Install a stainless steel termination bar mechanically fastened every 12 inches, sealed with a bead of polyurethane joint sealant at the top edge.
Expert FAQ on Application Tolerances
Can I apply liquid polyurethane over a damp-proofing asphalt coat?
No. Asphaltic dampproofing contains volatile oils that will migrate into and degrade polyurethane membranes over time. If an existing asphalt coat is present, it must be completely removed via mechanical grinding, or you must use a sheet membrane system specifically designed with a separation slip-sheet.
How does backfilling impact the membrane selection?
The best waterproof material is useless if it is destroyed during backfill. If you are using angular, poorly graded drainage stone directly against the wall, you must install a dimpled high-density polyethylene (HDPE) drainage/protection board over the primary membrane. If using native, well-graded soil, a heavy-duty geotextile fabric is sufficient to protect the membrane from backfill equipment abrasion.
What is the minimum temperature for sheet membrane application?
Most standard modified bitumen sheets require ambient and surface temperatures of at least 40°F (4°C) and rising. Below this threshold, the rubberized asphalt adhesive becomes brittle and will not form a watertight seal at the laps. For winter construction, you must switch to cold-weather formulated membranes and utilize hot-air welding for the seams rather than relying solely on the peel-and-stick adhesive.
Written by
Priya KapoorPriya Kapoor is a real estate market analyst and construction economics researcher with expertise in housing affordability, development feasibility, and infrastructure investment. She holds a Master of Regional Planning from Cornell University and previously worked as a senior analyst at CBRE's Investment Properties group, where she modeled returns for $4B in mixed-use development pipelines. Priya now runs an independent research practice advising developers, municipalities, and REITs on construction cost forecasting and market timing. She publishes the quarterly "BuildMat Market Pulse" report tracking material price indices across 12 commodity categories. Based in Austin, TX, Priya serves on the board of Habitat for Humanity Austin and is a marathon runner.
More from Priya Kapoor
View all
Construction Cost
Cost to Build a 1600 Sq Ft Home in 2026: Full Breakdown
Accurate 2026 cost to build a 1600 sq ft home—material, labor, and regional pricing breakdowns included. Plan your budget with real-time estimates.
Aug 11, 2026

Wood & Lumber
Name the Types of Wood for Pressure Treatment and Preservation
Learn how to name the types of wood best suited for pressure treatment. Compare species treatability, chemical retention levels, and 2026 preservation costs.
Aug 4, 2026

Stone & Masonry
Stone Veneer Suppliers Lindenhurst: 2026 Cost Analysis
Analyze 2026 stone veneer costs in Lindenhurst, NY. Compare local supplier pricing, delivery fees, and Suffolk County installation labor rates.
Aug 4, 2026