How to Select and Apply Rancho Building Materials for Ranch Homes
Master the application of rancho building materials. Learn structural specs for stucco, clay tile roofing, and timber accents for authentic Ranch homes.

Defining the Rancho Architectural Envelope
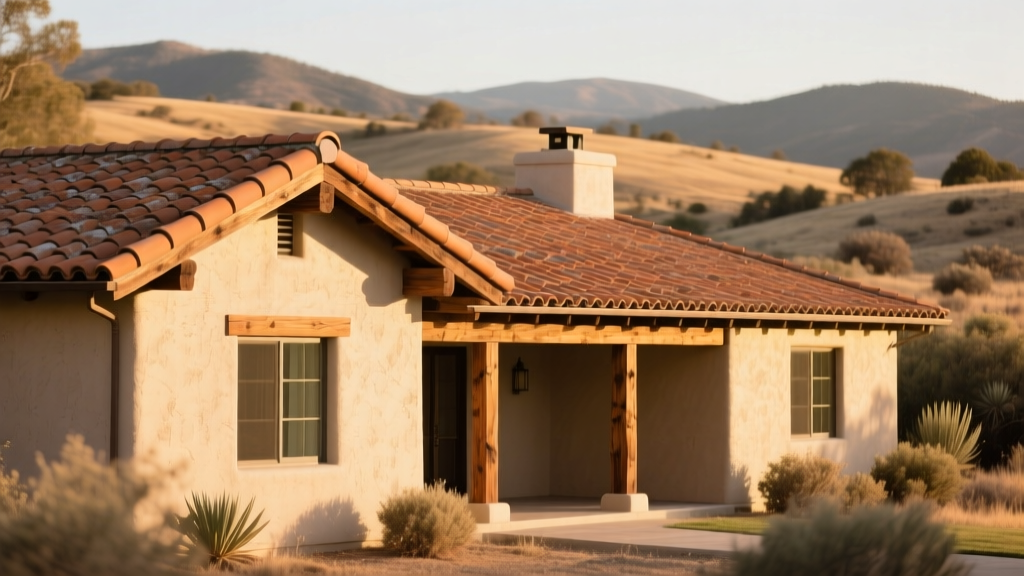
Authentic Ranch and Spanish Colonial Revival homes rely on a specific material palette to achieve their characteristic low-profile, grounded aesthetic. Selecting the correct rancho building materials goes beyond visual matching; it requires strict adherence to structural load limits, moisture management protocols, and regional climate adaptations. The traditional Rancho envelope integrates heavy masonry, deep overhangs, and porous exterior finishes that demand precise application techniques to prevent premature degradation. This guide details the technical specifications and installation frameworks required for modern Ranch-style construction and historical renovation.
Stucco and Plaster Systems: Moisture and Mix Specifications
The hallmark of rancho building materials is the exterior plaster finish. While traditional adobe is still used in specific arid microclimates, modern Ranch construction predominantly utilizes Portland cement plaster (stucco) applied over wood or steel framing. To achieve the authentic sand-finish or smooth trowel look without compromising the building envelope, a three-coat system is mandatory.
The scratch and brown coats must comply with ASTM C926 standards, utilizing a 1:3 ratio of Portland cement to washed, graded masonry sand. The scratch coat is applied at 3/8-inch thickness and heavily scored to provide a mechanical key. The brown coat follows at 3/8-inch, bringing the total base thickness to 3/4-inch. The final 1/8-inch finish coat utilizes a higher lime content for workability and color consistency.
Clay Tile Roofing: Structural Load and Fastening
Barrel and Mission S-profile clay tiles are essential rancho building materials, providing the distinct roofline silhouette. However, their application is heavily constrained by structural dead loads. Standard clay tiles weigh between 900 and 1,100 pounds per roofing square (100 sq. ft.). This requires engineered trusses or heavy timber rafters (minimum 2x8 at 16 inches on center) to prevent roof sagging over time.
According to the Tile Roofing Institute (TRI), fastening schedules must be adjusted based on local wind uplift requirements. In coastal or high-wind zones, reliance on mortar-set applications is strictly prohibited.
| Roofing Component | Specification / Material | Application Requirement |
|---|---|---|
| Underlayment | ASTM D226 Type II or 40lb synthetic | Minimum 2-inch headlap; ice and water shield at eaves |
| Batten System | 1x4 or 2x4 pressure-treated pine | Spaced to match tile gauge; allows sub-tile ventilation |
| Primary Fastener | 8d or 10d corrosion-resistant nails | Minimum one per tile; two per tile in >90mph wind zones |
| Secondary Clip | Copper or stainless steel nose clips | Required on all perimeter tiles and ridges |
Timber Vigas and Masonry Accents
Exposed structural and decorative timber, known as vigas, combined with natural stone wainscoting, bridge the gap between the structure and the landscape. When sourcing rancho building materials for these accents, structural grading and preservative treatments are paramount.
- Viga Beam Sizing: For decorative, non-load-bearing vigas installed beneath drywall ceilings, 4-inch to 6-inch diameter logs are sufficient. For structural applications supporting porch roofs, utilize Douglas Fir or Ponderosa Pine graded as Structural Select. A 6-inch diameter structural viga can safely span up to 12 feet under standard residential loads (20 psf dead, 30 psf live). Refer to the American Wood Council calculation aids for precise span tables.
- Preservative Treatment: Exposed timber ends embedded in masonry pockets must be treated to AWPA U1 standards (Use Category UC4A or higher) to prevent ground-contact rot. Alternatively, wrap the embedded ends in 16-ounce copper flashing or utilize specialized elastomeric membrane wraps to isolate the wood from masonry moisture.
- Stone Veneer Integration: When applying natural stone or Adhered Manufactured Stone Masonry Veneer (AMSMV) as a wainscot, follow ASTM C1670. Apply a 1/2-inch scratch coat over galvanized wire lath before setting the stone. Always include a weep system behind the stone base to allow hydrostatic pressure to escape.
Material Sourcing and Cost Matrix
Budgeting for a Ranch-style build requires accounting for the premium associated with specialized profiles and heavy-gauge materials. The following matrix outlines current market pricing for primary rancho building materials, factoring in both material costs and specialized labor premiums.
| Material Category | Specific Profile / Grade | Est. Material Cost (per Sq. Ft.) | Labor Multiplier |
|---|---|---|---|
| Clay Roof Tile | Mission S-Profile, Unfired | $8.50 - $14.00 | 2.5x standard shingle |
| Exterior Stucco | 3-Coat Portland Cement, Sand Finish | $4.00 - $7.50 | 1.8x standard vinyl |
| Timber Vigas | 6" dia. Douglas Fir, Rough Sawn | $35.00 - $60.00 (per linear ft) | Heavy equipment req. |
| Stone Wainscot | AMSMV, Fieldstone Profile | $9.00 - $15.00 | 2.2x standard brick |
Troubleshooting Common Application Failures
Even with premium rancho building materials, improper installation leads to distinct failure modes. Identifying these early prevents costly envelope replacements.
Symptom: White, powdery efflorescence on stucco surfaces.
Cause: Soluble salts within the masonry sand or Portland cement are being dissolved by moisture migrating through the wall and deposited on the surface upon evaporation.
Fix: Do not use water or acid washes, which drive salts deeper. Dry-brush the surface aggressively. Identify the moisture intrusion point (usually missing weep screeds or unsealed parapet caps). Once the moisture source is eliminated, apply a breathable silane/siloxane penetrating sealer to the stucco.
Symptom: Clay tile slippage or cracking at the nail hole.
Cause: Over-driving the fastener during installation, which fractures the clay around the nail head, or thermal expansion causing the nail to back out of the decking.
Fix: Remove the affected tile. If the decking hole is stripped, inject structural epoxy or move the batten attachment point. Replace the tile and utilize a copper nose clip hooked to the tile's bottom lug and nailed to the batten, removing reliance on the fragile top nail hole entirely.
Symptom: Rotting timber viga ends where they penetrate the stucco wall.
Cause: Direct embedment of untreated wood into cementitious stucco, which holds moisture against the wood grain.
Fix: Cut the rotted section back to sound wood. Scarf in a new section using a structural epoxy adhesive and concealed steel dowels. Wrap the new penetrating end in a self-adhering rubberized asphalt membrane (ice and water shield) before the stucco base coat is applied to create a permanent moisture break.
Written by
David NakamuraDavid Nakamura is a licensed architect (AIA) and construction technology writer focused on sustainable building methods, mass timber engineering, and high-performance building envelopes. He holds a Master of Architecture from the University of Washington and is a certified Passive House Consultant (CPHC). David spent eight years at the Seattle firm Mithun, where he led the design of three LEED Platinum projects, before founding his own practice specializing in net-zero residential design. He serves on the editorial advisory board of GreenBuilder Magazine and has authored peer-reviewed papers on cross-laminated timber (CLT) connections for the Journal of Structural Engineering. In his spare time, David teaches woodworking at Pratt Fine Arts Center and kayaks the Puget Sound.
More from David Nakamura
View all
Construction Cost
Labor Cost to Build a Deck Per Sq Ft: 2026 Installation Guide
Discover the exact labor cost to build a deck per sq ft in 2026. This installation guide breaks down contractor rates, complexity factors, and hidden fees.
Aug 4, 2026

Construction Cost
How Much Does It Cost to Build a 3 Bedroom House? Financing Guide
Learn exactly how much it costs to build a 3 bedroom house and explore 2026 financing options, construction loan types, and budget frameworks for your build.
Aug 4, 2026

Construction Cost
Cost to Build a Tennis Court: 2026 Guide
How much does it cost to build a tennis court in 2026? Breakdowns for asphalt, concrete, and synthetic surfaces plus fencing and lighting.
Jul 30, 2026