Applying Stucco Building Material: The 3-Coat System Guide
Master stucco building material application with our 3-coat system guide. Learn exact mix ratios, ASTM standards, and curing times for durable finishes.

Substrate Preparation and Lath Installation
The longevity of any stucco building material relies entirely on the substrate preparation. According to ASTM C1063 standards for lath and furring installation, the wall assembly must begin with a continuous weather-resistive barrier (WRB). Apply two layers of Grade D building paper or a high-performance housewrap over the structural sheathing. The first layer acts as a secondary drainage plane, while the second protects the WRB from the alkaline nature of the cementitious stucco.
Install a corrosion-resistant weep screed at the base of all walls. The weep screed must feature a minimum 1/4-inch lap over the WRB and be positioned at least 2 inches above finished soil grade or 4 inches above concrete walks to prevent capillary moisture draw. Over the WRB, attach 2.5 lb/sq yd self-furring galvanized wire lath using 1-inch crown staples or roofing nails. Fasteners must penetrate the wood framing by a minimum of 3/4 inch, spaced no more than 7 inches on center along the studs. Ensure the lath overlaps horizontal joints by 1 inch and vertical joints by 1/2 inch. At all structural transitions and material changes, install casing beads and control joints to restrict movement; control joint spacing should not exceed 144 square feet for horizontal runs and 120 square feet for vertical applications.
The Scratch Coat: Foundation of the Stucco Building Material
The scratch coat is the structural anchor of the 3-coat system, designed to embed into the wire lath and create a mechanical key. The traditional volumetric mix ratio for the scratch coat is 1 part ASTM C150 Type I or II Portland cement, 1/4 to 1/2 part Type S hydrated lime, and 2.25 to 3 parts ASTM C897 masonry sand. Alternatively, pre-blended products like Quikrete Base Coat Stucco or LaHabra Fastwall provide consistent factory-calibrated ratios, eliminating on-site proportioning errors.
Before applying the scratch coat, lightly mist the lath and underlying building paper with water. This prevents the dry substrate from rapidly drawing moisture out of the stucco building material, which can cause premature shrinkage and weaken the mechanical bond.
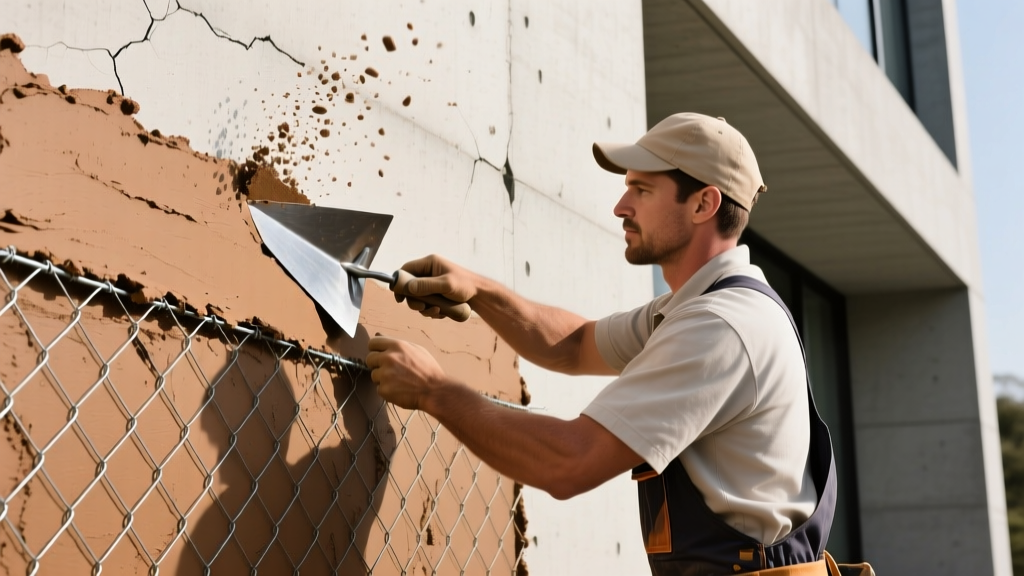
Apply the scratch coat using a hawk and steel trowel, forcing the material firmly through the wire lath to ensure complete encapsulation. The target thickness for the scratch coat is 3/8 inch. Immediately after application, use a scarifier or a stiff-bristled broom to score horizontal grooves into the surface. These horizontal scratches provide the mechanical key for the subsequent brown coat. Avoid cross-hatching or vertical scoring, as this can create channels for water migration.
The Brown Coat: Leveling and Curing Dynamics
Once the scratch coat has achieved sufficient rigidity (typically 24 to 48 hours, depending on ambient conditions), the brown coat is applied. The mix ratio remains identical to the scratch coat, but the application technique shifts from embedding to leveling. The brown coat is applied to a thickness of 3/8 inch, bringing the total base thickness to 3/4 inch. Use a straightedge or darby to rod the surface to a true, plumb plane, followed by a wood float to create a uniform, slightly textured surface that will accept the finish coat.
Proper curing of the brown coat is the most critical phase in preventing map cracking. The Portland Cement Association mandates continuous moist curing to allow the Portland cement to fully hydrate. Below is the required moist-curing timeline based on environmental conditions:
| Ambient Temperature | Relative Humidity | Minimum Moist Curing Time | Application Method |
|---|---|---|---|
| 70°F - 85°F (21°C - 29°C) | 50% - 70% | 48 Hours | Fine mist spray 2x daily |
| 85°F - 100°F (29°C - 38°C) | Below 50% | 72 Hours | Fine mist spray 3x daily + shade cloth |
| Below 50°F (10°C) | Any | 7 Days | Insulated blankets (do not freeze) |
The Finish Coat: Texture and Weatherproofing
The finish coat provides the final aesthetic texture and the primary weather-resistant shell. Traditional finish coats utilize a richer mix: 1 part white Portland cement, 1 part Type S hydrated lime, and 2 parts fine-graded masonry sand. The thickness of the finish coat is nominally 1/8 inch, bringing the total 3-coat system thickness to 7/8 inch.
For enhanced durability and color retention, modern applications frequently substitute traditional cementitious finishes with acrylic polymer-modified finishes. Acrylic finishes offer superior elastomeric properties, allowing the stucco building material to bridge micro-cracks (up to 1/16 inch) that inevitably form due to thermal expansion and structural settling. When applying an acrylic finish, ensure the brown coat has cured for a minimum of 7 to 14 days to prevent alkaline efflorescence from migrating through the acrylic film and causing discoloration.
Troubleshooting Common Application Failures
Even with premium materials, improper execution leads to systemic failures. Identifying the root cause of these defects is essential for remediation:
- Map Cracking (Craze Cracking): A network of fine, shallow cracks resembling a spider web. Cause: Rapid moisture evaporation during the curing phase, often due to high winds or direct sunlight without misting. Remediation: Apply a high-quality elastomeric masonry sealer to bridge the cracks and prevent water ingress.
- Delamination: The stucco pulls away from the lath, sounding hollow when tapped. Cause: Failure to use self-furring lath, or applying the scratch coat too thinly, preventing the material from wrapping behind the wire. Remediation: Complete removal of the affected section, re-installation of proper self-furring lath, and re-application of the 3-coat system.
- Efflorescence: White, powdery salt deposits on the surface. Cause: Soluble salts within the cement or sand are dissolved by unmanaged moisture and deposited on the surface upon evaporation. Remediation: Dry-brush the deposits, then wash with a dilute solution of 1 part muriatic acid to 10 parts water. Neutralize with a baking soda solution and apply a breathable siloxane water repellent.
- Corner Cracking: Diagonal cracks radiating from the corners of windows and doors. Cause: Structural stress concentration and lack of diagonal lath reinforcement. Remediation: During installation, always apply 12-inch by 12-inch pieces of wire lath diagonally across all frame corners before the scratch coat.
Cost and Material Estimation Matrix
Budgeting for a stucco building material project requires accounting for both raw material costs and the highly specialized labor required for trowel application. The U.S. Department of Energy notes that while stucco provides excellent thermal mass, its R-value is inherently low (approx. R-0.20 per inch), meaning continuous rigid foam insulation behind the lath is often required in modern energy codes, adding to the baseline cost.
| System Type | Material Cost (per sq ft) | Labor Cost (per sq ft) | Total Installed Cost | Expected Lifespan |
|---|---|---|---|---|
| Traditional 3-Coat (Cement) | $1.50 - $2.50 | $7.00 - $9.50 | $8.50 - $12.00 | 50 - 80 Years |
| 1-Coat System (Fiberglass) | $1.20 - $2.00 | $4.80 - $6.50 | $6.00 - $8.50 | 30 - 50 Years |
| EIFS (Synthetic Polymer) | $2.50 - $4.00 | $6.50 - $10.00 | $9.00 - $14.00 | 25 - 40 Years |
When specifying the stucco building material for your project, prioritize the traditional 3-coat system for high-impact zones and coastal environments where salt spray and physical abrasion are concerns. For budget-conscious residential builds in arid climates, the 1-coat fiberglass-reinforced system offers a viable compromise between cost and structural integrity, provided the weep screed and WRB details are executed flawlessly.
Written by
Elena RodriguezElena Rodriguez is a civil engineer and technical writer specializing in concrete technology, masonry systems, and ASTM/ACI compliance. She earned her B.S. in Civil Engineering from Texas A&M University and spent a decade at a materials testing laboratory, performing over 2,000 concrete compressive strength tests and masonry prism evaluations. Elena is an ACI-certified Field Testing Technician (Grade I) and a member of ASTM Committee C12 on Natural Building Stone. She currently consults on forensic engineering cases involving concrete failures and moisture intrusion. Based in San Antonio, TX, Elena is a proud member of the Society of Women Engineers (SWE) and coaches her daughter's FIRST Robotics team.
More from Elena Rodriguez
View all
Walls & Panels
Cost Analysis: Light Gauge Steel Framing Advantages and Disadvantages
Evaluate light gauge steel framing advantages and disadvantages through a strict cost analysis lens, comparing material, labor, and lifecycle expenses.
Aug 4, 2026

Walls & Panels
Gypsum Board Types: Exact Specifications, Thickness & Dimensions
Compare standard, Type X, and moisture-resistant gypsum board types. Get exact specifications, thicknesses, dimensions, and ASTM standards for your project.
Aug 4, 2026

Fire Resistance
Best Fire-Resistant Outdoor Decking Materials: 2026 Buyer Guide
Discover the best fire-resistant outdoor decking materials for 2026. Compare Class A PVC, aluminum, and hardwood options for WUI compliance and safety.
Aug 4, 2026