Application Guide: Installing Masonry from L&L Building Materials Inc
Master the specification and installation of brick and CMU products sourced from L&L Building Materials Inc with this technical application guide.

Sourcing and Specifying via L&L Building Materials Inc
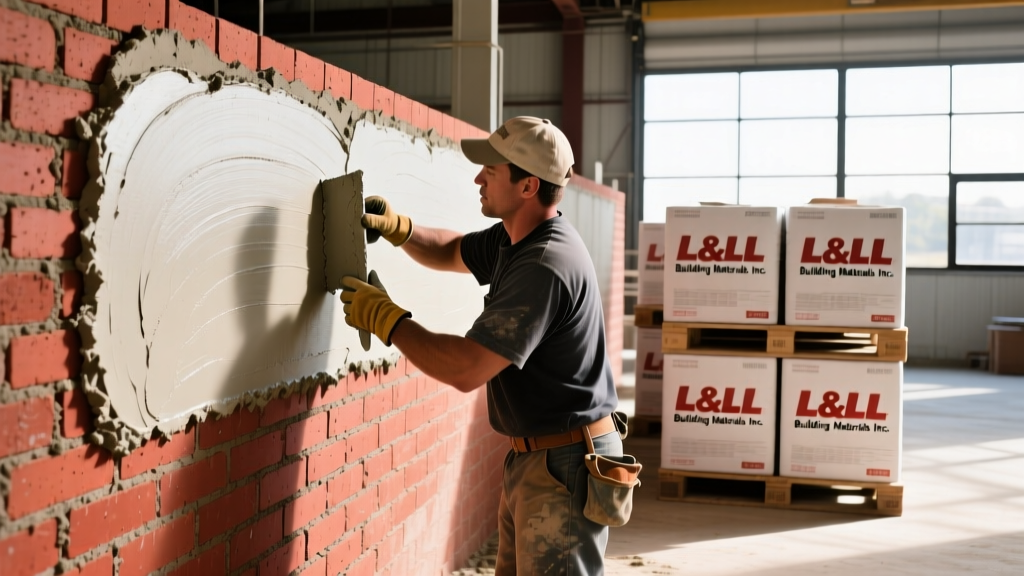
Procuring heavy masonry units—such as clay brick, concrete masonry units (CMU), and architectural block—requires precise coordination to ensure material integrity upon arrival. When sourcing from specialized distributors like L&L Building Materials Inc, contractors benefit from regionally optimized palletizing, shrink-wrapping, and direct-from-manufacturer quality control. However, the transition from the delivery truck to the scaffold demands strict adherence to application protocols. This guide details the technical specifications, mortar selection, and installation workflows required to maximize the structural performance and aesthetic longevity of masonry products supplied by L&L Building Materials Inc.
Mortar Selection Matrix for Heavy Masonry
The structural bond between masonry units relies entirely on the correct mortar specification. Per ASTM C270, mortar must be selected based on the exposure conditions and the compressive strength of the units provided by L&L Building Materials Inc. Using a mortar that is too hard (high Portland cement content) for a soft clay brick will result in unit spalling during freeze-thaw cycles.
| Mortar Type | Mix Ratio (Cement : Lime : Sand) | Compressive Strength | Best Application Use Case |
|---|---|---|---|
| Type N | 1 : 1 : 6 | 750 psi | General above-grade exterior walls, parapets, and interior load-bearing walls. |
| Type S | 1 : 0.5 : 4.5 | 1,800 psi | Below-grade foundations, retaining walls, and pavements subject to lateral loads. |
| Type M | 1 : 0.25 : 3.75 | 2,500 psi | High-load bearing columns, foundations, and structures subjected to severe compressive stress. |
| Type O | 1 : 2 : 9 | 350 psi | Non-load-bearing interior partitions and historic tuckpointing (rarely used in new commercial builds). |
Pre-Installation: Moisture Management and IRA Testing
One of the most frequent causes of bond failure and efflorescence is improper moisture management at the time of laying. Clay bricks supplied through L&L Building Materials Inc vary in porosity. Before laying the first course, test the Initial Rate of Absorption (IRA).
- Low IRA (< 10 g/30 min): Do not wet. Keep bricks dry to prevent floating in the mortar bed.
- Medium IRA (10 - 30 g/30 min): Lightly fog-spray the brick beds 12 hours before laying.
- High IRA (> 30 g/30 min): Thoroughly soak the bricks and allow them to surface-dry (SSD condition) so they do not rapidly suck moisture out of the mortar, which halts the hydration process and causes powdery, weak joints.
For CMU blocks, the National Concrete Masonry Association (NCMA) strictly advises against wetting the units before installation. CMUs shrink as they dry; adding water artificially expands them, leading to severe shrinkage cracking once the wall cures.
Step-by-Step Application Workflow
1. Base Preparation and Flashing
Apply a continuous layer of through-wall flashing at the base of the wall, above grade, and above all lintels. Install weep holes at a maximum spacing of 32 inches on center immediately above the flashing to allow hydrostatic pressure to escape. Use open-head joints or manufactured plastic weep vents; never use solid mortar joints at the base course.
2. Laying the Leads
Build the corners (leads) first, stepping them up 4 to 5 courses. Use a laser level and a masonry line to ensure absolute plumb and level. The leads dictate the geometry of the entire wall. Check diagonal measurements to ensure the structure is perfectly square before running the courses between the leads.
3. Running the Course and Tooling
Apply a 3/8-inch mortar bed. Butter the head joints of the brick or CMU before placing them to ensure a complete seal. Tooling timing is critical: Wait until the mortar is "thumbprint hard" (typically 20-45 minutes depending on ambient humidity) before tooling the joints with a convex or V-shaped jointer. Tooling too early brings excess water to the surface, causing crazing; tooling too late fails to compress the mortar against the unit, inviting water penetration.
Managing Control Joints and Expansion
Different materials react to thermal and moisture changes differently. Failing to install control joints will result in unsightly and structurally compromising stair-step cracking.
• Clay Brick: Expands over time. Install vertical expansion joints every 12 to 15 feet and at all wall intersections or changes in wall height.
• CMU Block: Shrinks over time. Install control joints filled with flexible sealant every 20 to 25 feet, and always directly beneath window sills where stress concentrates.
Cold Weather Application Protocols
When installing masonry products in temperatures below 40°F (4°C), standard hydration ceases, and freezing water expands, destroying the mortar matrix. Follow these strict cold-weather parameters:
- Heat the Mixing Water and Sand: Water should be heated to 120°F-140°F, and sand should be thawed and free of ice chunks. Never heat the Portland cement or lime directly.
- Use Accelerators Cautiously: Use ASTM C494 Type C accelerating admixtures. Never use calcium chloride or antifreeze compounds, as they cause severe efflorescence and corrode steel reinforcement.
- Curing Protection: Cover the freshly laid masonry with insulated tarps immediately after the shift. The masonry must be maintained at a minimum temperature of 40°F for at least 24 hours post-installation to achieve initial set.
Troubleshooting Common Defects
Efflorescence (White Powdery Staining)
Cause: Water-soluble salts migrating to the surface due to excessive moisture during installation or lack of proper cavity drainage.
Fix: Allow the wall to dry completely. Dry-brush the surface, then wash with a diluted solution of muriatic acid (1 part acid to 10 parts water) or a proprietary masonry cleaner. Always pre-wet the wall with clean water before applying acid to prevent the acid from etching the masonry unit.
Step Cracking at Lintels
Cause: Deflection of the steel lintel exceeding L/600, or lack of soft joints above the lintel.
Fix: For future prevention, always specify pre-galvanized steel lintels with adequate bearing (minimum 4 inches on each side) and install a compressible expansion joint material directly above the top flange of the lintel to accommodate brick expansion.
Frequently Asked Questions
What is the standard waste factor when ordering from L&L Building Materials Inc?
For standard running bond patterns, calculate a 5% to 7% waste factor. For complex patterns like herringbone or when cutting numerous arches and radii, increase the waste factor to 10% to 12% to account for breakage during cutting.
How long should I wait to clean the masonry after installation?
Wait a minimum of 7 to 14 days after installation before performing the final acid wash. Cleaning too early can erode the uncured lime in the mortar joints, leading to permanent joint erosion and sand exposure.
Written by
Priya KapoorPriya Kapoor is a real estate market analyst and construction economics researcher with expertise in housing affordability, development feasibility, and infrastructure investment. She holds a Master of Regional Planning from Cornell University and previously worked as a senior analyst at CBRE's Investment Properties group, where she modeled returns for $4B in mixed-use development pipelines. Priya now runs an independent research practice advising developers, municipalities, and REITs on construction cost forecasting and market timing. She publishes the quarterly "BuildMat Market Pulse" report tracking material price indices across 12 commodity categories. Based in Austin, TX, Priya serves on the board of Habitat for Humanity Austin and is a marathon runner.
More from Priya Kapoor
View all
Construction Cost
Cost to Build a 1600 Sq Ft Home in 2026: Full Breakdown
Accurate 2026 cost to build a 1600 sq ft home—material, labor, and regional pricing breakdowns included. Plan your budget with real-time estimates.
Aug 11, 2026

Wood & Lumber
Name the Types of Wood for Pressure Treatment and Preservation
Learn how to name the types of wood best suited for pressure treatment. Compare species treatability, chemical retention levels, and 2026 preservation costs.
Aug 4, 2026

Stone & Masonry
Stone Veneer Suppliers Lindenhurst: 2026 Cost Analysis
Analyze 2026 stone veneer costs in Lindenhurst, NY. Compare local supplier pricing, delivery fees, and Suffolk County installation labor rates.
Aug 4, 2026