How to Build a Bamboo Trellis: Step-by-Step DIY Guide
Learn how to build a bamboo trellis with structural integrity. This DIY guide covers pole selection, lashing techniques, and joinery for heavy vines.

The Structural Advantage of Bamboo in Garden Architecture
Building a trellis that can withstand the dynamic loads of mature climbing vines, heavy snow, and seasonal wind requires more than just sticking poles in the dirt. Bamboo offers an exceptional strength-to-weight ratio, with certain species exhibiting tensile strength that rivals mild steel. However, learning how to build a bamboo trellis that lasts requires a strict adherence to material selection, proper curing, and specialized joinery techniques. Unlike dimensional lumber, bamboo is a hollow, tapered cylinder that demands unique structural approaches to prevent splitting and crushing at the joints.
Never use freshly cut 'green' bamboo or untreated craft-store bamboo for outdoor structural projects. Uncured bamboo contains high levels of starch and moisture, making it highly susceptible to powderpost beetle infestation and fungal rot within a single season. Always source heat-treated or borax-cured structural poles.
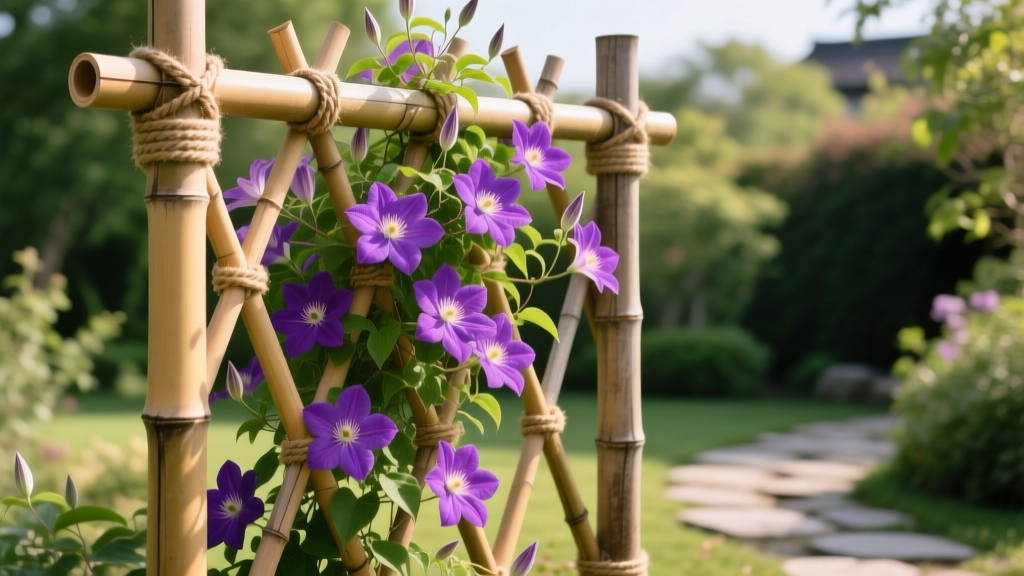
Phase 1: Material Selection and Sizing
The longevity and load-bearing capacity of your trellis depend entirely on the species and dimensions of the bamboo you select. According to structural guidelines published by the International Bamboo and Rattan Organisation (INBAR), the wall thickness and internode length are just as critical as the outer diameter.
Recommended Species for Trellis Construction
- Moso (Phyllostachys edulis): The industry standard for structural bamboo. Ideal for main load-bearing posts. Select poles with a 3 to 4-inch base diameter and a minimum wall thickness of 3/8 inch.
- Tonkin Cane (Arundinaria amabilis): Exceptionally straight with thick walls and short internodes. Perfect for horizontal cross-members and diagonal bracing (1 to 1.5-inch diameter).
- Guadua (Guadua angustifolia): The gold standard for heavy load-bearing structures, primarily grown in South America. Overkill for a standard garden trellis, but necessary if you are supporting aggressive, heavy woody vines like mature Wisteria.
Sizing Guidelines by Vine Type
Matching the trellis mass to the plant's mature weight is a common failure point in DIY builds. Use the following framework to size your primary vertical posts:
| Vine Category | Examples | Min. Post Diameter | Min. Bury Depth |
|---|---|---|---|
| Light Herbaceous | Sweet Pea, Morning Glory | 1.5 - 2 inches | 12 inches |
| Medium Perennial | Clematis, Honeysuckle | 2.5 - 3 inches | 18 - 24 inches |
| Heavy Woody | Wisteria, Climbing Hydrangea | 4+ inches | 30 - 36 inches |
Phase 2: Joinery and Fastening Matrix
Because bamboo splits easily when nailed or screwed directly, traditional carpentry fasteners require modification. You must choose between traditional lashing, mechanical bolting, or a hybrid approach. The American Bamboo Society notes that allowing for slight flex in the joints often increases the overall wind-resistance of the structure.
| Method | Best Application | Pros | Cons |
|---|---|---|---|
| Square Lashing | 90-degree perpendicular joints | Aesthetic, allows natural flex, no splitting | Time-consuming, requires annual tension checks |
| Diagonal Lashing | Cross-bracing and X-frames | Pulls spars together tightly, high shear strength | Complex to tie correctly for beginners |
| Carriage Bolts (304 SS) | Primary post-to-beam connections | Permanent, high load-bearing, zero maintenance | Requires precise drilling, risks splitting if overtightened |
Expert Insight: When using mechanical bolts, always drill through the bamboo at a node (the solid joint). The node provides internal structural support that prevents the hollow culm from crushing when the bolt nut is tightened. If a joint must occur mid-internode, insert a tight-fitting wooden dowel or a two-part epoxy plug inside the culm before drilling.
Phase 3: Step-by-Step Installation Guide
Step 1: Site Preparation and Footings
Direct soil contact is the primary cause of bamboo trellis failure. Even treated bamboo will eventually succumb to ground moisture.
- Dig Post Holes: Excavate holes to the depth specified in the sizing table above. The diameter should be three times the width of the bamboo post.
- Create a Gravel Base: Add 4 inches of crushed angular gravel to the bottom of the hole and tamp it down. This ensures drainage and prevents the base from sitting in pooled water.
- Set the Posts: Place your main vertical Moso poles into the holes. Use a post level to ensure they are perfectly plumb.
- Backfill and Secure: For light vines, backfill with a 50/50 mix of native soil and gravel, tamping every 4 inches. For heavy woody vines, pour a fast-setting concrete collar around the base, but keep the concrete 2 inches below the final soil grade, covering it with dirt to hide the footprint and prevent water pooling against the bamboo.
Step 2: Framework Assembly
Attach your horizontal cross-members using your chosen joinery method. If utilizing 3/8-inch 304 stainless steel carriage bolts:
- Drill pilot holes through the intersecting poles. Use a sharp spade bit or Forstner bit to prevent tearing the bamboo fibers.
- Insert the carriage bolt with a large fender washer on both the head side and the nut side. The fender washers distribute the clamping force across the curved surface of the bamboo, preventing the bolt head from pulling through the outer skin.
- Tighten with a socket wrench until snug, then back off a quarter-turn to allow for seasonal expansion and contraction.
Step 3: Executing the Square Lash (For Cross-Members)
If you opt for traditional lashing using 3mm sisal or synthetic hemp twine:
- Secure the twine to the vertical post with a clove hitch, leaving a 6-inch tail.
- Wrap the twine over the horizontal pole, under the vertical post, and over the horizontal pole again. Repeat this square pattern 3 to 4 times, pulling tightly with each pass.
- Execute the frapping turns: Wrap the twine tightly between the two poles, over the existing wraps, 2 to 3 times. This pulls the initial wraps tight and locks the joint.
- Finish with a square knot, binding the frapping turns to the initial tail. Apply a drop of cyanoacrylate (superglue) to the knot to prevent unraveling.
Phase 4: Long-Term Maintenance and Rot Prevention
A properly built bamboo trellis can last 10 to 15 years with minimal intervention. However, UV degradation and moisture cycling will slowly break down the lignin in the bamboo's outer skin.
Annual Sealing Protocol
Do not use polyurethane or film-forming finishes on outdoor bamboo. These trap moisture inside the culm, accelerating internal rot. Instead, use penetrating oils.
- Year 1 & 2: Apply a generous coat of pure tung oil or boiled linseed oil mixed with a citrus solvent (for deeper penetration) every spring. Wipe off excess after 30 minutes.
- Year 3+: Inspect the lashing twine. Natural sisal will degrade and need replacement every 3 to 4 years. If you used synthetic hemp (polypropylene core), it will outlast the bamboo itself.
Inspecting for Pest Intrusion
Check the nodes and cut ends for fine, sawdust-like powder (frass). This is the hallmark of powderpost beetles. If detected, inject a borate-based wood preservative directly into the affected internode using a syringe, and seal the injection hole with exterior-grade wood filler.
By respecting the unique cylindrical geometry of the material and prioritizing drainage at the footings, your bamboo trellis will transition from a simple garden support into a permanent, load-bearing architectural feature capable of sustaining decades of vigorous plant growth.
Written by
Elena RodriguezElena Rodriguez is a civil engineer and technical writer specializing in concrete technology, masonry systems, and ASTM/ACI compliance. She earned her B.S. in Civil Engineering from Texas A&M University and spent a decade at a materials testing laboratory, performing over 2,000 concrete compressive strength tests and masonry prism evaluations. Elena is an ACI-certified Field Testing Technician (Grade I) and a member of ASTM Committee C12 on Natural Building Stone. She currently consults on forensic engineering cases involving concrete failures and moisture intrusion. Based in San Antonio, TX, Elena is a proud member of the Society of Women Engineers (SWE) and coaches her daughter's FIRST Robotics team.
More from Elena Rodriguez
View all
Walls & Panels
Cost Analysis: Light Gauge Steel Framing Advantages and Disadvantages
Evaluate light gauge steel framing advantages and disadvantages through a strict cost analysis lens, comparing material, labor, and lifecycle expenses.
Aug 4, 2026

Walls & Panels
Gypsum Board Types: Exact Specifications, Thickness & Dimensions
Compare standard, Type X, and moisture-resistant gypsum board types. Get exact specifications, thicknesses, dimensions, and ASTM standards for your project.
Aug 4, 2026

Fire Resistance
Best Fire-Resistant Outdoor Decking Materials: 2026 Buyer Guide
Discover the best fire-resistant outdoor decking materials for 2026. Compare Class A PVC, aluminum, and hardwood options for WUI compliance and safety.
Aug 4, 2026