How to Apply Acoustic Caulk for Soundproofing Gaps and Seams
Learn the exact installation procedures for applying acoustic caulk for soundproofing. Master gap sealing, bead sizing, and curing times for STC gains.
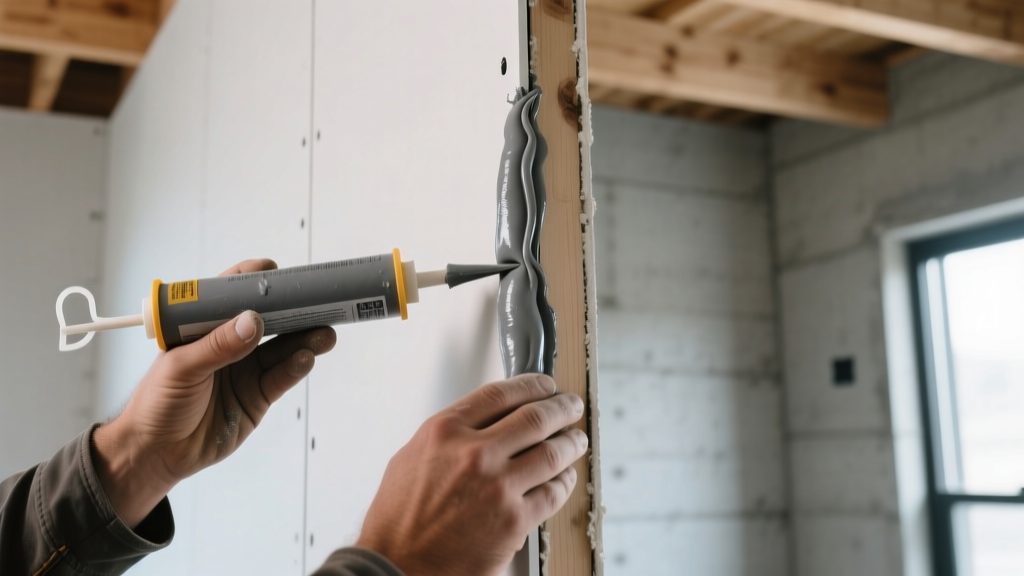
The Physics of the Air Seal in Acoustic Partitions
Sound behaves like a fluid under pressure; it will exploit the path of least resistance to bypass a high-mass barrier. When installing decoupled walls, mass-loaded vinyl (MLV), or resilient channel systems, applying acoustic caulk for soundproofing is the critical final step that dictates the actual performance of the assembly. According to the National Institute of Building Sciences (WBDG), an unsealed gap comprising just 1% of a partition's total surface area can degrade the Sound Transmission Class (STC) rating by up to 10 points. Standard acrylic latex caulks dry hard and brittle, eventually cracking as the building settles or the drywall flexes under acoustic vibration. True acoustic sealants remain permanently elastomeric, maintaining an airtight bond despite structural micro-movements.
Material Selection Matrix: Top Acoustic Sealants
Not all acoustical sealants are formulated identically. The choice between synthetic rubber, butyl, and water-based elastomeric compounds depends on your substrate, ventilation, and painting requirements. Below is a comparison of the industry-standard products available in the 2026 market.
| Product Model | Base Chemistry | Paintability | Shrinkage | Est. Cost (28oz Tube) | Best Application |
|---|---|---|---|---|---|
| OSI SC-175 | Synthetic Rubber | Poor (Bleeds through) | Zero | $9.50 - $11.00 | Hidden perimeter seals, bottom plates |
| Green Glue Noiseproofing Sealant | Water-based Elastomeric | Excellent | Minimal | $12.00 - $14.00 | Visible drywall seams, electrical boxes |
| Tremco Acoustical Sealant | Butyl Rubber | Poor | Zero | $10.50 - $12.50 | Masonry-to-wood transitions, deep gaps |
Pre-Application Preparation and Tooling
Proper tooling ensures the acoustic caulk for soundproofing achieves the correct volume and depth to absorb vibrational energy without tearing.
Surface Conditioning
Acoustic sealants require clean, dust-free substrates for maximum adhesion. Vacuum all drywall dust from the floor perimeter and stud cavities. If sealing to concrete, ensure the surface is free of curing compounds or form-release oils, which act as bond-breakers. Wipe down PVC or ABS pipe penetrations with isopropyl alcohol to remove manufacturing mold-release agents.
Nozzle Cutting and Gun Setup
Do not puncture the tube seal with a nail or wire, which can create an uneven flow. Use the built-in puncture tool on your caulk gun. Cut the nozzle tip at a strict 45-degree angle. For standard 1/2-inch drywall gaps, the orifice should measure exactly 3/8 of an inch. This forces a thick, continuous bead rather than a thin, easily broken ribbon. Use a high-thrust, drip-free ratcheting caulk gun (minimum 12:1 thrust ratio) to handle the high viscosity of elastomeric compounds without hand fatigue.
Step-by-Step Application Procedures
Execute the sealing process in a specific sequence to ensure no flanking paths are missed before the drywall is taped and mudded.
Step 1: Perimeter and Bottom Plate Sealing
- The Floor-to-Drywall Gap: Leave a 1/4-inch to 3/8-inch gap between the bottom edge of the drywall and the subfloor. This prevents moisture wicking and allows for structural deflection.
- Bead Application: Hold the gun at a 45-degree angle to the joint. Push the gun forward (do not pull) to force the acoustic caulk for soundproofing deep into the cavity, rather than just bridging the surface.
- Tooling: Immediately tool the bead with a convex plastic jointing tool or a gloved finger dipped in a soapy water solution (for water-based sealants) or mineral spirits (for synthetic rubber). This compresses the sealant into the void and ensures full contact with both substrates.
Step 2: Electrical Box and Penetration Sealing
Electrical boxes are notorious acoustic leaks. Sound enters the wall cavity through the cutout and bypasses the insulation.
- Putty Pads: Before installing the drywall, wrap the back and sides of standard electrical boxes with an intumescent acoustic putty pad (e.g., Tenmat or Soundproofing America models).
- Perimeter Caulking: Once the drywall is hung, run a continuous 3/8-inch bead of paintable acoustic sealant (like Green Glue) around the entire perimeter where the drywall meets the electrical box flange.
- Wire Penetrations: Seal the knockout holes where Romex or MC cable enters the box. If the gap exceeds 1/2 inch, pack it first with a closed-cell polyethylene backer rod before applying the sealant.
Step 3: Pipe and HVAC Penetrations
Plumbing and HVAC ducts expand and contract with temperature changes. Rigid fills will crack and fail.
Common Failure Modes and Troubleshooting
Even experienced installers encounter issues when working with high-viscosity acoustic compounds. Recognizing these failure modes prevents costly teardowns.
Adhesion Failure on Cold Substrates
Synthetic rubber and butyl sealants become extremely thick and lose tackiness when applied below 40°F (4°C). If you are sealing an unheated garage or basement in winter, store the tubes in a climate-controlled room at 70°F for 24 hours prior to application. Applying cold caulk results in poor wetting and eventual detachment from the substrate.
Shrinkage and Concave Beads
If a water-based acoustic sealant cures with a deep concave dip, it was likely applied too thickly without a backer rod. Water-based compounds shrink as the carrier evaporates. For any gap deeper than 1/2 inch, you must install a closed-cell backer rod to limit the depth of the sealant to 1/2 inch, creating an optimal hourglass shape that handles movement without internal tearing.
Skinned-Over Extrusion
Leaving the nozzle unsealed between uses allows a skin to form inside the tip. When you resume work, this skin acts as a plug, causing uneven pressure and burst beads. Always cap the tube tightly or insert a long steel wire into the nozzle when pausing for more than 15 minutes.
Curing Timelines and Final Cleanup
Curing times dictate when you can proceed to taping, mudding, or painting. According to building science principles outlined by the U.S. Department of Energy, achieving a true airtight seal requires full solvent or water evaporation.
- Water-Based Elastomeric (Green Glue): Tack-free in 2 hours. Can be taped and mudded over in 24 hours. Requires 14-28 days for full deep-cure before applying direct paint to prevent trapping moisture.
- Synthetic Rubber (OSI SC-175): Skins over in 24 hours but remains permanently non-hardening underneath. Do not mud over this product. Cleanup requires mineral spirits or naphtha before the skin sets.
- Butyl Rubber (Tremco): Never truly cures; remains a viscous mastic. Excellent for deep, irregular masonry gaps. Cleanup requires aggressive solvents like xylene or toluene, requiring strict respiratory PPE.
By adhering to these precise application procedures, selecting the correct chemistry for the specific joint, and respecting the curing timelines, you ensure the acoustic caulk for soundproofing performs as an unbroken, flexible membrane. This transforms a theoretically high-STC wall design into a verified, field-tested acoustic barrier.