Basement Insulation Maintenance: Inspection and Cleaning Playbook
Master basement insulation maintenance with our expert playbook. Learn to inspect for moisture, clean mold from foam, and prevent pest damage.
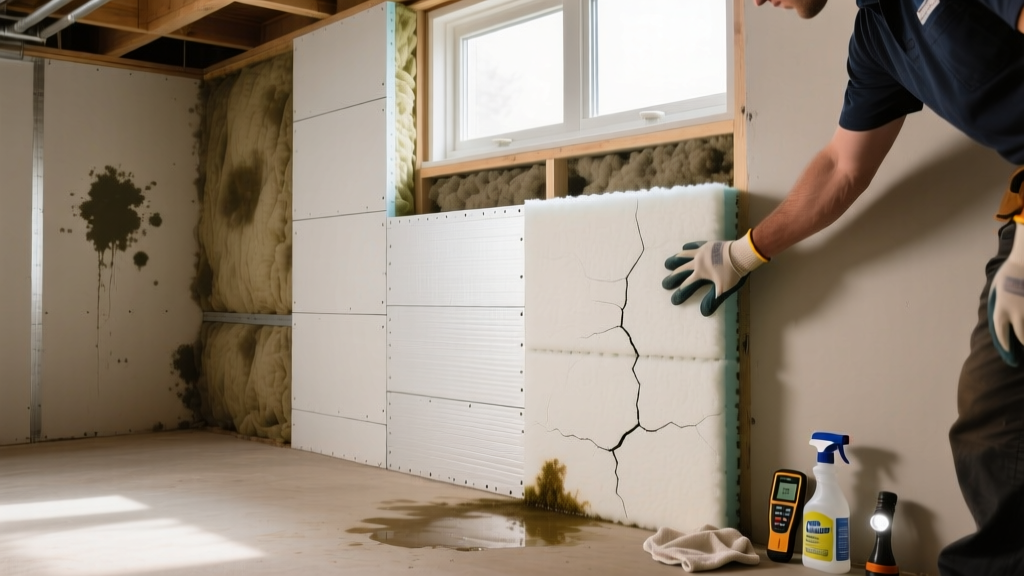
The Diagnostic Inspection Protocol
Basement environments operate under unique hygrothermal loads. Unlike above-grade walls, below-grade assemblies must manage hydrostatic pressure, capillary rise, and interior humidity condensation. When basement insulation fails or becomes contaminated, the remediation approach depends entirely on the material's vapor permeability and cellular structure. A visual check is insufficient; effective maintenance requires quantitative diagnostic tools to detect hidden moisture migration before structural rot or microbial growth occurs.
Essential Diagnostic Toolkit
- Pinless Moisture Meter: Wagner Meters Orion 910 or Klein Tools ET40. Use to scan drywall and subflooring adjacent to insulated rim joists.
- Thermal Imaging Camera: FLIR E8-XT or similar. Crucial for identifying thermal bridging, missing spray foam, and hidden water pooling behind rigid boards.
- Borescope: A 5mm articulating endoscope to inspect the cavity between the concrete foundation wall and the interior framed insulation.
Begin your inspection at the rim joist, the most common failure point for air infiltration and condensation in basement assemblies. Scan the perimeter with your thermal camera. Cool blue or dark purple anomalies on the interior surface during winter indicate air leaks where warm, moist interior air is hitting cold surfaces. Next, use your pinless moisture meter on any wood framing behind fiberglass or mineral wool batts. Wood moisture content (MC) must remain below 16%. Readings between 16% and 19% indicate active condensation that will eventually support mold growth, while readings above 20% confirm a liquid water intrusion event requiring immediate intervention.
Material-Specific Cleaning and Remediation
Not all insulation materials respond to moisture or mold in the same way. The cleaning playbook must be adapted to the specific chemistry and physical structure of the installed product.
Rigid Foam Boards (XPS, EPS, Polyiso)
Extruded polystyrene (XPS), such as Owens Corning FOAMULAR NGX, features a closed-cell structure that resists water absorption, retaining up to 90% of its R-value even in damp conditions. Expanded polystyrene (EPS) is more permeable and can wick moisture if the facer is damaged.
- Surface Mold Cleaning: If mold grows on the surface of XPS or foil-faced polyiso, do not use bleach, which can degrade certain facers. Instead, apply a commercial fungicide like Concrobium Mold Control. Scrub gently with a nylon-bristle brush, then wipe clean with a microfiber cloth.
- Hidden Moisture: If a moisture meter detects water behind the rigid foam, the boards must be temporarily unfastened. Use a shop vac to extract standing water, run commercial dehumidifiers (aiming for 50% relative humidity), and allow the concrete to dry to a pH-neutral state before re-adhering the foam with a low-VOC polyurethane adhesive like Loctite PL 300.
Closed-Cell Spray Polyurethane Foam (ccSPF)
Closed-cell spray foam acts as both an insulator and a Class II vapor retarder. Because it does not wick water, mold cannot grow inside the foam matrix itself; it only grows on surface dust or organic debris trapped against the foam.
- Surface Remediation: For minor surface contamination, HEPA-vacuum the area thoroughly. For stubborn biological growth, professionals utilize dry ice blasting, which removes the top microscopic layer of contaminated foam without introducing liquid moisture. DIYers can carefully scrape the surface with a putty knife and encapsulate it with a mold-resistant mastic.
- Delamination Repair: If ccSPF pulls away from the concrete (delamination) due to improper substrate temperature during installation, inject a two-part polyurethane crack injection resin behind the foam to re-establish the air and vapor seal.
Mineral Wool and Fiberglass Batts
Mineral wool (e.g., ROCKWOOL Comfortboard) is inherently hydrophobic and inorganic, meaning the fibers themselves will not mold. However, the binders and dust trapped within the batt can support microbial growth if repeatedly wetted. Fiberglass batts face the same issue, with the added risk of the kraft paper facing acting as a food source for mold.
Moisture and Mold Decision Matrix
Use the following matrix to quickly diagnose basement insulation failures based on observable symptoms and determine the correct remediation pathway.
| Observable Symptom | Likely Root Cause | Affected Materials | Remediation Action |
|---|---|---|---|
| Frost or ice crystals on interior rim joist insulation | Warm, moist interior air leaking into cold joist cavities | Fiberglass batts, open-cell foam | Remove wet batts; air-seal joists with ccSPF or rigid foam cut-and-cobble method. |
| White, powdery efflorescence on concrete behind foam | Hydrostatic pressure driving liquid water through porous concrete | EPS, Polyiso, wood framing | Install interior French drain; replace damaged insulation with XPS or mineral wool. |
| Musty odor with no visible water stains | High ambient humidity condensing on cold concrete behind vapor-permeable insulation | Fiberglass, Mineral Wool | Install continuous rigid foam against concrete to move the condensing surface; run dehumidifier. |
| Black spotting on drywall over insulated wall | Thermal bridging through wood studs creating cold spots | Drywall, cavity batts | Add 1-2 inches of continuous exterior/interior rigid foam to break the thermal bridge. |
Pest Intrusion and Burrow Repair
Basements are primary entry points for rodents and insects. Mice frequently burrow into EPS and XPS foam because it provides excellent thermal shelter, while carpenter ants and termites can tunnel through rigid foam to reach structural wood. The Department of Energy (DOE) notes that unprotected foam insulation in below-grade applications is highly vulnerable to pest degradation.
If you discover pest tunnels in your basement insulation:
- Assess the Damage: Cut away the compromised foam section using a hot wire cutter or utility knife. Ensure you cut back at least 6 inches into clean, un-tunneled foam.
- Treat the Perimeter: Apply a borate-based liquid termiticide/insecticide to the adjacent concrete and soil interface.
- Replace with Pest-Resistant Materials: When patching, use borate-treated EPS (such as Bora-Foam) or switch to mineral wool, which is entirely inorganic and impenetrable to rodents.
- Seal the Edges: Use a specialized pest-blocking polyurethane sealant, like Pur Black NF, which contains a bittering agent that deters rodents from chewing through the cured foam.
Expert Insight: Never use standard expanding spray foam from a hardware store can to seal pest entry points in a basement. Standard foam lacks the density and chemical deterrents required to stop mice, who will simply chew through it again within weeks. Always use high-density, pest-specific sealants for below-grade maintenance.
Seasonal Preventative Maintenance Schedule
Reactive remediation is costly; professional basement mold remediation averages $15 to $30 per square foot. Implementing a bi-annual preventative maintenance schedule ensures your basement insulation performs at its rated R-value and maintains healthy indoor air quality, as recommended by Centers for Disease Control and Prevention (CDC) guidelines on moisture control.
Spring Protocol (Post-Snowmelt)
- Inspect all rim joist spray foam and rigid foam seals for cracking caused by winter thermal contraction.
- Check the discharge lines of sump pumps and exterior grading to ensure hydrostatic pressure is not building up against the foundation wall.
- Run a dehumidifier to maintain basement relative humidity strictly between 40% and 50% as outdoor temperatures begin to rise.
Fall Protocol (Pre-Heating Season)
- Perform a thermal scan of all basement walls to identify any new thermal bridges or air leaks before the heating season creates severe temperature differentials.
- Verify that basement exhaust fans (if any) are venting directly outdoors and not dumping moist air into insulated joist cavities.
- Inspect the bottom 12 inches of any framed basement walls for capillary wicking; ensure a minimum 1-inch capillary break (using closed-cell foam or mineral wool) exists between the concrete slab and the bottom plate of the framed wall.