Maintenance Playbook: Cleaning and Repairing Foam Insulation for Pipes
Learn how to inspect, clean, and repair foam insulation for pipes. Prevent CUI, mold, and UV damage with this expert maintenance playbook.
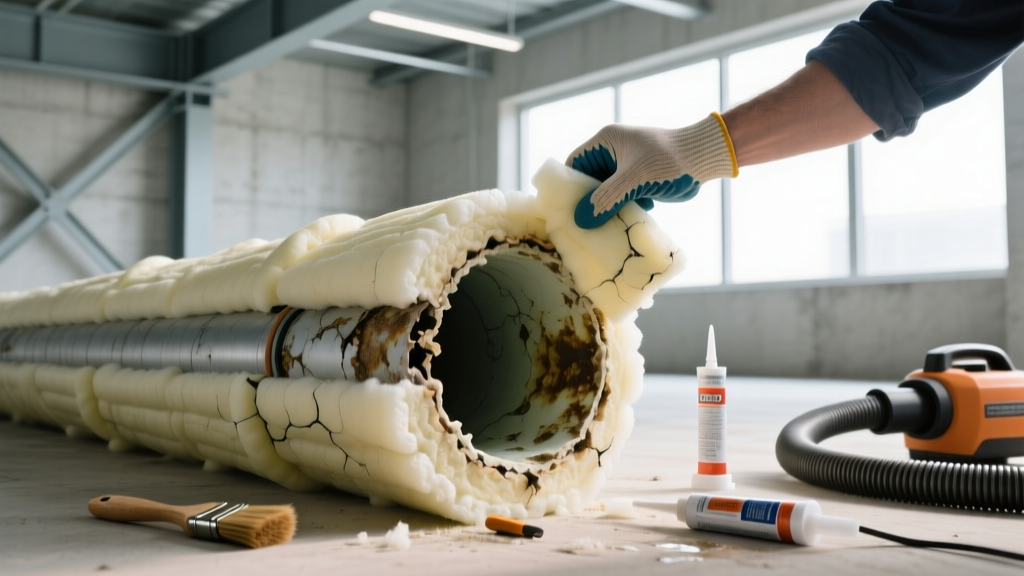
The Hidden Risks of Neglected Pipe Foam
Foam insulation for pipes—specifically closed-cell elastomeric (ASTM C534) and polyethylene (ASTM C1427)—is engineered to resist moisture vapor transmission and maintain thermal efficiency. However, mechanical rooms, crawlspaces, and exterior chiller lines subject these materials to physical abrasion, UV degradation, and chemical exposure. When the outer skin of elastomeric foam is compromised, or when polyethylene seams separate, the underlying pipe becomes vulnerable.
The most severe consequence of failed foam insulation is Corrosion Under Insulation (CUI). According to the National Insulation Association (NIA), CUI accounts for a disproportionate amount of pipeline maintenance budgets in commercial facilities. Once moisture breaches the foam barrier and becomes trapped against the pipe surface, the thermal conductivity of the wet insulation can increase by up to 300%, rendering the R-value useless while simultaneously accelerating oxidation on carbon steel and copper piping.
Bi-Annual Inspection Checklist
Routine maintenance begins with a systematic visual and tactile inspection. Facility managers should schedule this bi-annually, ideally before the cooling season (spring) and heating season (fall).
- Seam Integrity Check: Run a gloved hand along all longitudinal and butt seams. Look for lifting tape, dried-out adhesive, or gaps wider than 1/16th of an inch.
- UV Degradation Assessment: On exterior runs, check for chalking, micro-cracking, or a powdery residue on black elastomeric foam. This indicates the UV inhibitors are exhausted.
- Compression and Crushing: Inspect areas where pipes pass through hangers or wall penetrations. Compressed foam loses R-value; a 1-inch thick foam compressed to 1/2-inch loses nearly 40% of its thermal resistance.
- Condensation Sweating: Use a thermal imaging camera to scan chilled water lines (typically 42°F to 45°F). Dark blue or purple spots on the thermal readout indicate thermal bridging or moisture saturation inside the foam.
Cleaning Protocols for Elastomeric and Polyethylene Foam
Dust, grease, and biological growth not only degrade the aesthetic of a mechanical room but can also harbor moisture against the insulation jacket. The Environmental Protection Agency (EPA) emphasizes that controlling moisture and removing biological contaminants promptly is essential for indoor air quality, particularly when air handling units are nearby.
Routine Dust and Grime Removal
- Dry Dusting: Use a microfiber cloth or a soft-bristle brush to remove loose particulate matter. Avoid stiff wire brushes that will puncture the 10-mil outer skin of the foam.
- Wet Cleaning Solution: Mix a pH-neutral cleaner, such as Simple Green Pro HD, at a 1:10 ratio with warm water.
- Application: Dampen a sponge (do not soak it) and wipe the foam in the direction of the pipe run. Wring out the sponge frequently to prevent water from pooling in the seams.
- Rinsing: Wipe the surface with a clean cloth dampened with plain water to remove surfactant residue, which can otherwise attract more dust.
Mold and Mildew Remediation
If black or green spotting appears on the exterior jacket or at the seams, biological growth is present. While closed-cell foam does not provide a food source for mold, the dust and condensation on its surface do.
- Apply a commercial fungicidal spray like Concrobium Mold Control directly to the affected area.
- Allow it to dwell for 15 minutes. Do not scrub aggressively, as this can drive spores into micro-abrasions in the foam.
- Wipe clean with a damp cloth and allow the area to dry completely before applying any new sealants or tapes.
Repairing Physical Damage and Seam Failures
When inspection reveals torn foam, crushed sections, or failed seams, spot repairs are more cost-effective than full replacement. The key to a lasting repair is surface preparation and using manufacturer-matched adhesives.
Step-by-Step Seam and Tear Repair
- Clean and Prep: Wipe the bonding surfaces with isopropyl alcohol (70% or higher) to remove oils and dust. Allow 60 seconds for flash-off.
- Adhesive Application: Apply a thin, even coat of contact adhesive to both mating surfaces using a 2-inch natural bristle brush.
- Flash Time: Wait 3 to 10 minutes (depending on ambient humidity) until the adhesive is tacky but does not transfer to a knuckle.
- Compression: Press the seams together firmly, applying pressure for 30 seconds. Roll the seam with a silicone seam roller to ensure 100% contact.
Adhesive and Tape Selection Matrix
| Foam Material | Recommended Adhesive | Seam Tape / Jacketing | Cure Time (70°F) |
|---|---|---|---|
| Elastomeric (ArmaFlex, Rubatex) | Armacell 520 BLV or K-FLEX 320 | ArmaTape (36-mil elastomeric) | 24 hours full cure |
| Polyethylene (Tubolit, PE Foam) | Water-based acrylic or PE-specific contact cement | Shurtape PE-444 or ASJ Tape | 12 hours full cure |
| Polyurethane (Rigid Fiberglass/PU combo) | Polyurethane construction adhesive (e.g., PL Premium) | Aluminum foil tape (ASJ-R) | 24-48 hours full cure |
UV and Mechanical Protection Upgrades
Standard black elastomeric foam insulation for pipes is not inherently UV-stable for long-term exterior exposure. According to data referenced by the U.S. Department of Energy, unprotected exterior insulation degrades rapidly, leading to massive energy losses in chilled water and HVAC systems. If your facility has exterior pipe runs, maintenance must include upgrading the outer jacket.
For areas subject to physical impact—such as pipes running at floor level in parking garages or loading docks—wrap the foam in a rigid PVC or aluminum mechanical jacket. A 0.016-inch thick aluminum jacketing (Smooth or Stucco-embossed) provides excellent protection against forklifts, foot traffic, and bird pecking.
Cost Expectations for Pipe Insulation Maintenance
Budgeting for foam insulation maintenance requires separating material costs from specialized labor. As of 2026, commercial insulation contractors typically charge based on linear footage and accessibility.
- Inspection and Cleaning: $0.75 to $1.50 per linear foot. This includes basic dusting, seam inspection, and thermal imaging of critical valves.
- Seam Re-taping and Adhesive Repair: $1.50 to $3.00 per linear foot. Costs rise if scaffolding or scissor lifts are required for high-ceiling mechanical rooms.
- Section Replacement (Cut and Patch): $8.00 to $14.00 per linear foot. This includes removing the damaged 3/4-inch or 1-inch elastomeric section, prepping the pipe, and installing new factory-slitted tubing with matched adhesive.
- Exterior UV Coating Application: $2.50 to $4.50 per linear foot for a two-coat acrylic elastomeric paint system.
Expert Troubleshooting: Symptom-to-Fix Guide
When field issues arise, use this diagnostic matrix to identify the root cause and implement the correct fix without wasting materials.
Symptom: Condensation Dripping from the Insulation Jacket
- Cause: The insulation thickness is insufficient for the dew point, or the vapor retarder (seams) has failed, allowing ambient humidity to reach the cold pipe.
- Fix: Check the dew point calculator for your specific climate zone. If the pipe is 42°F and ambient is 85°F at 60% RH, you need a minimum of 1.5-inch thick elastomeric foam. If thickness is adequate, strip all existing tape, clean with alcohol, and re-seal using 36-mil elastomeric tape and contact adhesive.
Symptom: Foam is Shrinking and Pulling Away from Fittings
- Cause: Exposure to high heat (above 220°F for standard elastomeric) or chemical incompatibility from nearby PVC primer/cleaner spills.
- Fix: Standard elastomeric foam maxes out at 220°F. If insulating hot water or steam lines exceeding this, replace the damaged sections with EPDM rubber (rated to 250°F) or fiberglass with an ASJ jacket. Clean all chemical spills immediately.
Symptom: Chalky, Crumbly Texture on Exterior Foam
- Cause: Advanced UV degradation. The ozone and ultraviolet radiation have broken the surface polymer bonds.
- Fix: If the damage is only surface-deep (less than 1/16-inch), wire-brush the loose material gently, wipe clean, and encapsulate with an acrylic UV coating or wrap in aluminum jacketing. If the foam crumbles when squeezed, cut out the section and replace it entirely.
Proactive maintenance of foam insulation for pipes is not merely an aesthetic exercise; it is a critical operational protocol that protects capital infrastructure, ensures HVAC efficiency, and prevents catastrophic water damage from CUI and condensation. By adhering to strict cleaning protocols, utilizing manufacturer-specified adhesives, and upgrading exterior jackets, facility managers can easily double the functional lifespan of their pipe insulation systems.