How to Install the Best Insulator Material for Maximum R-Value
Master installation techniques for the best insulator material. Learn exact field metrics for spray foam, mineral wool, and rigid foam to maximize R-value.

The "Installed R-Value" Reality Check
Builders and homeowners constantly search for the best insulator material, but laboratory R-values are virtually meaningless if the installation technique fails in the field. A fiberglass batt rated at R-20 can easily perform at R-11 if compressed, improperly fluffed, or bypassed by convective air leaks. According to the U.S. Department of Energy, air leakage accounts for 25% to 40% of the energy used for heating and cooling a typical home. Therefore, identifying the best insulator material is only half the battle; executing the correct installation protocol is what actually delivers thermal resistance.
This guide strips away marketing claims and focuses on the exact field techniques, ambient requirements, and failure-mode avoidances required to achieve the rated thermal resistance of top-tier insulation systems in modern construction.
Installation Matrix: Matching Technique to Material
Different materials require radically different handling. The table below outlines the critical field metrics for the most common high-performance insulation types used in residential and light commercial framing.
| Material Type | Nominal R-Value / Inch | Critical Field Metric | Primary Installation Failure |
|---|---|---|---|
| 2lb Closed-Cell Spray Foam | R-6.5 to R-7.0 | Substrate temp 60°F–80°F | Exothermic overheating / delamination |
| Mineral Wool Batts | R-4.2 to R-4.3 | Cut 0.5" wider than cavity | Compression reducing effective R-value |
| High-Density Fiberglass | R-3.8 to R-4.3 | Fluffing to full 3.5" or 5.5" thickness | Stuffing tightly behind wiring and pipes |
| Polyiso Rigid Foam | R-6.0 to R-6.5 | Taped seams with acrylic tape | Thermal bridging at untreated joints |
Executing the Best Insulator Material: Closed-Cell Spray Foam
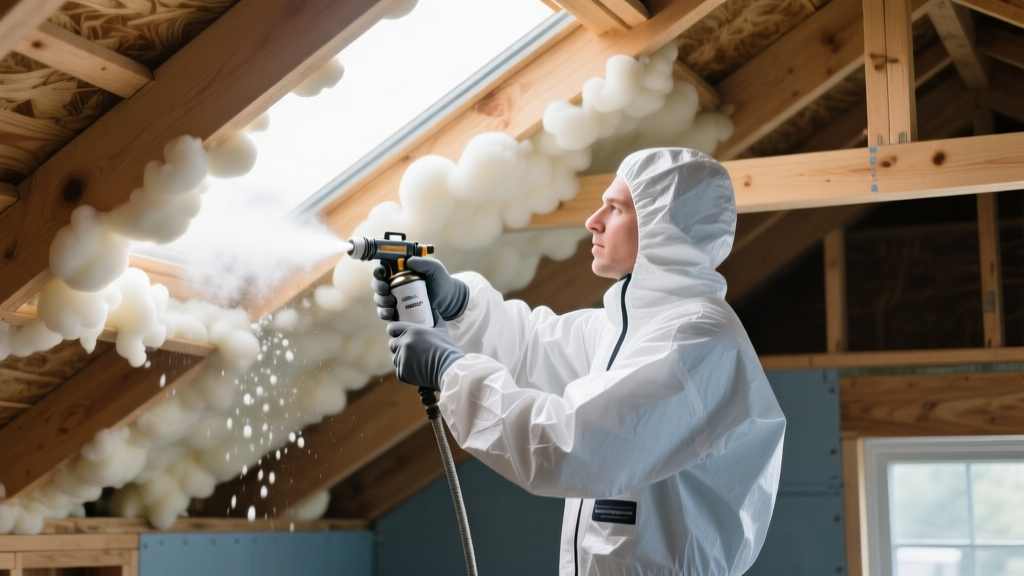
When evaluating the best insulator material for complex geometries, rim joists, and unvented roof assemblies, 2lb closed-cell polyurethane spray foam (such as Demilec Heatlok XT or Icynene ProSeal) remains the industry benchmark. It provides structural rigidity, an inherent vapor retarder, and exceptional R-value. However, its chemical installation process is highly unforgiving.
The 2-Inch Lift Rule and Exothermic Management
Closed-cell foam is created by the rapid chemical reaction of isocyanate and polyol resin. This reaction is highly exothermic. If an installer attempts to spray a 4-inch cavity in a single continuous pass, the core temperature of the foam can exceed 350°F. This leads to scorching, off-gassing, cell collapse, and in severe cases, structural fires.
- Pass Thickness: Never exceed a 2-inch thickness per pass. Allow the foam to cool for 3 to 5 minutes between lifts before applying the next layer.
- Substrate Moisture: Wood framing must have a moisture content below 19%. Spraying closed-cell foam over damp lumber traps moisture, leading to concealed rot because the foam is vapor-impermeable.
- Ambient Temperature: The chemical drums must be stored at 70°F to 80°F for 24 hours prior to use. If the substrate temperature drops below 60°F, the foam will not adhere properly, resulting in delamination and massive thermal gaps.
Trimming and Flush Finishing
Once cured, the foam will overfill the stud bays. Installers must trim it flush with the framing to allow drywall to sit flat. Do not use a standard drywall saw, which tears the closed-cell structure and compromises the air barrier. Use a specialized serrated insulation trimming saw or a hot-wire cutting tool to slice the foam cleanly without fracturing the cured cells.
Executing the Best Insulator Material: Mineral Wool Batts
For exterior walls requiring both high thermal resistance and superior acoustic dampening, mineral wool (such as Rockwool Comfortbatt or Thermafiber UltraBatt) is frequently chosen as the best insulator material. Unlike fiberglass, mineral wool is hydrophobic, fire-resistant up to 2,150°F, and maintains its shape over decades without sagging.
The Friction-Fit Cutting Technique
Mineral wool relies on a friction fit to stay in place without stapling or netting. To achieve this, the batt must be cut slightly larger than the cavity.
- Measurement: Measure the exact width between the studs. For standard 16-inch on-center framing, the cavity is exactly 14.5 inches wide.
- The Overcut: Add 0.5 inches to your measurement. Cut the mineral wool to 15 inches wide. This extra half-inch compresses slightly against the wood studs, creating a continuous seal that prevents convective looping.
- Cutting Tool: Never use a standard utility knife. A utility knife compresses the edges of the mineral wool, ruining the friction-fit geometry. Use a long, serrated insulation knife (or a clean bread knife) and cut over a rigid, flat surface.
Navigating Electrical Boxes and Plumbing
The most common failure point in batt installation is around electrical boxes. Do not simply cut a hole and leave a 1-inch gap around the box. Instead, slit the batt horizontally at the height of the box, tuck the insulation tightly behind the electrical box, and use a small scrap piece of mineral wool to stuff the gap between the box and the drywall. For plumbing drains, split the batt to wrap around the pipe, ensuring no wood framing is left exposed.
Climate-Specific Vapor Retarder Placement
Installing the best insulator material incorrectly regarding vapor dynamics will cause catastrophic moisture failure. According to principles outlined by the Building Science Corporation, vapor retarders must be placed on the warm-in-winter side of the insulation.
- Cold Climates (Zones 5-8): Require a Class I or Class II vapor retarder (e.g., 6-mil polyethylene or Kraft-faced batts) on the interior drywall side.
- Mixed Climates (Zones 3-4): Require a Class III retarder (e.g., standard latex paint on drywall) or a "smart" vapor retarder like CertainTeed MemBrain that adjusts its permeability based on humidity.
- Hot-Humid Climates (Zones 1-2): The vapor retarder must be on the exterior side of the wall assembly. Never install interior polyethylene in these zones, as it will trap air-conditioning condensation inside the wall cavity, leading to mold. Consult the EPA's moisture control guidelines for specific regional mandates.
Pre-Insulation Air Sealing Protocol
You cannot install the best insulator material into a leaky box and expect high performance. Insulation stops conductive heat transfer; it does not stop convective air movement. Before any insulation is laid or sprayed, a rigorous air-sealing protocol must be executed.
Fluid-Applied Membranes and Tapes
Move away from cheap caulk and canned spray foam for critical joints. Modern building envelopes utilize fluid-applied membranes and specialized acrylic tapes.
- Sheathing Seams: Use a liquid-applied flashing membrane like PROSOCO R-Guard FastFlash over all plywood or OSB seams, corners, and rough openings. This creates a monolithic, fully adhered air barrier that will not shrink or crack over time.
- Window and Door Rough Openings: Seal the flange to the weather-resistive barrier (WRB) using a UV-stable, airtight tape such as SIGA Rissan or Tescon Vana. These tapes maintain adhesion for decades, unlike standard asphalt-based flashing tapes which degrade and peel.
- Top and Bottom Plates: Apply a continuous bead of acoustical sealant (such as Tremco) under the bottom plate before framing, and seal the top plate to the ceiling drywall or top chord of the truss to prevent the stack effect from pulling conditioned air into the attic.
Verifying the Envelope: Blower Door Testing
The only way to verify that your air sealing and insulation installation have succeeded is through quantitative testing. Conduct a blower door test prior to hanging drywall. For high-performance builds in 2026, the target should be 2.0 ACH50 (Air Changes per Hour at 50 Pascals) or lower. If the test reveals leaks, use a theatrical fog machine in conjunction with the blower door to visually identify the exact bypasses, seal them, and retest before concealing the work behind drywall.
Written by
Elena RodriguezElena Rodriguez is a civil engineer and technical writer specializing in concrete technology, masonry systems, and ASTM/ACI compliance. She earned her B.S. in Civil Engineering from Texas A&M University and spent a decade at a materials testing laboratory, performing over 2,000 concrete compressive strength tests and masonry prism evaluations. Elena is an ACI-certified Field Testing Technician (Grade I) and a member of ASTM Committee C12 on Natural Building Stone. She currently consults on forensic engineering cases involving concrete failures and moisture intrusion. Based in San Antonio, TX, Elena is a proud member of the Society of Women Engineers (SWE) and coaches her daughter's FIRST Robotics team.
More from Elena Rodriguez
View all
Walls & Panels
Cost Analysis: Light Gauge Steel Framing Advantages and Disadvantages
Evaluate light gauge steel framing advantages and disadvantages through a strict cost analysis lens, comparing material, labor, and lifecycle expenses.
Aug 4, 2026

Walls & Panels
Gypsum Board Types: Exact Specifications, Thickness & Dimensions
Compare standard, Type X, and moisture-resistant gypsum board types. Get exact specifications, thicknesses, dimensions, and ASTM standards for your project.
Aug 4, 2026

Fire Resistance
Best Fire-Resistant Outdoor Decking Materials: 2026 Buyer Guide
Discover the best fire-resistant outdoor decking materials for 2026. Compare Class A PVC, aluminum, and hardwood options for WUI compliance and safety.
Aug 4, 2026