Ductwork Insulation Installation: Step-by-Step Pro HVAC Guide
Master professional ductwork insulation installation. Step-by-step guide covering rigid board, flex wrap, and mastic sealing for HVAC efficiency.
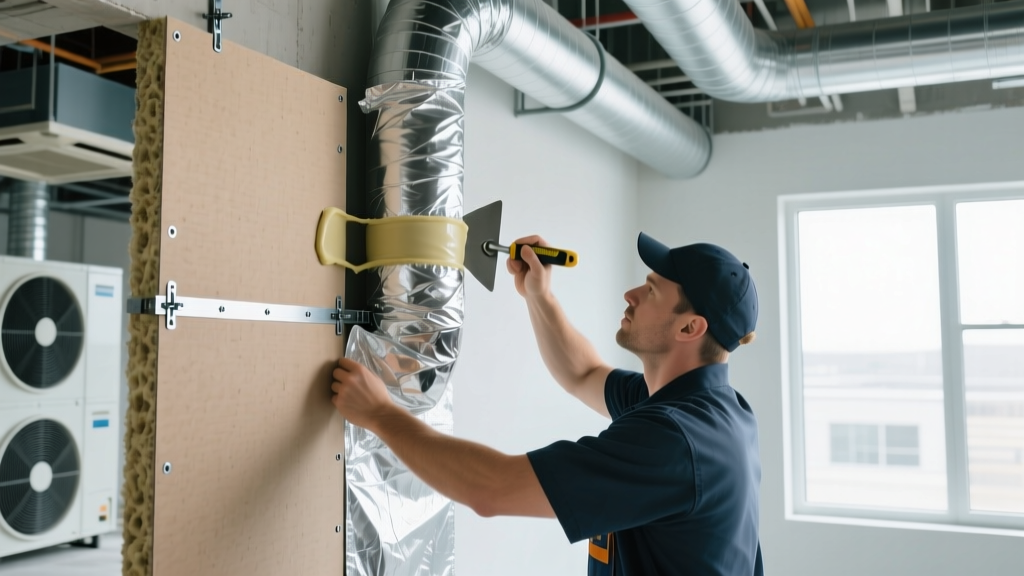
Why Proper Ductwork Insulation Installation Matters
Uninsulated or poorly insulated ducts located in unconditioned spaces—such as vented attics, crawlspaces, or garages—can lose 20% to 30% of the conditioned air moving through them. According to the Department of Energy, this thermal loss directly translates to inflated utility bills and compromised indoor comfort. Proper ductwork insulation installation is not merely about wrapping pipes; it requires a systematic approach to air sealing, vapor management, and material compression avoidance. The International Energy Conservation Code (IECC) mandates minimum R-values for ducts in unconditioned spaces, typically R-8 for climates zones 3 through 8. Achieving this rated performance in the field depends entirely on meticulous installation technique.
Material Selection Matrix for HVAC Ducts
Selecting the correct insulation medium depends on the duct geometry, spatial constraints, and moisture exposure. Below is a technical comparison of the three primary materials used in commercial and residential ductwork insulation.
| Material Type | Best Application | R-Value per Inch | 2026 Avg. Material Cost |
|---|---|---|---|
| Foil-Faced Fiberglass Blanket (e.g., Johns Manville SPI) | Rectangular and round sheet metal trunks/branches | R-4.2 | $0.85 - $1.15 / sq. ft. |
| Rigid Polyisocyanurate Board (e.g., Owens Corning DuoCoat) | Plenums, large flat trunks, and exterior rooftop units | R-6.5 | $1.60 - $2.20 / sq. ft. |
| Elastomeric Rubber (e.g., ArmaFlex) | Chilled water lines, refrigerant lines, high-humidity zones | R-4.4 | $2.50 - $3.80 / sq. ft. |
Phase 1: Air Sealing and Surface Preparation
Insulating a leaky duct system traps the inefficiency inside the wrapper. Before any insulation is unrolled, the bare sheet metal or flex duct must be hermetically sealed. The ENERGY STAR Seal and Insulate program emphasizes that mastic is vastly superior to tape for long-term joint sealing.
- Clean the Joints: Wipe all longitudinal seams, transverse joints, and plenum connections with a degreaser to remove manufacturing oils and dust. Mastic will not adhere to oily metal.
- Apply Water-Based Mastic: Use a high-grade UL 181A-M listed mastic (such as Hardcast 1402 or RCD #13). Apply a 1/16-inch thick layer over all joints, extending 1 inch past the seam on both sides. Embed fiberglass mesh tape into the mastic for joints wider than 1/8 inch to prevent cracking during thermal expansion.
- Seal Register Boots: The connection between the branch duct and the floor/wall register boot is the most common leak point. Apply a generous bead of mastic at the flange where the duct meets the subfloor or drywall.
- Cure Time: Allow the mastic to cure for 24 hours in standard conditions (70°F, 50% humidity) before wrapping the ducts. Wrapping over wet mastic traps moisture against the metal, accelerating corrosion.
Phase 2: Step-by-Step Installation Procedures
Wrapping Rectangular Sheet Metal with Fiberglass Blanket
Fiberglass duct wrap is the industry standard for residential and light commercial branch lines. The critical rule is to avoid compression, which destroys the trapped air pockets that provide thermal resistance. A 2-inch thick R-6 blanket compressed to 1 inch over a sharp metal edge drops to an effective R-3.5.
- Measure and Cut: Measure the duct perimeter. Cut the fiberglass blanket 2 inches wider than the perimeter to allow for a 2-inch longitudinal overlap. Use a specialized insulation knife with a hooked blade to ensure clean, unfaced edges.
- Positioning: Drape the blanket over the duct with the foil-scrim-kraft (FSK) facing outward. The FK facing acts as the mandatory vapor retarder.
- Securing the Seam: Pull the overlap tight without stretching the fiberglass core. Seal the longitudinal seam with 2.5-inch wide UL 181A-P listed foil tape. Do not use standard cloth-backed 'duct tape' (ASTM D3330), which dries out and fails within 18 months due to HVAC thermal cycling.
- Circumferential Banding: For vertical duct runs or long horizontal spans, use 1/2-inch galvanized steel banding or heavy-duty nylon duct ties every 18 inches to prevent the blanket from sagging off the duct over time.
Applying Rigid Polyiso Board to Plenums and Trunks
Rigid boards are required for large plenums where flexible blankets would sag and create uninsulated voids. Polyisocyanurate offers the highest R-value per inch and features a durable foil facer.
- Fabrication: Score the foil facer and snap the rigid board to size. For corners, use a V-groove cutting technique to fold the board neatly around 90-degree angles without breaking the core.
- Adhesion: Apply a continuous bead of compatible foam-board adhesive (ensure it is non-solvent based to prevent melting the polyiso core) to the back of the board. Press firmly against the cleaned sheet metal.
- Mechanical Fastening: Supplement the adhesive with welded insulation pins or stick-pins equipped with speed clip washers. Place pins every 12 inches along the seams and field of the board.
- Joint Sealing: Tape all board-to-board joints with 3-inch FSK tape, ensuring a continuous, unbroken vapor barrier across the entire plenum.
The vapor retarder (the foil facing) must ALWAYS face the warm-in-winter side of the assembly. In cooling-dominated climates (Zones 1-3), if ducts are located in a conditioned space but carry cold air, condensation can form on the exterior of the duct. In these specific scenarios, the vapor retarder must face outward to prevent ambient moisture from migrating into the insulation and soaking the fiberglass, which leads to mold growth and total R-value collapse.
Common Installation Failures and Edge Cases
Even premium materials fail if the installation ignores real-world building physics. Avoid these frequent field errors:
- The 'Hanger Penetration' Void: When metal hanger straps support the duct, installers often cut the insulation and leave the strap exposed. This creates a thermal bridge where condensation drips onto the ceiling drywall below. Fix: Install pre-formed insulation saddles or wrap the hanger strap itself with a scrap piece of elastomeric rubber.
- Flex Duct Compression at Bends: Bending flexible ductwork too sharply compresses the internal fiberglass core on the inside radius and stretches the vapor barrier on the outside. Fix: Maintain a minimum bend radius equal to the duct diameter. Use manufactured sweep elbows for tight turns instead of bending the flex duct.
- Ignoring the Plenum Connection: The first 4 feet of ductwork immediately exiting the air handler (the plenum) experiences the highest air velocity and temperature differentials. Fix: Upgrade this specific section to R-12 or double-wrap with an additional layer of R-6 blanket to prevent thermal shock and condensation.
2026 Cost Breakdown and Energy ROI
Investing in professional-grade ductwork insulation installation yields measurable returns. The following table outlines the typical costs for a standard 2,500 sq. ft. home with an unconditioned attic, alongside the projected energy savings based on current utility rates.
| Project Component | Material Cost | Labor Cost (Pro) | Total Estimated Cost |
|---|---|---|---|
| Mastic Air Sealing (All joints) | $45 | $150 | $195 |
| R-8 Fiberglass Duct Wrap (150 linear ft) | $320 | $450 | $770 |
| Rigid Polyiso Plenum Insulation | $110 | $200 | $310 |
| UL 181A-P Foil Tape & Fasteners | $65 | Included | $65 |
| Total Project Cost | $540 | $800 | $1,340 |
ROI Analysis: For a home spending $2,400 annually on heating and cooling, eliminating a 25% duct loss via proper sealing and R-8 insulation saves approximately $480 per year. This results in a simple payback period of 2.8 years, after which the energy savings represent pure net-positive cash flow, alongside the extended lifespan of the HVAC compressor due to reduced runtime.