High Temperature Insulation Materials: Installation Techniques
Master the installation of high temperature insulation materials. Learn step-by-step techniques for ceramic fiber, calcium silicate, and safety protocols.

Installing high temperature insulation materials requires a fundamental shift from standard residential framing techniques. When dealing with industrial boilers, commercial kilns, exhaust flues, and high-heat residential masonry heaters, the primary objectives shift from simple thermal resistance to thermal shock management, structural integrity at extreme heat, and preventing catastrophic localized hot spots. A failure in high-heat insulation does not just increase energy bills; it can melt structural steel, ignite adjacent combustibles, or cause severe equipment downtime.
This guide details the exact installation protocols for the three most common high-heat insulation categories: ceramic fiber blankets, rigid calcium silicate boards, and microporous silica panels. According to the U.S. Department of Energy, proper installation and continuous thermal barriers are critical for maintaining the rated efficiency of high-temperature industrial systems.
Material Selection Matrix for High-Heat Zones
Before cutting or fastening, verify that your material matches the operational temperature profile of the equipment. Using a material rated for 1200°F on a 1800°F kiln will result in rapid sintering, shrinkage, and insulation failure.
| Material Type | Max Continuous Temp | Density / Form | Best Application |
|---|---|---|---|
| Ceramic Fiber Blanket | 2300°F (1260°C) | 8 lb/ft³ (Flexible) | Boiler walls, kiln linings, complex geometries |
| Calcium Silicate Board | 1200°F (650°C) | 14-18 lb/ft³ (Rigid) | Steam piping, flat equipment surfaces, structural backing |
| Microporous Silica Panel | 1830°F (1000°C) | 15 lb/ft³ (Semi-Rigid) | Space-constrained areas, aerospace, high-efficiency backup |
Pre-Installation Safety & Surface Preparation
RCF is classified as a possible human carcinogen and a severe respiratory irritant. The Occupational Safety and Health Administration (OSHA) mandates strict handling protocols for synthetic vitreous fibers. You must wear a NIOSH-approved P100 respirator, sealed goggles, and a Tyvek disposable suit. Never use compressed air to clean RCF dust off surfaces or clothing; use a HEPA-filtered vacuum.
Surface preparation dictates the lifespan of the installation. For steel vessels and piping, wire-brush the surface to remove loose rust, slag, and old adhesive. Do not paint the substrate with standard primers; the heat will vaporize the paint, creating gas pockets that delaminate the insulation. If corrosion protection is required, apply a high-temperature inorganic zinc silicate primer rated for your specific operating temperature.
Step-by-Step Installation: Ceramic Fiber Blankets
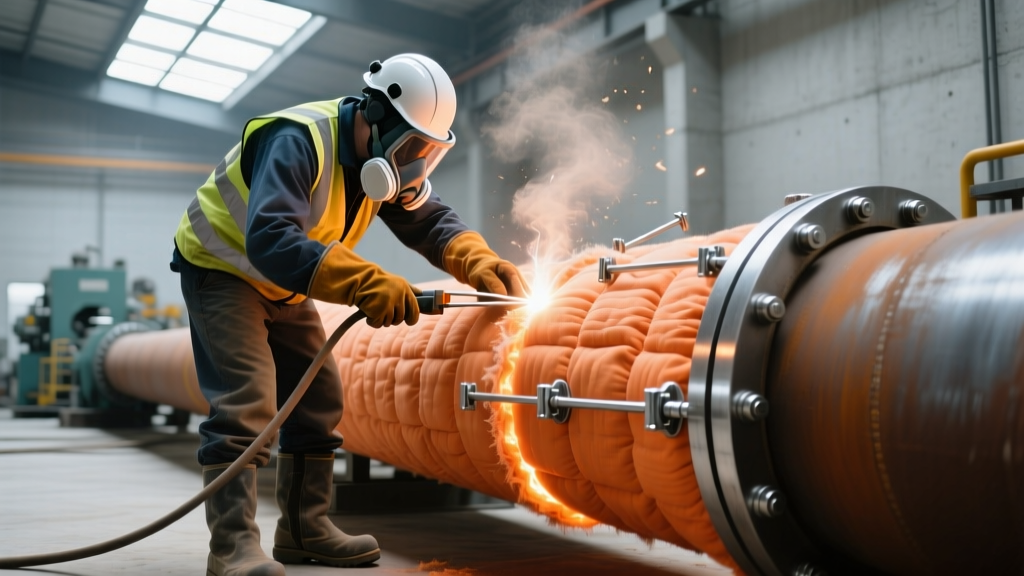
Ceramic fiber blankets (such as Unifrax Cerablanket or Morgan Advanced Materials Cerafiber) are the industry standard for lining high-temperature enclosures due to their flexibility and thermal shock resistance.
- Weld Pin Placement: Weld 304 stainless steel pins (for temps up to 1500°F) or 316 stainless steel pins (for temps up to 1800°F) to the steel substrate. Never use carbon steel pins; they will oxidize and snap under thermal cycling. Space pins 12 inches on center (OC) horizontally and 16 inches OC vertically.
- Cutting and Sizing: Cut the 8 lb/ft³ blanket using a specialized insulation knife. Cut the pieces 2% to 3% oversized. This deliberate oversizing ensures the blanket compresses tightly at the seams, preventing hot gas penetration.
- Impaling and Securing: Impale the blanket onto the weld pins. Press firmly to the substrate. Secure the blanket using self-locking stainless steel speed clips (washers). Bend the protruding pin tabs flat over the washer to lock it in place.
- Seaming: Stagger all vertical and horizontal seams. For multi-layer installations (e.g., two 2-inch layers for a 4-inch total depth), ensure the seams of the inner layer are completely covered by the center of the outer layer panels.
- Rigidizing (High-Velocity Areas): If the insulation faces high-velocity gas flow (like inside a kiln or boiler firebox), spray the hot-face with a colloidal silica rigidizer. This binds the surface fibers, preventing them from tearing off and contaminating the product or degrading the insulation thickness over time.
Step-by-Step Installation: Rigid Calcium Silicate Boards
Calcium silicate (e.g., Promat PROMASIL) is used where structural rigidity and high compressive strength are required, such as backing for refractory bricks or insulating high-pressure steam lines.
- Cutting: Score and snap the boards for straight cuts, or use a carbide-tipped masonry blade on a circular saw. Wear respiratory protection, as cutting generates fine silica dust.
- Adhesive Application: Apply a high-temperature sodium silicate-based adhesive to the substrate using a 1/4-inch notched trowel. Butter the edges of the calcium silicate boards with the same adhesive to ensure a sealed joint.
- Staggering Joints: Stagger all joints by a minimum of 6 inches. Thermal bridging through continuous straight joints will cause the exterior metal jacketing to overheat and fail.
- Mechanical Banding: For pipe applications, secure the boards with 20-gauge stainless steel banding spaced every 18 inches. Do not overtighten the bands to the point of crushing the board edges.
Common Installation Failure Modes & Troubleshooting
- Compressing Microporous Silica: Microporous panels derive their extreme R-value (up to R-10 per inch) from nanopore structures that restrict gas molecule movement. If you step on them, drop heavy tools on them, or force them into a tight radius, you collapse the nanopores, permanently destroying their insulating value. Handle them like fragile glass.
- Using Organic Adhesives: Standard construction adhesives contain organic binders that burn off at 400°F. This leaves a void between the insulation and the substrate, leading to heat channeling and exterior jacketing discoloration. Always use inorganic, sodium silicate-based high-temp cements.
- Ignoring Expansion Gaps: Rigid insulation expands under thermal load. If you butt calcium silicate boards tightly together without leaving a 1/16-inch expansion gap (filled with ceramic fiber rope), the boards will buckle and crack when the equipment reaches operating temperature.
Cost Breakdown & Material Sourcing (2026 Pricing)
Estimated Material Costs (Per Square Foot)
- Ceramic Fiber Blanket (2" thick, 8 lb/ft³): $4.50 - $6.00 / sq ft
- Calcium Silicate Board (1" thick): $9.00 - $13.50 / sq ft
- Microporous Silica Panel (10mm thick): $28.00 - $35.00 / sq ft
- 316 SS Weld Pins & Speed Clips: $0.18 - $0.25 per piece
- Colloidal Silica Rigidizer (1 Gallon): $85.00 - $110.00 (covers ~200 sq ft)
Note: Labor costs for certified high-temp insulation installers typically range from $85 to $150 per hour due to the specialized PPE, welding equipment, and hazard pay required.
FAQ: High-Heat Insulation Clearances & Codes
Q: What is the required clearance to combustibles for high-temperature exhaust flues?
A: Clearances are dictated by the specific equipment listing and NFPA 211 (Standard for Chimneys, Fireplaces, Vents, and Solid Fuel-Burning Appliances). However, as a general rule, uninsulated single-wall flues require an 18-inch clearance to combustibles. When wrapped with a minimum 2-inch layer of 8 lb/ft³ ceramic fiber blanket and clad in aluminum jacketing, this clearance can often be reduced to 2 to 4 inches, pending local building inspector approval.
Q: Can ceramic fiber blanket get wet during installation?
A: Yes, but it must be completely dried before the equipment is fired. If the equipment is heated while the blanket holds moisture, the water turns to steam, expanding rapidly and blowing the blanket off the weld pins. Allow a minimum of 24 hours of ambient drying, or use a low-temperature bake-out cycle before bringing the system up to full operating heat.
Q: Do I need to jacket outdoor high-temperature insulation?
A: Absolutely. Ceramic fiber and calcium silicate are highly porous. If exposed to rain, they will absorb water, which drastically increases thermal conductivity (ruining the R-value) and causes severe corrosion under insulation (CUI) on the steel substrate. Always finish outdoor installations with a minimum 0.016-inch thick aluminum or stainless steel weather jacket, sealed at all laps with high-temperature silicone.
Written by
Marcus ChenMarcus Chen is a licensed structural engineer (PE) and building materials analyst with over 12 years of experience across residential, commercial, and industrial construction. He holds a Master of Science in Civil Engineering from UC Berkeley and spent six years at Thornton Tomasetti before transitioning to independent consulting and technical writing. Marcus specializes in material selection for seismic-prone regions, concrete reinforcement strategies, and lifecycle cost analysis. His work has been cited by the American Concrete Institute (ACI) and the Structural Engineers Association of California (SEAOC). When he is not on a job site or at his desk, you will find him hiking the Sierra Nevada or restoring a 1920s craftsman bungalow in Oakland, CA.
More from Marcus Chen
View all
Construction Cost
How Much Did the Eiffel Tower Cost to Build?
How much did the Eiffel Tower cost to build in 1889? We adjust for inflation and compare its budget to modern skyscraper construction.
Aug 4, 2026

Fire Resistance
What Is a Fire Resistant Material? Testing & Certification Guide
Discover what is a fire resistant material through ASTM and UL testing. Learn how fire ratings, certifications, and assemblies work in construction.
Aug 4, 2026

Construction Cost
How Much Did the Burj Khalifa Cost to Build?
How much did the Burj Khalifa cost to build? We break down the $1.5B project and extract 5 money-saving strategies for your next build.
Jul 30, 2026