Step-by-Step Sound Insulation Installation Procedures for Walls
Master sound insulation installation procedures for interior walls. Learn decoupling, MLV application, and mineral wool fitting for maximum STC ratings.
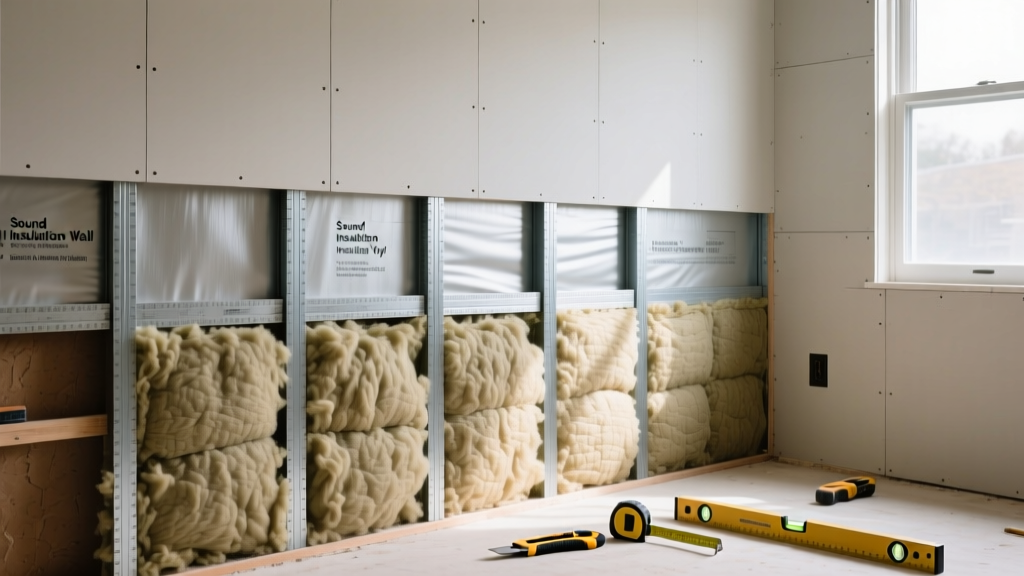
The Physics of Sound Transmission: Why Standard Installations Fail
Standard residential wall assemblies—typically consisting of 2x4 wood studs, R-13 fiberglass batts, and a single layer of 1/2-inch drywall on each side—yield a Sound Transmission Class (STC) rating of roughly 33 to 35. At this level, normal speech is easily understood through the partition. Achieving true acoustic privacy (STC 50+) or home theater isolation (STC 60+) requires a fundamental shift in installation methodology. Sound travels via two primary mechanisms: airborne transmission (voices, media) and structure-borne impact (footsteps, mechanical vibration). Effective sound insulation installation procedures must address both by introducing mass, damping, and mechanical decoupling into the assembly.
Even a perfectly constructed STC 60 wall will perform at STC 40 if sound flanks around it. Before beginning installation, identify all continuous structural elements. Hardwood floors, shared HVAC ductwork, and uninsulated ceiling joists will bypass your wall assembly. Treat flanking paths with acoustic underlayments and duct liners before closing up the wall.
Material Selection Matrix for Acoustic Wall Assemblies
Selecting the correct materials is the first critical step in the installation process. The following matrix outlines the core components required for a high-performance acoustic partition.
| Material | Primary Acoustic Function | Specific Product Example | Approx. Cost (per sq. ft.) |
|---|---|---|---|
| Mineral Wool Batts | Cavity absorption (reduces resonance) | Rockwool Safe'n'Sound (3.5") | $1.10 - $1.40 |
| Mass Loaded Vinyl (MLV) | Mass addition (blocks airborne noise) | Soundproof Cow 1 lb/sq ft MLV | $1.50 - $2.00 |
| Viscoelastic Compound | Damping (dissipates vibrational energy) | Green Glue Noiseproofing Compound | $1.75 - $2.25 |
| Resilient Channels | Decoupling (breaks mechanical path) | ClarkDietrich RC-1 Channel | $0.40 - $0.60 |
| Acoustical Sealant | Air-sealing (prevents flanking leaks) | Tremco Acoustical Sealant | $0.20 - $0.30 |
Phase 1: Framing and Decoupling Techniques
Decoupling prevents vibrational energy from traveling directly from the drywall on one side of the wall to the drywall on the other. You have three primary framing options for sound insulation installation:
Option A: Resilient Channel Retrofit (Space-Saving)
For existing 2x4 or 2x6 stud walls where floor space is at a premium, install RC-1 resilient channels horizontally across the studs.
- Space channels exactly 24 inches on center (OC).
- Fasten to the center of each stud using 1-5/8 inch Type S drywall screws. Never use nails, as they can work loose over time and create mechanical rattles.
- Do not overlap channels; butt them end-to-end and secure both ends to a stud.
Option B: Staggered Stud Assembly (New Construction)
Build the wall using a 2x6 bottom and top plate, but alternate 2x4 studs on opposite sides of the plate. This ensures no single stud connects both sides of the drywall. Maintain a 1-inch air gap between the studs on opposite sides to maximize decoupling.
Option C: Double Stud Wall (Maximum Isolation)
Frame two entirely separate 2x4 walls with a 1-inch to 2-inch air gap between them. This yields the highest STC ratings (often exceeding STC 65) but sacrifices 10 to 12 inches of floor space.
Phase 2: Cavity Filling and Damping Protocols
Once the framing is decoupled, the cavities must be filled to absorb airborne sound waves and prevent the "drum effect" (low-frequency resonance within the empty wall cavity).
- Select the Correct Thickness: Use 3.5-inch mineral wool for standard 2x4 walls. If using a double stud wall with a 1-inch gap, fill each 3.5-inch cavity completely. Never compress mineral wool to fit a smaller cavity; compression reduces its porous volume and severely degrades its acoustic absorption properties.
- Friction Fit Installation: Cut the Rockwool Safe'n'Sound batts 1/2-inch wider than the stud bay. Push them into the cavity so they expand and grip the wood or metal framing tightly. This eliminates edge gaps where sound can leak through.
- Seal Penetrations: If electrical boxes are present, wrap them in acoustic putty pads or build MDF backer boxes to maintain the mass and airtight seal of the wall cavity. Do not place electrical boxes back-to-back on opposite sides of the same stud bay.
Phase 3: Drywall, MLV, and Sealing Execution
The final phase involves adding mass to the assembly and sealing the perimeter. According to the USG Sound Control guidelines, airtight sealing is just as critical as the mass of the board itself.
Step-by-Step Drywall and Damping Application
- Perimeter Sealant: Apply a continuous 3/8-inch bead of non-hardening acoustical sealant (like Tremco) along the floor plate, ceiling plate, and intersecting walls.
- First Layer: Hang the first layer of 5/8-inch Type X fire-rated drywall. Leave a 1/4-inch gap between the drywall and the floor/ceiling. Fasten to the resilient channels or studs using 1-1/4 inch coarse-thread drywall screws. Do not overdrive the screws; the paper face must not be broken.
- Damping Compound: Apply Green Glue Noiseproofing Compound to the back of the second drywall layer. Use exactly two tubes per 4x8 sheet. Apply in a random squiggle pattern, staying 2 inches away from the edges to prevent squeeze-out.
- Second Layer: Press the second 5/8-inch drywall layer into the wet compound. Fasten it through the first layer into the framing using 2-inch or 2-1/2-inch drywall screws. The Green Glue requires confinement between two rigid layers to activate its viscoelastic damping properties; it cannot be used as a surface paint.
- MLV Integration (Optional for STC 60+): If incorporating Mass Loaded Vinyl, drape it directly over the resilient channels before hanging the first layer of drywall, or sandwich it between the two drywall layers. Ensure MLV seams overlap by 2 inches and are sealed with acoustic vinyl seam tape.
- Final Perimeter Seal: Once the wall is fully hung, fill the 1/4-inch perimeter gaps with a final bead of acoustical sealant. Smooth it with a putty knife before it skins over.
Expert Insight: "The most common mistake in sound insulation installation is treating the second layer of drywall as an independent floating wall. If you only screw the second layer into the first layer of drywall (without hitting the studs or channels), the assembly will fail at low frequencies. Always ensure fasteners penetrate into the structural framing or resilient channels."
Common Installation Failures and Troubleshooting
Even with premium materials, poor execution will compromise the assembly. Use this troubleshooting matrix to diagnose and correct field errors.
| Symptom | Root Cause | Corrective Action |
|---|---|---|
| High-frequency sound (speech) leaks through | Unsealed electrical boxes, perimeter gaps, or unsealed drywall seams. | Inject acoustical sealant into all perimeter gaps. Apply acoustic putty pads to all electrical boxes. |
| Low-frequency bass transmits easily | Lack of decoupling, rigid mechanical connections, or missing Green Glue. | Verify no drywall screws bypassed the resilient channel. Ensure double drywall layers are used with damping compound. |
| Audible rattling when doors close or bass hits | Resilient channels fastened with nails, or MLV not secured tightly. | Replace nails with Type S screws. Ensure MLV is stapled tightly to framing without loose folds. |
| Overall STC rating tests 10-15 points below design | Flanking paths (shared joists, HVAC ducts, hard flooring). | Decouple flooring with acoustic matting. Line HVAC boots with duct liner and install acoustic baffles. |
Cost and Labor Expectations for Acoustic Upgrades
Upgrading from a standard STC 35 wall to a decoupled STC 55+ assembly significantly increases both material and labor costs. Based on 2026 contractor averages, expect the following financial parameters:
Standard Wall (STC 35)
Materials: $1.20 - $1.80 / sq. ft.
Labor: $1.50 - $2.50 / sq. ft.
Total Installed: $2.70 - $4.30 / sq. ft.
Decoupled Acoustic Wall (STC 55+)
Materials: $5.50 - $8.00 / sq. ft.
Labor: $4.50 - $7.00 / sq. ft.
Total Installed: $10.00 - $15.00 / sq. ft.
The labor premium for acoustic installations stems from the meticulous attention to detail required. Installers must carefully apply sealant, manage the curing time of viscoelastic compounds, and ensure no rigid shortcuts are taken during drywall hanging. For specialized environments like home theaters or recording studios, hiring contractors certified by the industry's leading acoustic material distributors is highly recommended to guarantee the assembly performs to its engineered specifications.