How to Soundproof a Room: The Maintenance & Cleaning Playbook
Learn how to soundproof a room long-term with our maintenance playbook. Clean acoustic panels, maintain MLV, and fix sealants to restore STC ratings.
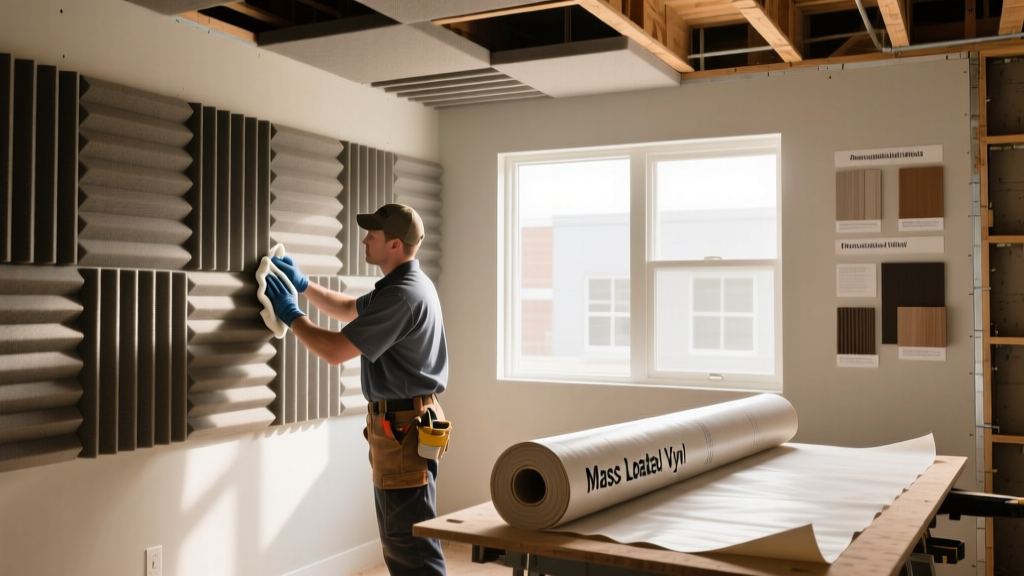
The Hidden Enemy of Soundproofing: Material Degradation
Most DIY guides and contractor manuals on how to soundproof a room treat acoustic treatment as a one-and-done installation. This is a critical error. Soundproofing materials are subject to environmental stress, dust accumulation, and chemical degradation that silently destroy their Sound Transmission Class (STC) and Noise Reduction Coefficient (NRC) ratings over time. According to the EPA Noise Pollution guidelines, chronic noise exposure has severe health impacts, making the long-term efficacy of your acoustic barriers a matter of well-being, not just comfort.
The 80/20 Rule of Acoustic Maintenance
80% of noise leaks in a previously soundproofed room are caused by 20% of the system failing—specifically, perimeter acoustic sealants shrinking and porous absorbers clogging with dust. Restoring a room's acoustic integrity rarely requires tearing down drywall; it requires a targeted maintenance playbook.
Fabric-Wrapped Fiberglass Panels: The HEPA Extraction Protocol
High-density fiberglass panels, such as the industry-standard Owens Corning 703 or Rockwool Safe'n'Sound, are the backbone of broadband absorption. However, their effectiveness relies on an open, porous matrix. When airborne dust, pet dander, and cooking grease embed themselves into the fabric facing and the fiberglass core, they create a micro-membrane. This membrane reflects high-frequency sound waves rather than absorbing them, effectively dropping the panel's NRC rating from 1.05 down to 0.60 or lower.
Step-by-Step Cleaning Procedure
- Dry HEPA Extraction: Never use water or steam on raw fiberglass. Use a commercial HEPA vacuum equipped with a soft upholstery brush attachment. Set the suction to a maximum of 0.5 PSI. High suction will pull the fiberglass fibers through the fabric facing, ruining the panel and creating an airborne respiratory hazard.
- The Tape Test: Press a piece of painter's tape against the fabric. If it pulls away grey or yellow, the core is impacted. Proceed to enzymatic cleaning.
- Enzymatic Spot Treatment: For grease or smoke residue, apply a micro-mist of an enzymatic cleaner (like Simple Solution or a dedicated acoustic fabric cleaner). Do not soak the panel. Allow the enzymes to break down the lipids for 15 minutes, then blot—never rub—with a microfiber cloth.
Mass Loaded Vinyl (MLV): Preventing Plasticizer Migration
Mass Loaded Vinyl is the premier material for blocking airborne noise and adding mass to decoupled walls. A standard 1 lb/sqft MLV adds roughly 27 STC points when installed correctly. But MLV relies on plasticizers to maintain its limp mass characteristics. If the vinyl becomes rigid, it will vibrate and transmit low-frequency bass rather than absorbing it.
The most common maintenance failure occurs when facility managers clean MLV barriers with harsh chemical solvents. Solvents strip the plasticizers, causing the vinyl to brittle and crack within 18 months. Below is the definitive matrix for MLV maintenance.
| Cleaning Agent | Chemical Impact on MLV | Verdict |
|---|---|---|
| Mild Dish Soap & Warm Water | Lifts surface dust without penetrating the vinyl matrix. | Approved |
| Isopropyl Alcohol (70%+) | Strips plasticizers; causes immediate surface clouding and long-term rigidity. | Destructive |
| Bleach Solutions | Degrades the molecular bonds of the vinyl, leading to micro-tears. | Destructive |
| Mineral Spirits | Dissolves the mass-loading compounds, destroying the acoustic weight. | Catastrophic |
Acoustic Sealants: Fixing the Flanking Paths
When researching how to soundproof a room, the most overlooked component is the perimeter seal. Acoustic sealants like Green Glue Noiseproofing Sealant or OSI SC-175 are designed to remain viscoelastic, moving with the building's natural expansion and contraction without breaking the acoustic envelope. However, even premium sealants experience volumetric shrinkage and adhesion failure over a 3-to-5-year cycle.
The Flashlight Test for Perimeter Leaks
Wait until the room is completely dark. Have a second person shine a high-lumen LED flashlight (minimum 1000 lumens) along the exterior side of the wall, specifically targeting the floor-to-drywall and ceiling-to-drywall junctions. If you see pinpricks of light inside the soundproofed room, your acoustic seal has failed. Sound behaves like water; a 1/16-inch gap can reduce a wall's STC rating by up to 10 points, as documented in ASTM E90 laboratory testing standards.
Re-Caulking Protocol
- Excavation: Use a rigid putty knife to scrape out the failed, hardened sealant. Do not simply apply new caulk over the old; the acoustic coupling will fail.
- Priming: Wipe the joint with a dry cloth to remove drywall dust.
- Application: Apply a continuous 1/4-inch to 3/8-inch bead of fresh viscoelastic acoustic sealant. Tool the bead with a wet finger to ensure it pushes deep into the joint, creating a minimum 1/2-inch contact area on both sides of the seam.
Expert Insight: Standard silicone or acrylic latex caulk will cure hard and crack under low-frequency bass vibration. You must use a dedicated acoustic sealant that cures to a rubber-like consistency. As of 2026, a 28oz tube of OSI SC-175 retails for approximately $9.50, a minor investment to save a $3,000 soundproofing installation.
Decoupled Ceilings and Resilient Channels: Dust Bridging
Decoupling is the mechanical isolation of drywall from the structural framing using resilient channels or isolation clips (like Kinetics IsoMax). This prevents structural vibration from transferring into the room. The primary maintenance threat to decoupled systems is 'dust bridging' and debris accumulation.
In environments with heavy HVAC use or construction dust, particulate matter can accumulate in the 1/2-inch isolation gap between the drywall edge and the structural wall or ceiling. Over time, this dust packs tightly, hardening into a solid mass that physically bridges the decoupling gap. This creates a rigid flanking path, allowing impact noise (footsteps, dropped objects) to bypass the isolation clips entirely.
The Fix: Annually inspect all perimeter isolation gaps. Use a narrow vacuum crevice tool to extract packed dust. If the gap has been painted over by inexperienced painters (a common failure mode), use a sharp utility knife to score and clear the paint and drywall mud from the gap, restoring the mechanical break. The NIOSH noise control protocols emphasize that engineering controls like decoupling require physical verification to ensure no rigid connections have formed post-installation.
Troubleshooting Matrix: Why Your Soundproofed Room is Leaking Noise
Use this diagnostic framework to identify why a previously soundproofed room is failing to block noise.
Symptom: High-Frequency Voices Leaking
Cause: Clogged fabric acoustic panels or failing HVAC duct liner.
Action: Perform HEPA extraction on panels; inspect ductwork for detached acoustic liner.
Symptom: Low-Frequency Bass Rumble
Cause: MLV plasticizer migration (rigidity) or drywall resting directly on the subfloor (decoupling failure).
Action: Replace brittle MLV; score the bottom drywall perimeter and inject acoustic sealant.
Symptom: Impact Noise (Footsteps)
Cause: Dust bridging in ceiling isolation clips or rigid light fixture canopies touching the drywall.
Action: Clear perimeter gaps; install foam isolation gaskets behind all ceiling-mounted electrical boxes.
Symptom: Intermittent Rattling
Cause: Loose HVAC diffuser grilles or recessed lighting cans vibrating against the decoupled ceiling.
Action: Apply butyl rubber damping tape to the flanges of all ceiling-mounted mechanical fixtures.
Understanding how to soundproof a room is only half the battle. By implementing this maintenance and cleaning playbook, you ensure that the acoustic materials you invested in continue to perform at their laboratory-rated specifications for decades, protecting your environment from the relentless intrusion of noise pollution.