How to Install Materials That Are Insulators: Pro Techniques
Master the installation of materials that are insulators. Learn pro techniques for spray foam, mineral wool, and rigid boards to maximize R-value.
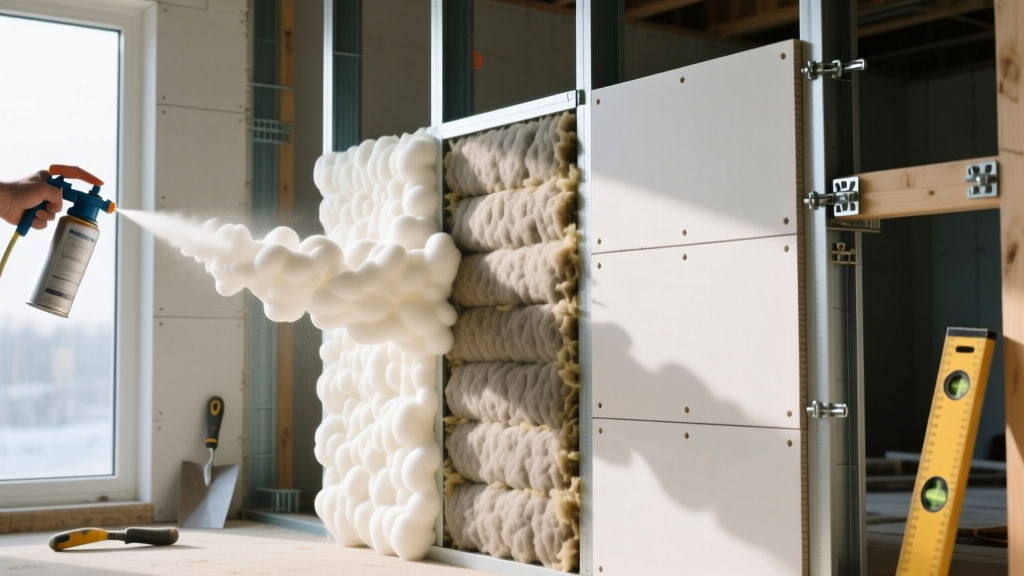
The Physics of Thermal Bridging and Installation Failures
The thermal resistance of any building envelope is dictated not just by the laboratory R-value of the insulation, but by the precision of its installation. According to research published by the Building Science Corporation, a mere 4% gap or compression defect in a fiberglass batt installation can degrade the overall wall assembly R-value by up to 50%. When evaluating materials that are insulators, contractors must recognize that thermal bridging through framing members and air leakage through unsealed seams will bypass the insulation entirely. Proper installation requires treating the insulation layer as a continuous, uncompromised thermal barrier.
Material-Specific Installation Protocols
Different insulation chemistries and physical forms demand distinct installation methodologies. Below are the precise protocols for the three most common high-performance insulation categories used in modern residential and commercial framing.
Closed-Cell Spray Polyurethane Foam (ccSPF)
Closed-cell foam, such as Demilec Heatlok XT or Icynene ProSeal, provides an R-value of approximately R-6.5 to R-7 per inch and acts as a Class II vapor retarder. However, its exothermic curing process requires strict adherence to application limits.
- The 2-Inch Lift Rule: Never apply ccSPF in lifts exceeding 2 inches to 3 inches per pass. Excessive thickness traps the heat generated by the chemical reaction, leading to core charring, off-gassing, and potential spontaneous combustion.
- Substrate Temperature: The wood or metal framing must be between 60°F and 80°F. Applying foam to cold sheathing (below 50°F) results in poor adhesion and delamination, while hot substrates cause the blowing agent to vaporize too quickly, creating brittle, low-density foam.
- Trimming: Allow a minimum 24-hour cure time before trimming flush with the studs using a specialized serrated foam saw to ensure a flat plane for drywall.
Mineral Wool Batts
Mineral wool, such as Rockwool Comfortbatt or Thermafiber UltraBatt, offers superior fire resistance (non-combustible up to 2,150°F) and acoustic dampening. Unlike fiberglass, it is semi-rigid and relies on a friction fit.
- The Overcut Technique: Measure the cavity width and cut the batt exactly 1/2 inch to 1 inch wider. This ensures the material compresses slightly against the studs, eliminating the edge gaps that cause convective looping.
- Cutting Tools: Do not use a standard utility knife. Use a long-blade, serrated insulation knife or a specialized mineral wool cutting board. A straight edge and a firm, sawing motion prevent the dense fibers from tearing or compressing unevenly.
- Obstacle Management: Never stuff mineral wool behind electrical boxes or plumbing. Instead, split the batt to the exact depth of the obstacle, wrapping it around the pipe or box to maintain uniform density.
Polyisocyanurate (Polyiso) Rigid Boards
Foil-faced polyiso boards deliver an impressive R-6.0 to R-6.5 per inch. The foil facing acts as a radiant barrier and a vapor retarder, but only if the seams are perfectly sealed.
- Staggered Seams: When installing multiple layers (e.g., exterior continuous insulation), stagger the vertical and horizontal joints by at least 16 inches to prevent continuous thermal bridges.
- Tape Selection: Standard duct tape will fail. Use acrylic-based flashing tapes like 3M All Weather Flashing Tape or Huber Zip System Tape. Apply firm pressure with a J-roller to activate the pressure-sensitive adhesive and ensure a continuous air seal.
- Fastener Penetrations: Every cap nail or screw used to secure the polyiso creates a micro-leak. Seal the underside of the fastener head with a bead of compatible sealant before driving it through the foil face.

Decision Matrix: Matching the Insulation to the Cavity
Selecting the correct material requires aligning the physical properties of the insulation with the specific geometry and moisture profile of the cavity.
| Insulation Type | Best Cavity Application | Primary Installation Tool | Common Failure Mode |
|---|---|---|---|
| ccSPF (2 lb density) | Irregular cavities, rim joists, cathedral ceilings | Proportioning rig, heated hoses | Exothermic charring from thick lifts |
| Mineral Wool Batts | Standard 16"/24" O.C. wood framing, fire-blocking | Serrated knife, straight edge | Edge gaps from under-cutting |
| Polyiso Rigid Board | Exterior continuous insulation, flat roof assemblies | Cap nailer, J-roller, tape | Unsealed seams bypassing foil facing |
| Open-Cell SPF (0.5 lb) | Interior partition walls (acoustic), deep rafters | Spray rig, trimming saw | Moisture retention in cold climate exterior walls |
Air Sealing Before Insulation: The Critical Precursor
Insulation does not stop air movement; it only slows thermal transfer. The U.S. Department of Energy mandates that all building envelopes must be air-sealed prior to insulation installation to meet modern energy codes. Before dropping any batts or spraying foam, contractors must address the following leakage points:
For the intersection of the bottom plate and the subfloor, abandon caulk. Use a fluid-applied membrane like Prosoco FastFlash or Tremco EXOAir. These elastomeric coatings bridge gaps up to 1/2 inch, remain flexible as the wood framing shrinks and shifts, and provide a monolithic air barrier that will not tear or detach over the 50-year lifecycle of the structure.
- Top Plate Penetrations: Seal around all plumbing stacks, HVAC chases, and electrical wiring passing through the top plates using expanding polyurethane foam or intumescent fire-stop putty.
- Window and Door Bucks: Apply low-expansion window and door foam (e.g., Great Stuff Pro Window & Door) between the rough opening and the window flange. High-expansion foam will bow the frames and crack the glass.
- Band Joists: Cut rigid foam blocks to fit snugly between the floor joists at the rim joist, then seal the perimeter of the blocks with closed-cell spray foam to prevent exterior air from washing across the floor cavity.
Troubleshooting Common Installation Defects
Even experienced crews make errors that compromise the building envelope. Use this diagnostic guide to identify and rectify field defects before the drywall goes up.
Cause: Interior warm, moist air is bypassing the insulation and condensing on the cold exterior sheathing. This is almost always due to missing air sealing at the top plates or unsealed electrical boxes.
Fix: Remove the insulation in the affected bay. Apply fluid-applied flashing or caulk to the sheathing-to-stud joints and seal the drywall-to-stud interface. Reinstall the insulation only after a blower door test confirms the leak is eliminated.
Cause: Installers forcing a thick batt (e.g., R-38) into a shallow cavity (e.g., 2x6 wall). Compressing fiberglass destroys the trapped air pockets that provide thermal resistance, dropping an R-38 batt to an effective R-18.
Fix: Switch to a higher-density material that fits the cavity depth, such as R-23 mineral wool, or fur out the studs to accommodate the proper thickness without compression.
Code Compliance and Inspection Checklists
The International Code Council continuously updates the International Energy Conservation Code (IECC) to demand higher continuous insulation (ci) values and stricter air leakage rates (typically 3.0 ACH50 or lower in climate zones 3-8). To pass municipal framing and insulation inspections in 2026, ensure your site includes the following:
- A posted insulation certificate detailing the R-value, thickness, and coverage area of all installed materials.
- Visible grade marks on all batt insulation facing the interior of the room prior to drywall.
- Thermal bypass inspection sign-off, verifying that all cantilevers, drop soffits, and attic kneewalls are fully aligned with the air barrier.
By adhering to these material-specific installation protocols, contractors ensure that the theoretical R-value of the insulation translates into actual, measurable energy performance in the field.
Written by
Priya KapoorPriya Kapoor is a real estate market analyst and construction economics researcher with expertise in housing affordability, development feasibility, and infrastructure investment. She holds a Master of Regional Planning from Cornell University and previously worked as a senior analyst at CBRE's Investment Properties group, where she modeled returns for $4B in mixed-use development pipelines. Priya now runs an independent research practice advising developers, municipalities, and REITs on construction cost forecasting and market timing. She publishes the quarterly "BuildMat Market Pulse" report tracking material price indices across 12 commodity categories. Based in Austin, TX, Priya serves on the board of Habitat for Humanity Austin and is a marathon runner.
More from Priya Kapoor
View all
Construction Cost
Cost to Build a 1600 Sq Ft Home in 2026: Full Breakdown
Accurate 2026 cost to build a 1600 sq ft home—material, labor, and regional pricing breakdowns included. Plan your budget with real-time estimates.
Aug 11, 2026

Wood & Lumber
Name the Types of Wood for Pressure Treatment and Preservation
Learn how to name the types of wood best suited for pressure treatment. Compare species treatability, chemical retention levels, and 2026 preservation costs.
Aug 4, 2026

Stone & Masonry
Stone Veneer Suppliers Lindenhurst: 2026 Cost Analysis
Analyze 2026 stone veneer costs in Lindenhurst, NY. Compare local supplier pricing, delivery fees, and Suffolk County installation labor rates.
Aug 4, 2026