Pro Installation Techniques for Spray Foam Insulation Materials
Master pro installation techniques for spray foam insulation materials. Learn substrate prep, temperature controls, pass thickness, and curing times.

The Chemistry of Application: Environmental Controls
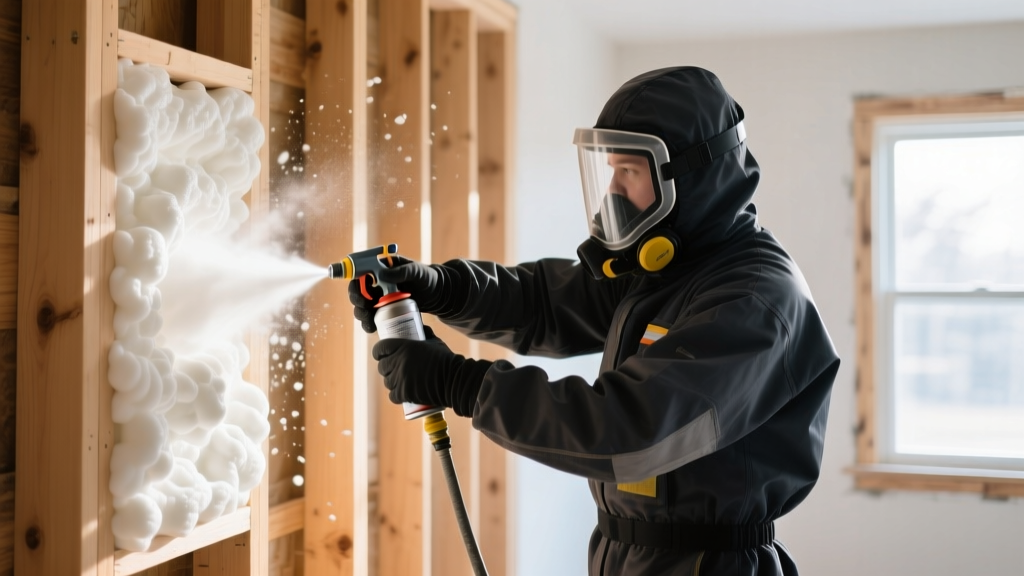
Installing spray foam insulation materials is less like traditional construction and more like applied chemistry. Spray polyurethane foam (SPF) relies on the precise reaction between an A-side (isocyanate) and a B-side (polyol resin). If the ambient, substrate, or material temperatures deviate from the manufacturer's strict tolerances, the foam will suffer from poor cell structure, shrinkage, or incomplete curing. According to the U.S. Department of Energy, proper thermal management during installation is the primary determinant of long-term R-value stability.
The 70/70/60 Temperature Rule
- Material Drums: Must be stored and conditioned to 70°F–80°F for at least 48 hours prior to spraying.
- Hose Temperature: Heated hoses must maintain 120°F–140°F at the gun to ensure optimal viscosity and mixing at the spray tip.
- Substrate Temperature: Must be a minimum of 60°F for closed-cell foam. Spraying on cold surfaces causes the foam to freeze on contact, resulting in a friable, crumbly bottom layer that lacks adhesion.
Substrate Preparation and Moisture Thresholds
Adhesion failure is the most common cause of thermal bridging in SPF installations. The Pacific Northwest National Laboratory (PNNL) emphasizes that substrate moisture content must be rigorously verified before the first pass. For wood framing and OSB sheathing, use a pin-type moisture meter to ensure readings are below 19%. If moisture exceeds this threshold, the isocyanate will react with the water instead of the polyol, producing carbon dioxide gas rather than forming a rigid polymer matrix. This results in low-density, structurally compromised foam.
Concrete and masonry substrates require a 28-day curing period to off-gas residual moisture. Highly porous concrete or rusted corrugated metal decking must be treated with a specialized primer, such as a moisture-curing urethane primer, to prevent the foam from pulling away during thermal expansion and contraction cycles.
The Pass-Thickness Protocol and Thermal Runaway
Amateur installers often attempt to fill a 6-inch wall cavity in a single pass. This triggers 'thermal runaway.' The chemical reaction of SPF is highly exothermic. When applied too thickly, the core temperature of the foam can exceed 400°F. This scorches the foam, degrades the R-value, and releases toxic off-gassing, including hydrogen cyanide in extreme cases. The Environmental Protection Agency strictly mandates adherence to manufacturer lift thicknesses to prevent these hazardous conditions.
| Foam Type | Max Pass Thickness (Lift) | Required Cooling Interval | Expansion Ratio |
|---|---|---|---|
| 2.0 lb Closed-Cell | 2.0 to 3.0 inches | 3 to 5 minutes | 30x to 40x |
| 0.5 lb Open-Cell | 4.0 to 6.0 inches | 2 to 3 minutes | 100x to 120x |
| 3.0 lb Roofing Grade | 1.5 to 2.0 inches | 5 to 10 minutes | 25x to 30x |
Equipment Calibration: Pressure and Temperature Matrices
Proper atomization requires high-pressure impingement mixing. For industry-standard plural-component reactors (such as the Graco Reactor E-30 or Gusthmer Gusmer GH-2), the baseline settings must be adjusted dynamically based on ambient conditions and hose length.
- Dynamic Pressure: Maintain 1,000 to 1,400 psi at the mixing chamber. If pressure drops below 900 psi, the foam will appear streaky and off-ratio (often yellow or brown instead of a uniform cream or pale yellow).
- Temperature Settings: Set primary heaters to 130°F–150°F. In winter conditions or when using hoses longer than 200 feet, increase hose heat zones by 10°F to compensate for thermal loss over distance.
- Gun Purging: Use mechanical purge chambers rather than air-purge guns for high-volume applications to prevent isocyanate crystallization on the mixing block.
Open-Cell vs. Closed-Cell Trimming Techniques
Once the foam has fully cured (typically 24 hours for core stabilization), it must be trimmed to accommodate drywall or interior finishes. The cellular structure dictates the tooling required.
Trimming Closed-Cell Foam
Closed-cell foam is dense and rigid. Using a standard utility knife will result in jagged edges and excessive physical strain. Professionals use a hot-wire foam cutter or a specialized serrated foam knife with a wavy blade. For 2026 IECC compliance where continuous interior insulation is required, closed-cell foam must be trimmed perfectly flush with the stud face to prevent drywall screw pops and seam cracking.
Trimming Open-Cell Foam
Open-cell foam is spongy and highly expansive. It is typically trimmed using a reciprocating saw with a long, coarse-tooth pruning blade, or a specialized foam chainsaw. Unlike closed-cell, open-cell foam can be recessed up to 1/2 inch behind the stud face, which provides a natural cavity for plumbing or electrical lines while still maintaining the air barrier.
Fire Code Compliance and Intumescent Coatings
Left exposed, most spray foam insulation materials will fail the 15-minute thermal barrier requirement mandated by the International Residential Code (IRC) and International Building Code (IBC). While covering the foam with 1/2-inch gypsum drywall satisfies this requirement, exposed applications in crawlspaces, rim joists, or commercial attics require an approved alternative.
Pro Application Tip: When applying an intumescent coating like DC315 over SPF, you must achieve a wet film thickness of 20 to 24 mils to yield the required 12 to 14 dry mils. Always use a wet mil thickness gauge immediately after spraying. Rolling it on too thin will fail the NFPA 286 fire test; rolling it too thick causes cracking and peeling during thermal cycling.
Managing Vapor Retarder Classifications
Understanding how thickness alters vapor permeability is critical for preventing interstitial condensation. Closed-cell SPF transitions from a Class III vapor retarder at 1 inch of thickness, to a Class II at 1.5 inches, and finally to a Class I vapor barrier at 3 inches. In cold climate zones (Zones 5 through 8), installing less than 2 inches of closed-cell foam on the interior side of roof sheathing can trap moisture, leading to sheathing rot. Conversely, in hot, humid climates (Zones 1 through 3), applying a thick layer of Class I closed-cell foam on the exterior of a wall assembly can trap inward-drying moisture, necessitating careful hygrothermal modeling before installation.
Written by
James ThorntonJames Thornton is a construction industry veteran with 25 years of hands-on experience in wood framing, lumber grading, and residential building codes. He started as a framing carpenter in rural Oregon, earned his ICC Residential Building Inspector certification, and eventually became a senior plan reviewer for the City of Portland Bureau of Development Services. James holds a B.S. in Wood Science & Technology from Oregon State University and is a certified lumber grader through the West Coast Lumber Inspection Bureau (WCLIB). He has inspected over 3,000 residential construction sites and authored the city's internal guide on advanced framing techniques (2x6 at 24" O.C.). James lives in Bend, OR, where he builds custom timber-frame cabins and competes in lumberjack sports.
More from James Thornton
View all
Insulation
Best Home Insulation Materials: Complete 2026 Guide
Compare top home insulation materials for 2026. Find R-values, installed costs per square foot, and best uses for fiberglass, spray foam, and mineral wool.
Aug 4, 2026

Sustainable Building
Certify Your Green Building Material for LEED and WELL
Step-by-step guide to certifying a green building material for LEED v5 and WELL v2. Master EPDs, HPDs, and VOC limits for 2026 project specifications.
Aug 4, 2026

Stone & Masonry
Veneer Stacked Stone Panels: Interior Design & Style Showcase
Discover how veneer stacked stone panels transform interiors. Explore modern design profiles, material pairings, and technical installation specs.
Aug 4, 2026