Drilling in Brick or Mortar vs. Adhesive Mounts: Load Capacity Guide
Compare drilling in brick or mortar with adhesive mounts. Discover load limits, failure modes, and the best masonry fastening methods for your project.

The Core Dilemma: Brick Unit vs. Mortar Joint
When mounting heavy fixtures to a masonry wall, the decision of where to place your fastener dictates the structural integrity of the installation. The fundamental difference lies in compressive and tensile strength. According to the Brick Industry Association (BIA), modern fired clay bricks boast a compressive strength ranging from 3,000 psi to over 10,000 psi. In stark contrast, the mortar binding them is intentionally designed to be the sacrificial, weaker element in the wall assembly.
Type N mortar, common in exterior, above-grade veneer walls, yields approximately 750 psi. Type S mortar, used for structural and below-grade applications, peaks around 1,800 psi. When you drill into the mortar joint, you are anchoring into a material with a fraction of the load-bearing capacity of the brick itself. However, mortar is softer, easier to drill without specialized heavy-duty equipment, and significantly easier to patch if you make a mistake or remove the fixture later.
If you are working on a building constructed before 1930, or a facade showing severe efflorescence and spalling, the brick units may be softer and more brittle than the lime-based mortar. In these rare edge cases, drilling into the brick can cause catastrophic shattering, making the mortar joint the safer (though still limited) choice.
Substrate Strength and Anchor Pull-Out Matrix
| Substrate Material | Avg. Compressive Strength | Est. 1/4" Screw Pull-Out | Patchability |
|---|---|---|---|
| Modern Clay Brick | 4,500 - 8,000 psi | 800 - 1,200 lbs | Poor (requires color-matched epoxy fillers) |
| Type S Mortar Joint | 1,800 psi | 350 - 500 lbs | Excellent (standard mortar mix) |
| Type N Mortar Joint | 750 psi | 150 - 250 lbs | Excellent (standard mortar mix) |
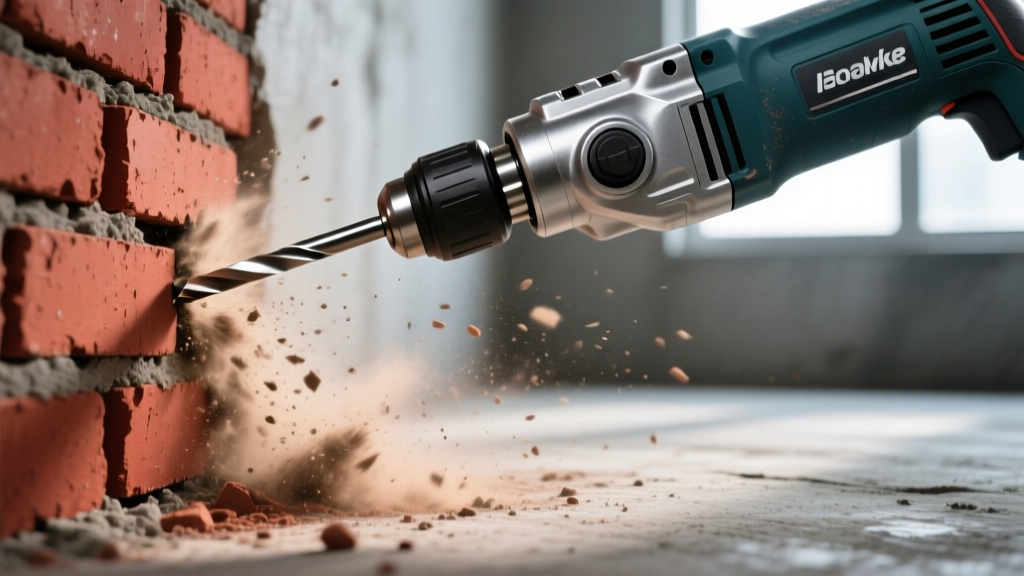
Mechanical Drilling: Best Practices and Specifications
If your load requirements exceed the shear limits of mortar, drilling in brick or mortar requires precise technique to avoid micro-fractures that compromise the anchor's grip. The primary failure mode in masonry drilling is thermal spalling—burning the brick face and widening the hole due to excessive friction.
- Tool Selection: Use a rotary hammer with an SDS-Plus chuck rather than a standard hammer drill. Rotary hammers utilize a pneumatic piston mechanism that delivers high-impact energy with lower rotational torque, pulverizing the masonry rather than grinding it.
- Bit Geometry: Always use a 4-cutter full-carbide SDS-Plus bit. Two-cutter bits tend to wander and create oval-shaped holes, which drastically reduces the pull-out strength of mechanical wedge anchors.
- RPM and Pressure Limits: Keep the rotational speed below 1,200 RPM. Let the tool's impact mechanism do the work; applying excessive forward pressure will overheat the carbide tip and glaze the interior of the brick hole, reducing friction for the anchor.
- Depth Clearance: Drill the hole exactly 1/4-inch deeper than the embedment depth of your anchor. This creates a void for masonry dust to fall into. If dust packs at the bottom of the hole, the anchor will bottom out before the head is flush, preventing proper expansion.
The Alternatives: When to Skip Drilling Entirely
While mechanical fasteners are the default, modern chemical adhesives and specialized mounting hardware offer viable alternatives to drilling in brick or mortar, particularly when dealing with historic preservation restrictions, thin veneers, or waterproofing membranes that cannot be punctured.
1. High-Modulus Polyurethane Construction Adhesives
For flat-surface mounting of lightweight to medium-weight fixtures (e.g., exterior sconces, address plaques, lightweight trellis brackets), polyurethane adhesives like Loctite PL Premium 3x provide exceptional shear strength. When applied to a clean, dry, and wire-brushed masonry surface, polyurethane cures to a rubberized solid that absorbs thermal expansion and contraction without snapping. The critical limitation is peel strength; adhesives resist shear forces well but fail rapidly under prying or peeling loads.
2. Epoxy Anchoring Systems (The Hybrid Approach)
For extreme loads where drilling into the mortar joint is the only geometric option, you can artificially upgrade the mortar's strength using structural epoxy. Products like Simpson Strong-Tie SET-XP bond the threaded rod or rebar to the interior of the drilled hole. The epoxy penetrates the microscopic pores of the mortar and brick, creating a monolithic bond. The pull-out strength of an epoxied anchor often exceeds the tensile strength of the steel rod itself before the masonry fails. This requires meticulous hole preparation: wire brushing and blowing out the dust with compressed air at least three times before injection.
3. Mortar-Free Brick Clips
For temporary installations, holiday lighting, or lightweight signage, brick clips (such as OOK Brick Clips) hook onto the top and bottom edges of individual brick units. They require zero drilling, zero adhesive, and leave the masonry completely unblemished. They are strictly limited to standard modular brick sizes and cannot support dynamic or cantilevered loads.
Fastening Method Comparison Matrix
| Method | Max Shear Load | Substrate Damage | Best Use Case |
|---|---|---|---|
| Tapcon into Brick | High (600+ lbs) | Permanent Hole | Heavy brackets, structural ties, TV mounts |
| Tapcon into Mortar | Medium (250 lbs) | Easily Patched | Medium shelving, conduit straps, awning ties |
| Polyurethane Adhesive | Med-High (1100 psi shear) | Surface Scarring | Flat plaques, trim, non-cantilevered fixtures |
| Epoxy Anchor in Mortar | Very High (1500+ lbs) | Permanent Hole | Heavy gates, seismic structural retrofitting |
| Brick Clips | Very Low (25 lbs) | None | Holiday lights, temporary signage, vines |
Decision Framework: Which Method Should You Choose?
Follow this sequential logic to determine the optimal fastening strategy for your specific masonry substrate:
- Is the fixture temporary or under 25 lbs? Use brick clips. They eliminate the risk of spalling and require zero surface prep.
- Is the load purely shear (flush against the wall) and under 50 lbs? Use a polyurethane construction adhesive. Ensure the mortar joints are slightly recessed (struck joints) so the fixture sits flat on the brick face.
- Is the load between 50 lbs and 300 lbs, and do you need a reversible installation? Drill into the mortar joint using a 3/16" masonry bit and a standard blue-Tapcon screw. The mortar will hold the shear load, and you can patch the joint with a $5 bag of Type N mix later.
- Is the load over 300 lbs, cantilevered, or subject to vibration? You must drill directly into the brick unit. Use a 1/4" or 3/8" wedge anchor or sleeve anchor. Maintain a minimum edge distance of 1.5 inches from the edge of the brick to prevent the face from blowing out during anchor expansion.
- Are you restricted from drilling into the brick (e.g., historic facade), but the load exceeds adhesive limits? Drill into the mortar joint and inject a structural two-part epoxy, embedding a zinc-plated threaded rod. The epoxy will bridge the gap between the weaker mortar and the high-strength steel rod.
Critical Edge Cases and Failure Modes
Even when following the correct drilling protocols, specific environmental and structural variables can cause sudden fastener failure.
The Veneer Blowout
Modern residential construction frequently utilizes brick veneer—a single, non-structural wythe of brick separated from the wood framing by a 1-inch air gap and house wrap. If you drill completely through the veneer, you compromise the weather-resistive barrier and risk water intrusion into the wall cavity. Always set your rotary hammer's depth gauge to stop exactly 1/4-inch short of the total brick thickness (typically 3.5 to 4 inches for standard modular brick).
Efflorescence and Adhesive Delamination
If you opt for the adhesive alternative, inspect the brick for efflorescence—the white, powdery salt deposits left behind by evaporating moisture. Adhesives will bond to the salt crystals rather than the masonry substrate. When the salts naturally shed or expand due to humidity changes, the fixture will peel off the wall. You must remove efflorescence using a stiff nylon brush and a mild solution of muriatic acid (diluted 10:1 with water), followed by a thorough rinsing and 48-hour drying period before applying polyurethane adhesives.
Thermal Expansion Shearing
Brick and mortar expand and contract at different rates under UV exposure and temperature fluctuations. If you mount a rigid, continuous metal bracket across multiple bricks and mortar joints using mechanical screws, the differential movement will eventually snap the screws or crack the brick faces. For long horizontal fixtures, use slotted mounting holes on the bracket to allow for lateral thermal movement, securing the fixture tightly only at the center point.
Written by
Sarah WhitfieldSarah Whitfield is a chartered quantity surveyor (MRICS) and construction cost analyst with 15 years of experience in material pricing, procurement strategy, and project budgeting. She earned her degree in Construction Management from the University of Reading (UK) and has worked on projects ranging from $2M custom homes to $180M mixed-use developments across North America and Europe. Sarah currently leads cost estimating for BuildMat Insight, maintaining a proprietary database of 4,000+ material price points updated quarterly. She is a frequent contributor to RSMeans cost data panels and has presented at the International Cost Engineering Council (ICEC) congress. Based in Denver, CO, Sarah is an avid trail runner and volunteer mentor for Women in Construction.
More from Sarah Whitfield
View all
Wood & Lumber
What Are the Different Types of Wood? A Builder's Guide
Compare structural softwoods, finish hardwoods, and engineered lumber. Analyze Janka ratings, MOE values, and 2026 pricing for construction.
Aug 4, 2026

Walls & Panels
Steel Framing vs Wood Framing: Corrosion and Moisture Defense
Compare steel framing vs wood framing for moisture resistance. Learn about galvanized coatings, condensation risks, and corrosion protection strategies.
Jul 21, 2026

Stone & Masonry
How to Cut Stone Veneer: Wet Saw vs Grinder Comparison
Compare the best tools for cutting stone veneer. We review wet saws, angle grinders, and chop saws to help you achieve clean, chip-free cuts.
Jul 21, 2026